Do you ever wonder how professional photographers manage to get such crisp and clear photos? How they make the water look like silk? Or how they capture lines of car lights? Then you are in the right place! These photos are achieved with long exposure shots. This is where you use a low shutter speed to sharply capture the stationary elements of images while blurring, smearing, or obscuring the moving elements.
In order to achieve this there are a few things you need to do, here are my top tips for taking long exposure shots:
1) Learn how to shoot manual
First things first in order to shoot long exposure shots you need to understand how to work the manual mode on your DSLR camera.
Long exposure shots are dependent on low shutter speeds. The shutter speed is the time in which the lens stays open (sort of like blinking your eye). So a shutter speed of 1/15 is a 15th of a second, whilst 15 is 15 seconds.
If you want a low shutter speed (lots of light), you will need to put the aperture right up (less light) and the ISO as low as possible (less light).
The best way to understand manual mode is to play around with it! Check out my guide to shooting in manual and then have a practice.
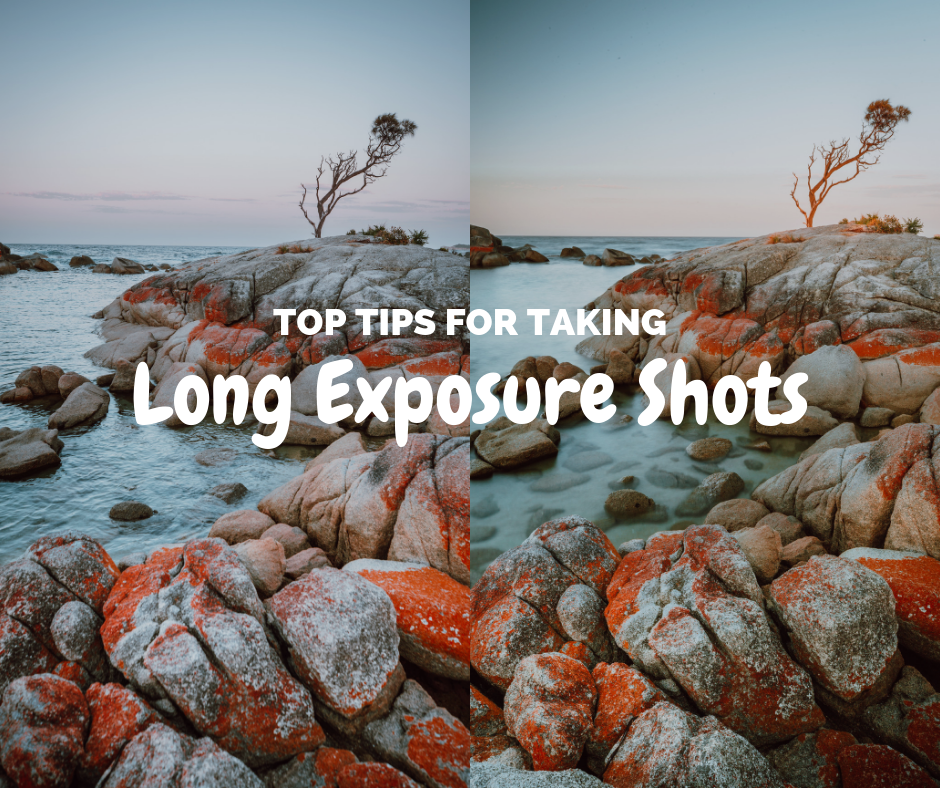
The photo on the left is with a shutter speed of 1/20 (ISO 100 and f/4.5) whilst the one of the right is with a shutter speed of 8 seconds (ISO 100 and f/22). A difference of only just over 8 seconds separates these two images and already you can see how the water looks clearer and the rocks more defined in the long exposure shot.


2) Use a tripod
Once you have the settings on the camera ready, you need to ensure that the camera itself is super still. You should only be taking handheld photos if the shutter speed is above 1/30 (a 30th of a second). Although this amount will be higher if your lens is a zoom, for example you would need a shutter speed of 1/70 for a 70mm lens.
If you want to take a beautiful and clear long exposure shot you will need to use a tripod to keep the camera still, as well as a remote so that you don’t move the camera when pressing the button. Although you can also choose to use the 2 second timer.
I personally use a zomei tripod, which is really affordable as well as a good travel companion.

3) Shoot when there isn’t much light
Now that you have the settings and a solid base sorted, you need to know when and where to shoot.
A low shutter speed lets in a lot of light, so you will need to be shooting your long exposure shots either at night, during blue hour, just a bit after sunrise and before sunset or in a well covered area (like a forest).

I use a GOBE variable ND filter which allows me to do long exposure shots even when it’s fairly light, the filter acts kind of like sunglasses for your camera. Make sure you buy the correct size for one of your lenses.
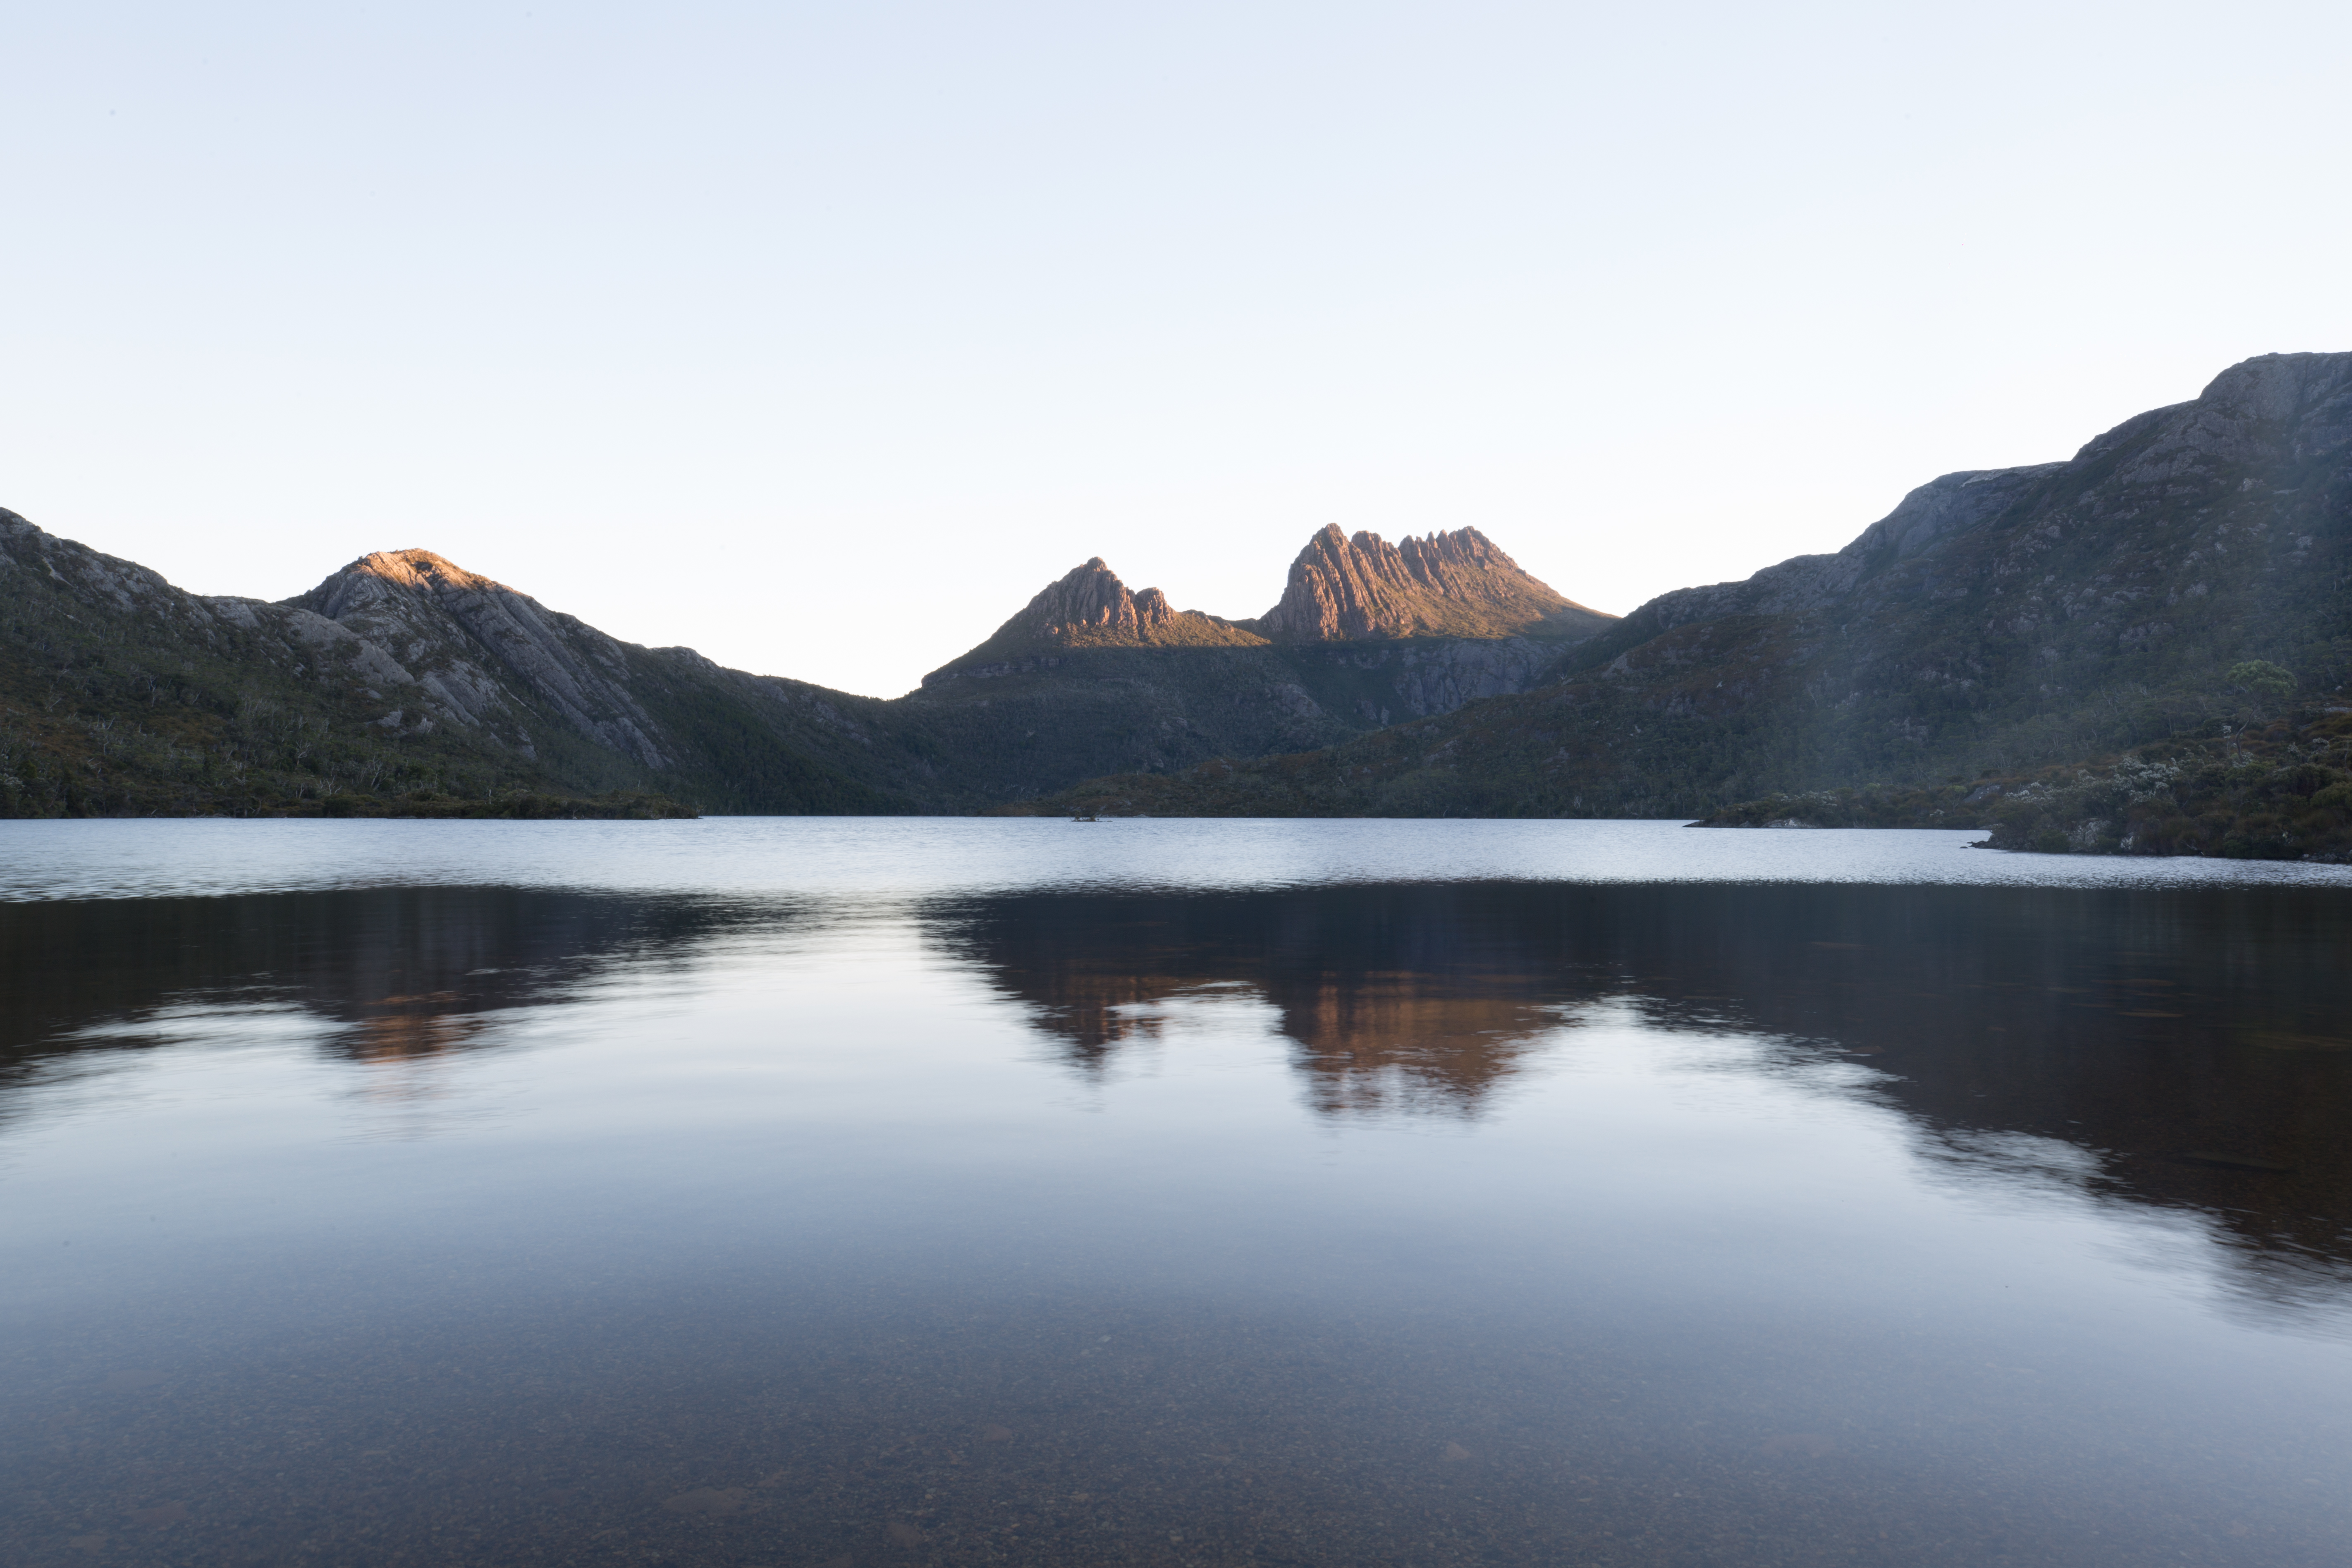
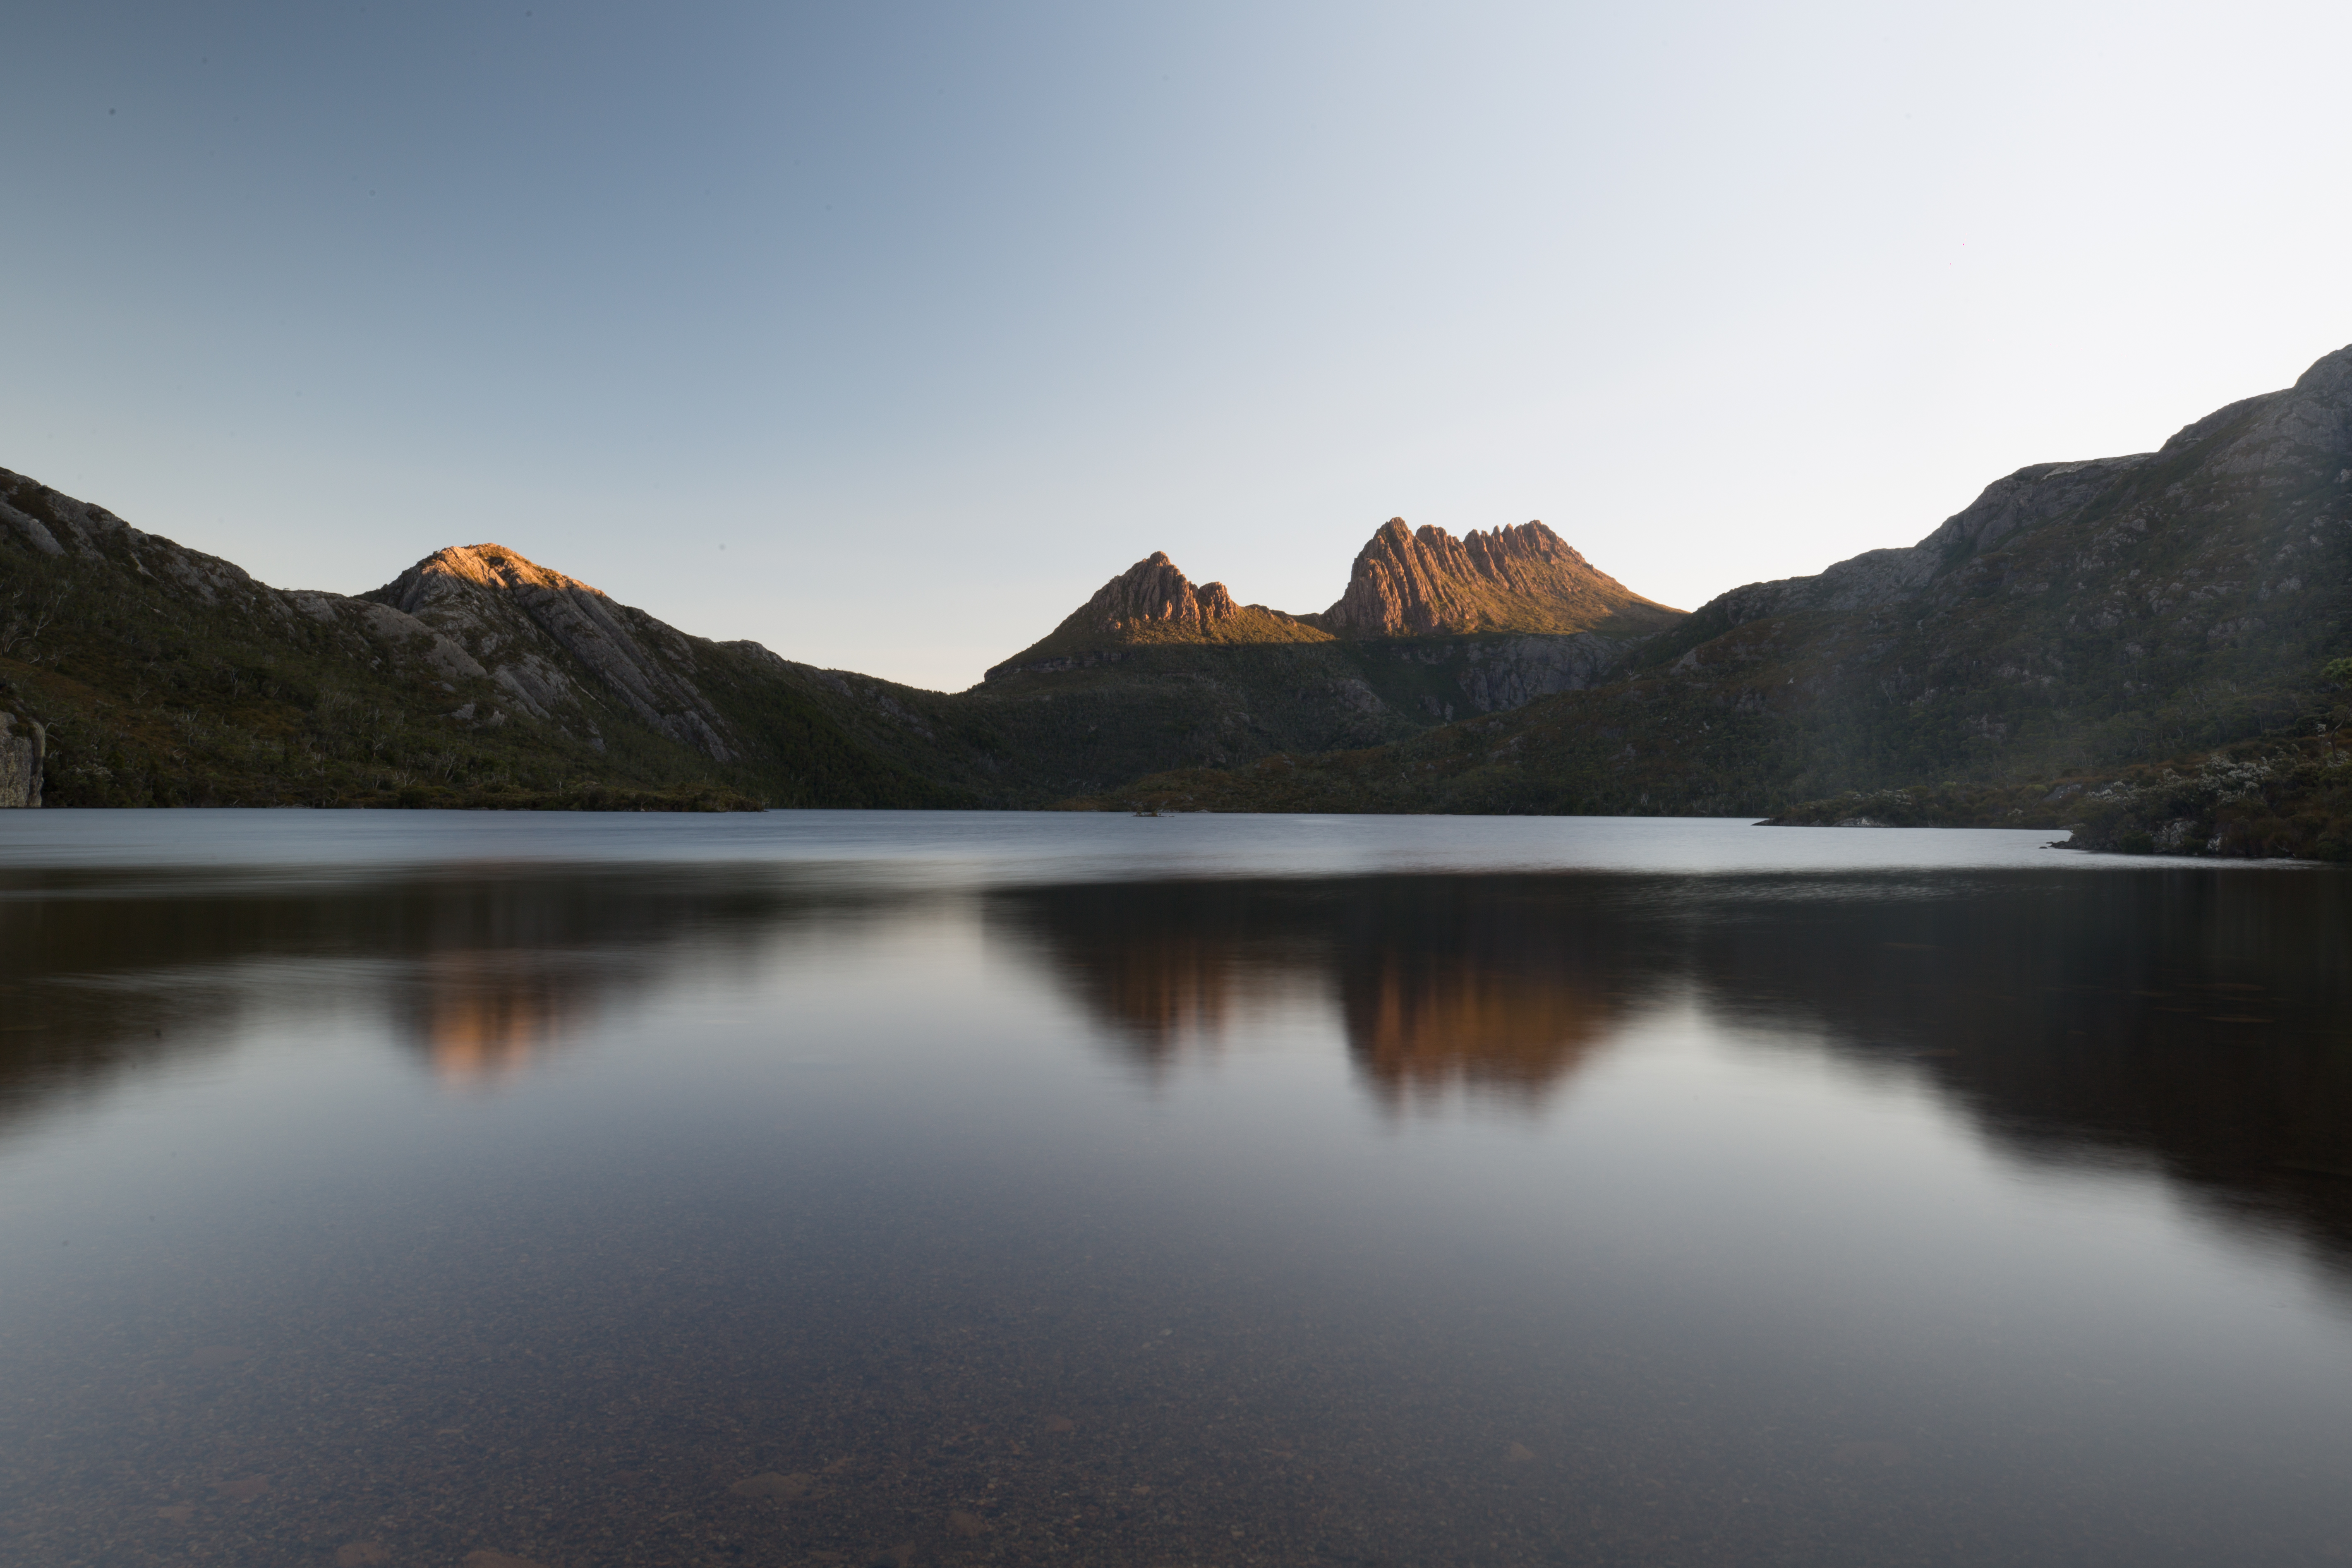
The first photo below was taken with a shutter speed of 0.5 seconds, ISO 100 and f/22 (no filter) and the second was taken with my filter allowing me to have a slightly lower shutter speed of 6 seconds. Neither of these photos are edited so that you can see the difference in the depth of colour that is brought in during a long exposure shot.
If you want to shoot long exposure shots at night check out my top tips on how to shoot at night! I hope my top tips for taking long exposure shots will help you to up your photography game, the main thing is to keep practising!
Like this post? Pin it to save for later!

")
2 Comments
How to use Manual on a DSLR - The Ginger Wanderlust
March 22, 2019 at 7:40 am[…] A shutter speed of under a second is considered a long exposure shot, find out my top tips on how to take long exposure photos. […]
Most Instagrammable Photo Spots in Sydney - The Ginger Wanderlust
July 5, 2019 at 1:51 pm[…] Kirribilli at night to capture the Sydney city sky line all lit up! This is a great spot for some long exposure shots of the city. If you want to take portraits make sure you bring some fairy […]