Shooting at night time is a great way to get more creative as well as capture a fresh perspective of a popular location. Night photography gives you a great opportunity to play around with light and shadow and capture light trails. You’ve probably come to this blog post as you would like to try taking photos at night but you are worried about the lack of light, in this article I will share all my top tips on how to take photos at night.
Using Manual Mode for Night Photography (what settings should you use?)
If you are wanting to take photos at night then you will need to learn how to shoot using manual mode. I am a strong believer in using natural available light and never use my flash.
The manual settings that you use for night photography will depend on what look you are going for (portrait / long exposure / starry sky) and also what light is available.
Make sure you understand the different manual settings and how they affect the light and read on to find out what settings I use.
Shooting portraits at night
If you want to capture portraits at night you will need to bring artificial light with you. This can take the form of a professional light or you can get creative with fairy lights, city lights or a phone! This light should be used to light up the subject as you so wish (think about what you want to high light vs what you want to leave in shadow).
As you are shooting a person (who will undoubtedly move) I would avoid going under a shutter speed of 1/45 (unless the subject is facing away from the camera and can keep very still). I then put the aperture as low as possible (for maximum light) and then the ISO at what is needed to add the correct amount of light into the photo (try to avoid having this too high though). This generally means a high ISO so you will need a good quality camera to capture this without too much grain.
For the below photo I used the following settings: 1/60 f/2.8 ISO800
As I had the fairy lights lighting up my face and the background is lit up by itself I didn’t need to have too high an ISO. I also shot this during blue hour just after sunset so there was still light in the sky. I then used my Golden Glow Pop preset (with decreased warmth and increased exposure) to add more light and glow to my photo, as well as a radial filter on my face with increased exposure to further highlight that area.


Long Exposure Night Photography
If you’re looking to create beautiful photos of night time city scapes, or want to capture the movement of car head lights then you should be taking long exposure shots! You will need a steady flat surface in order to do this (I personally use a tripod) in order to ensure your photo is crisp and clear. I also put my camera on a 2 second timer so I don’t move the camera when pushing on the button to take the photo.
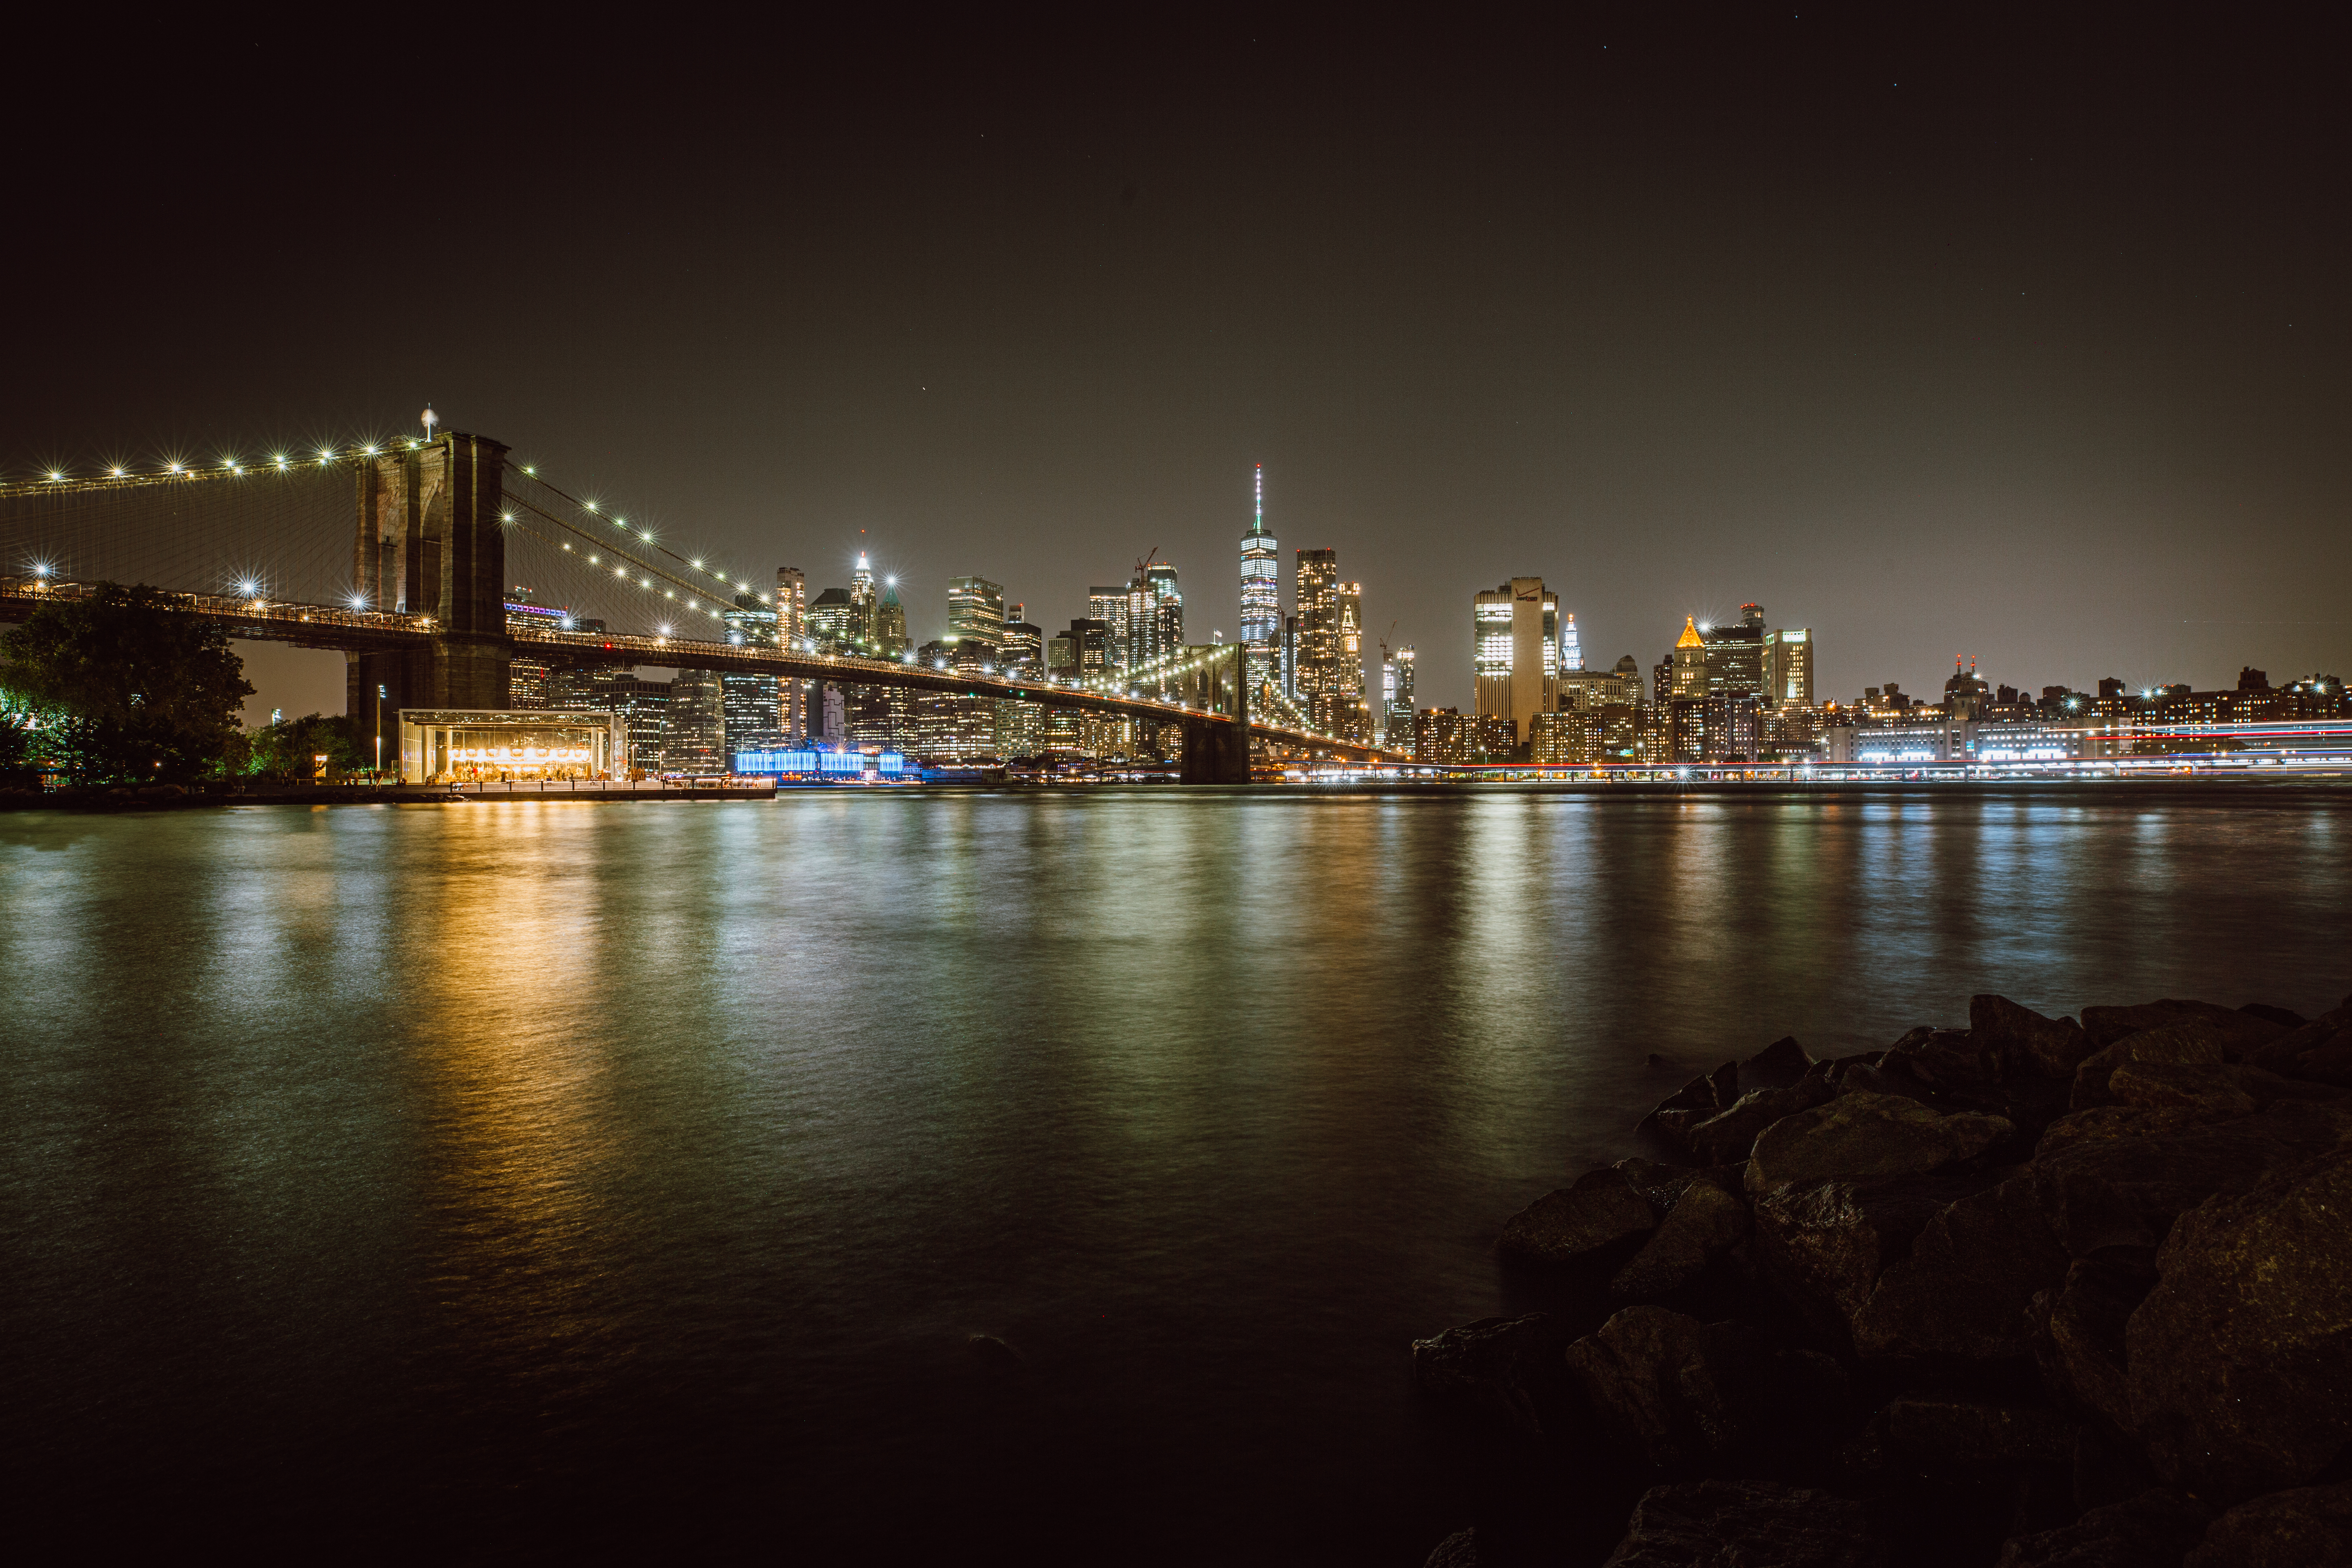
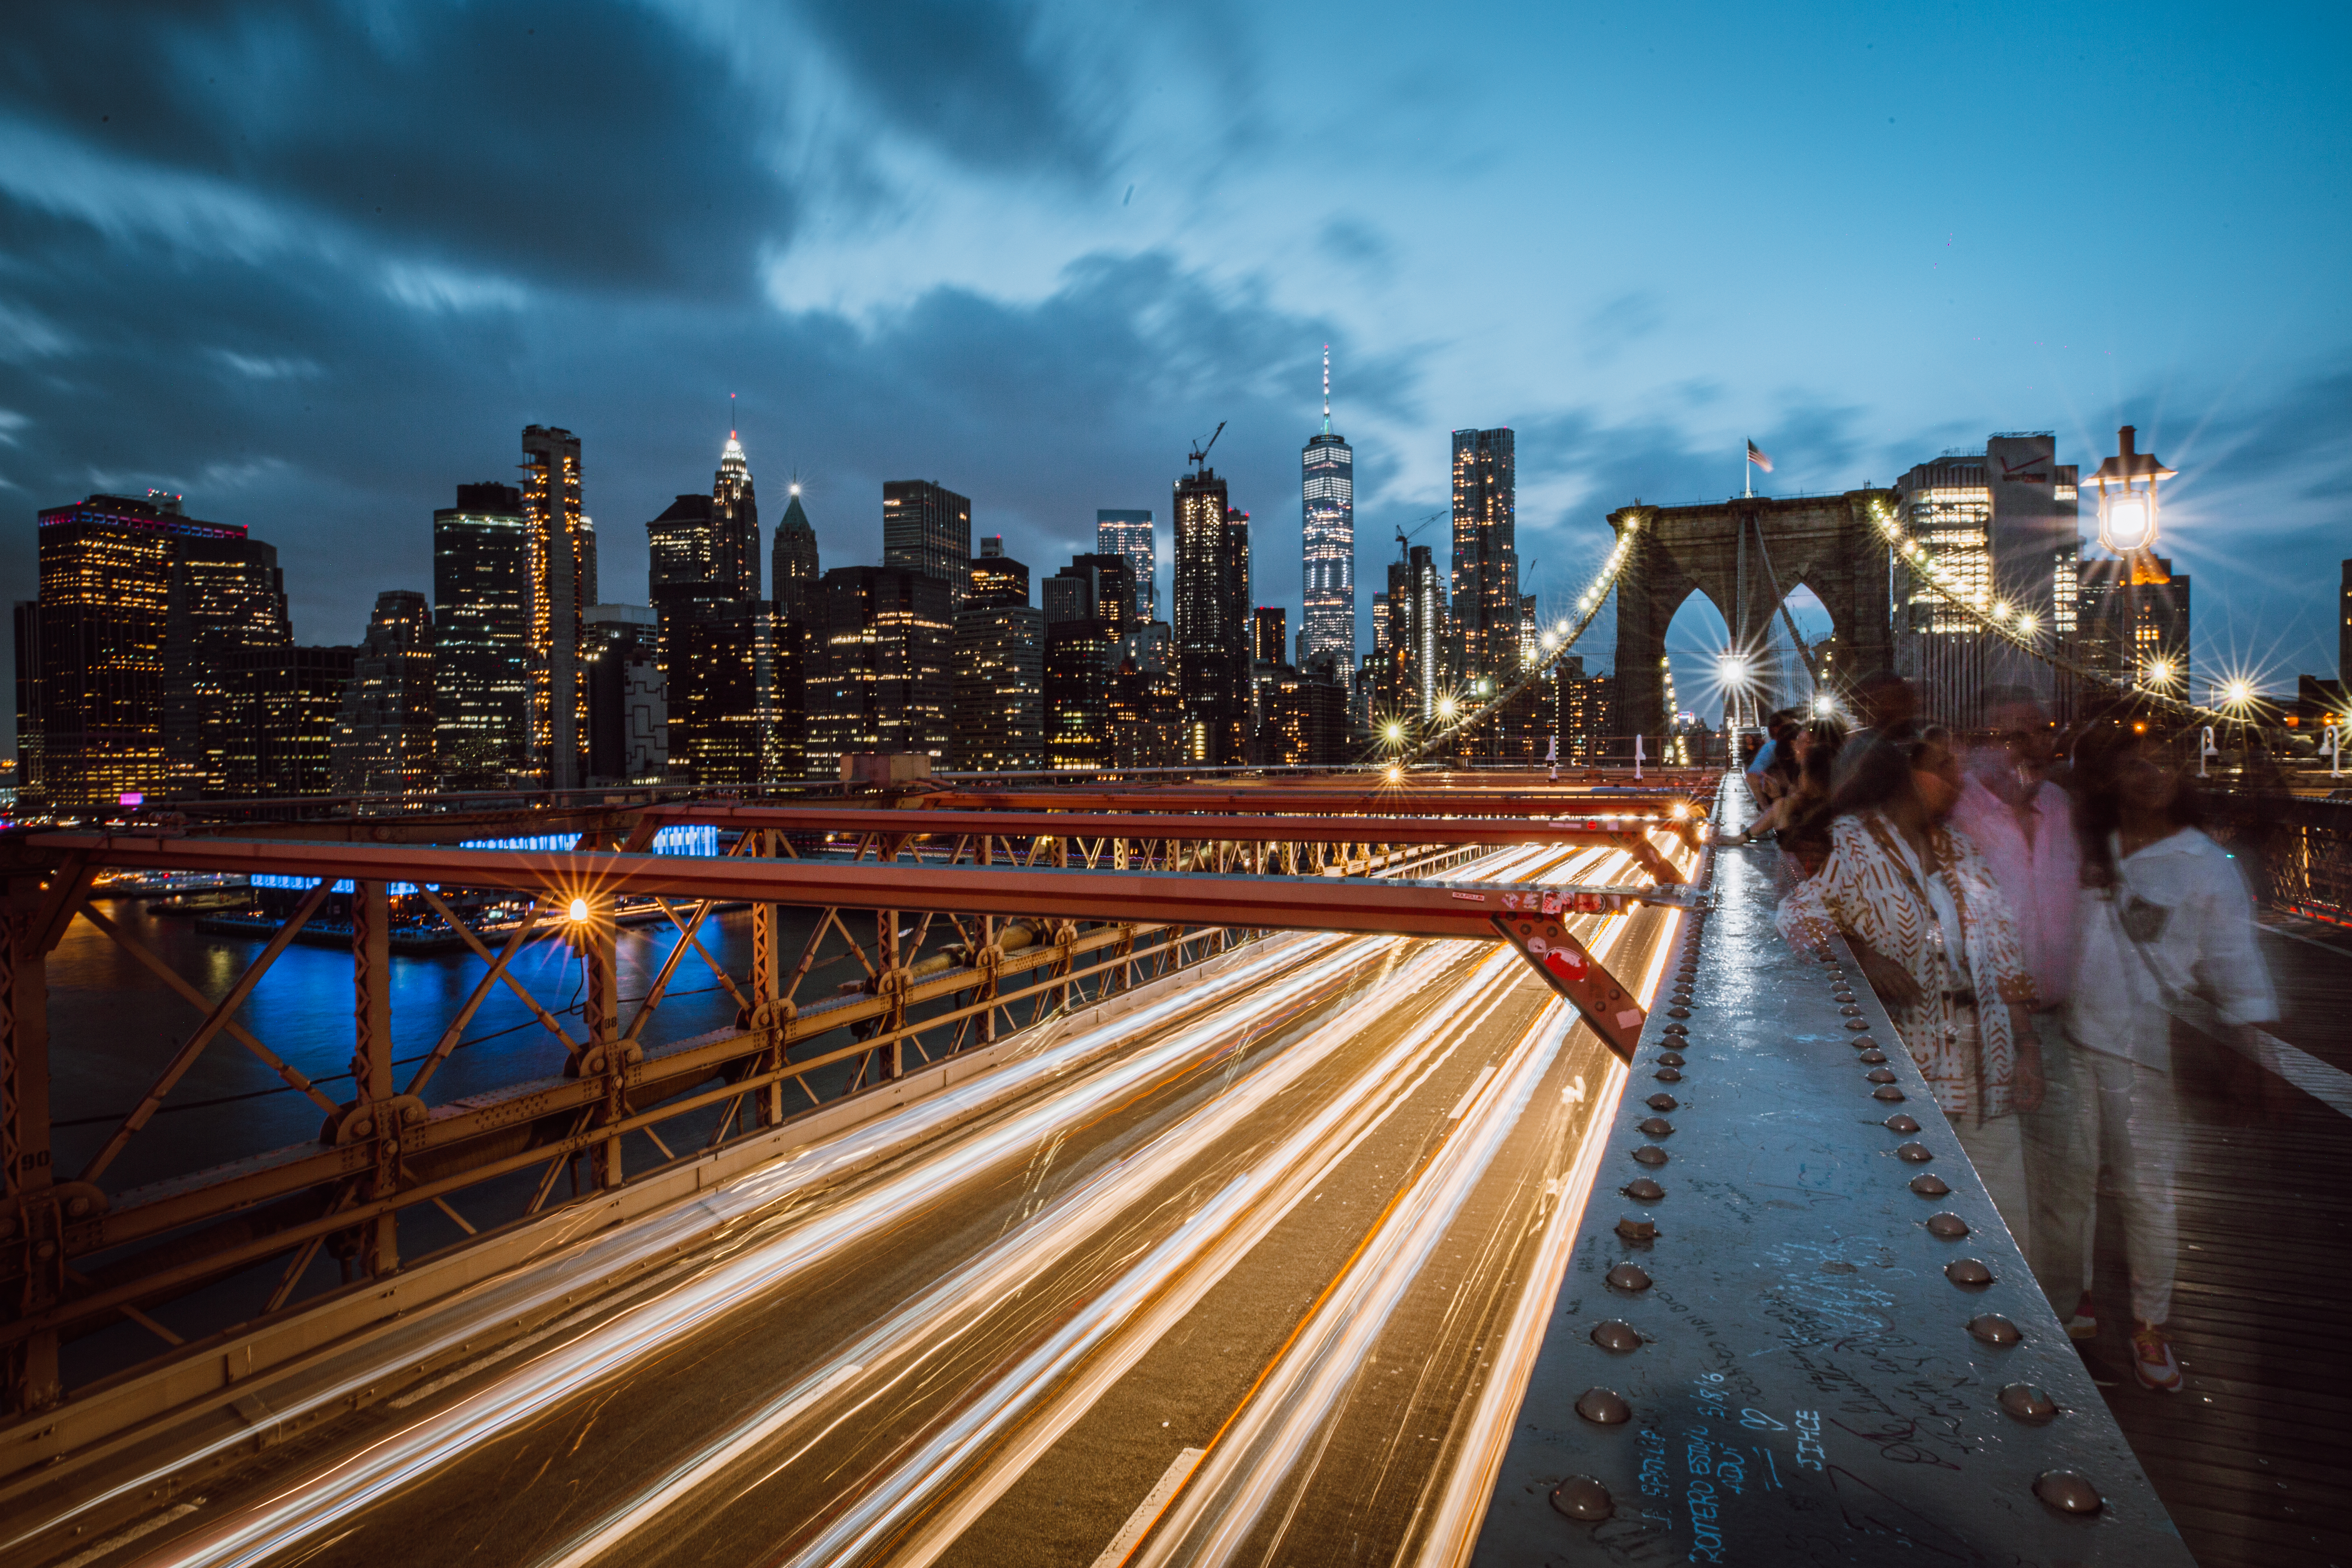
Below you can see two photos taken from the same spot but giving completely different outcomes. In the first photo I wanted to capture the cars so I used a shutter speed of 1/15 (not a long exposure shot), I’m still using a tripod here though as I’m not steady enough to keep the camera still. I then put the aperture as low as possible which was f/2.8 with the lens I was using and then the ISO to compliment this which was ISO1250.
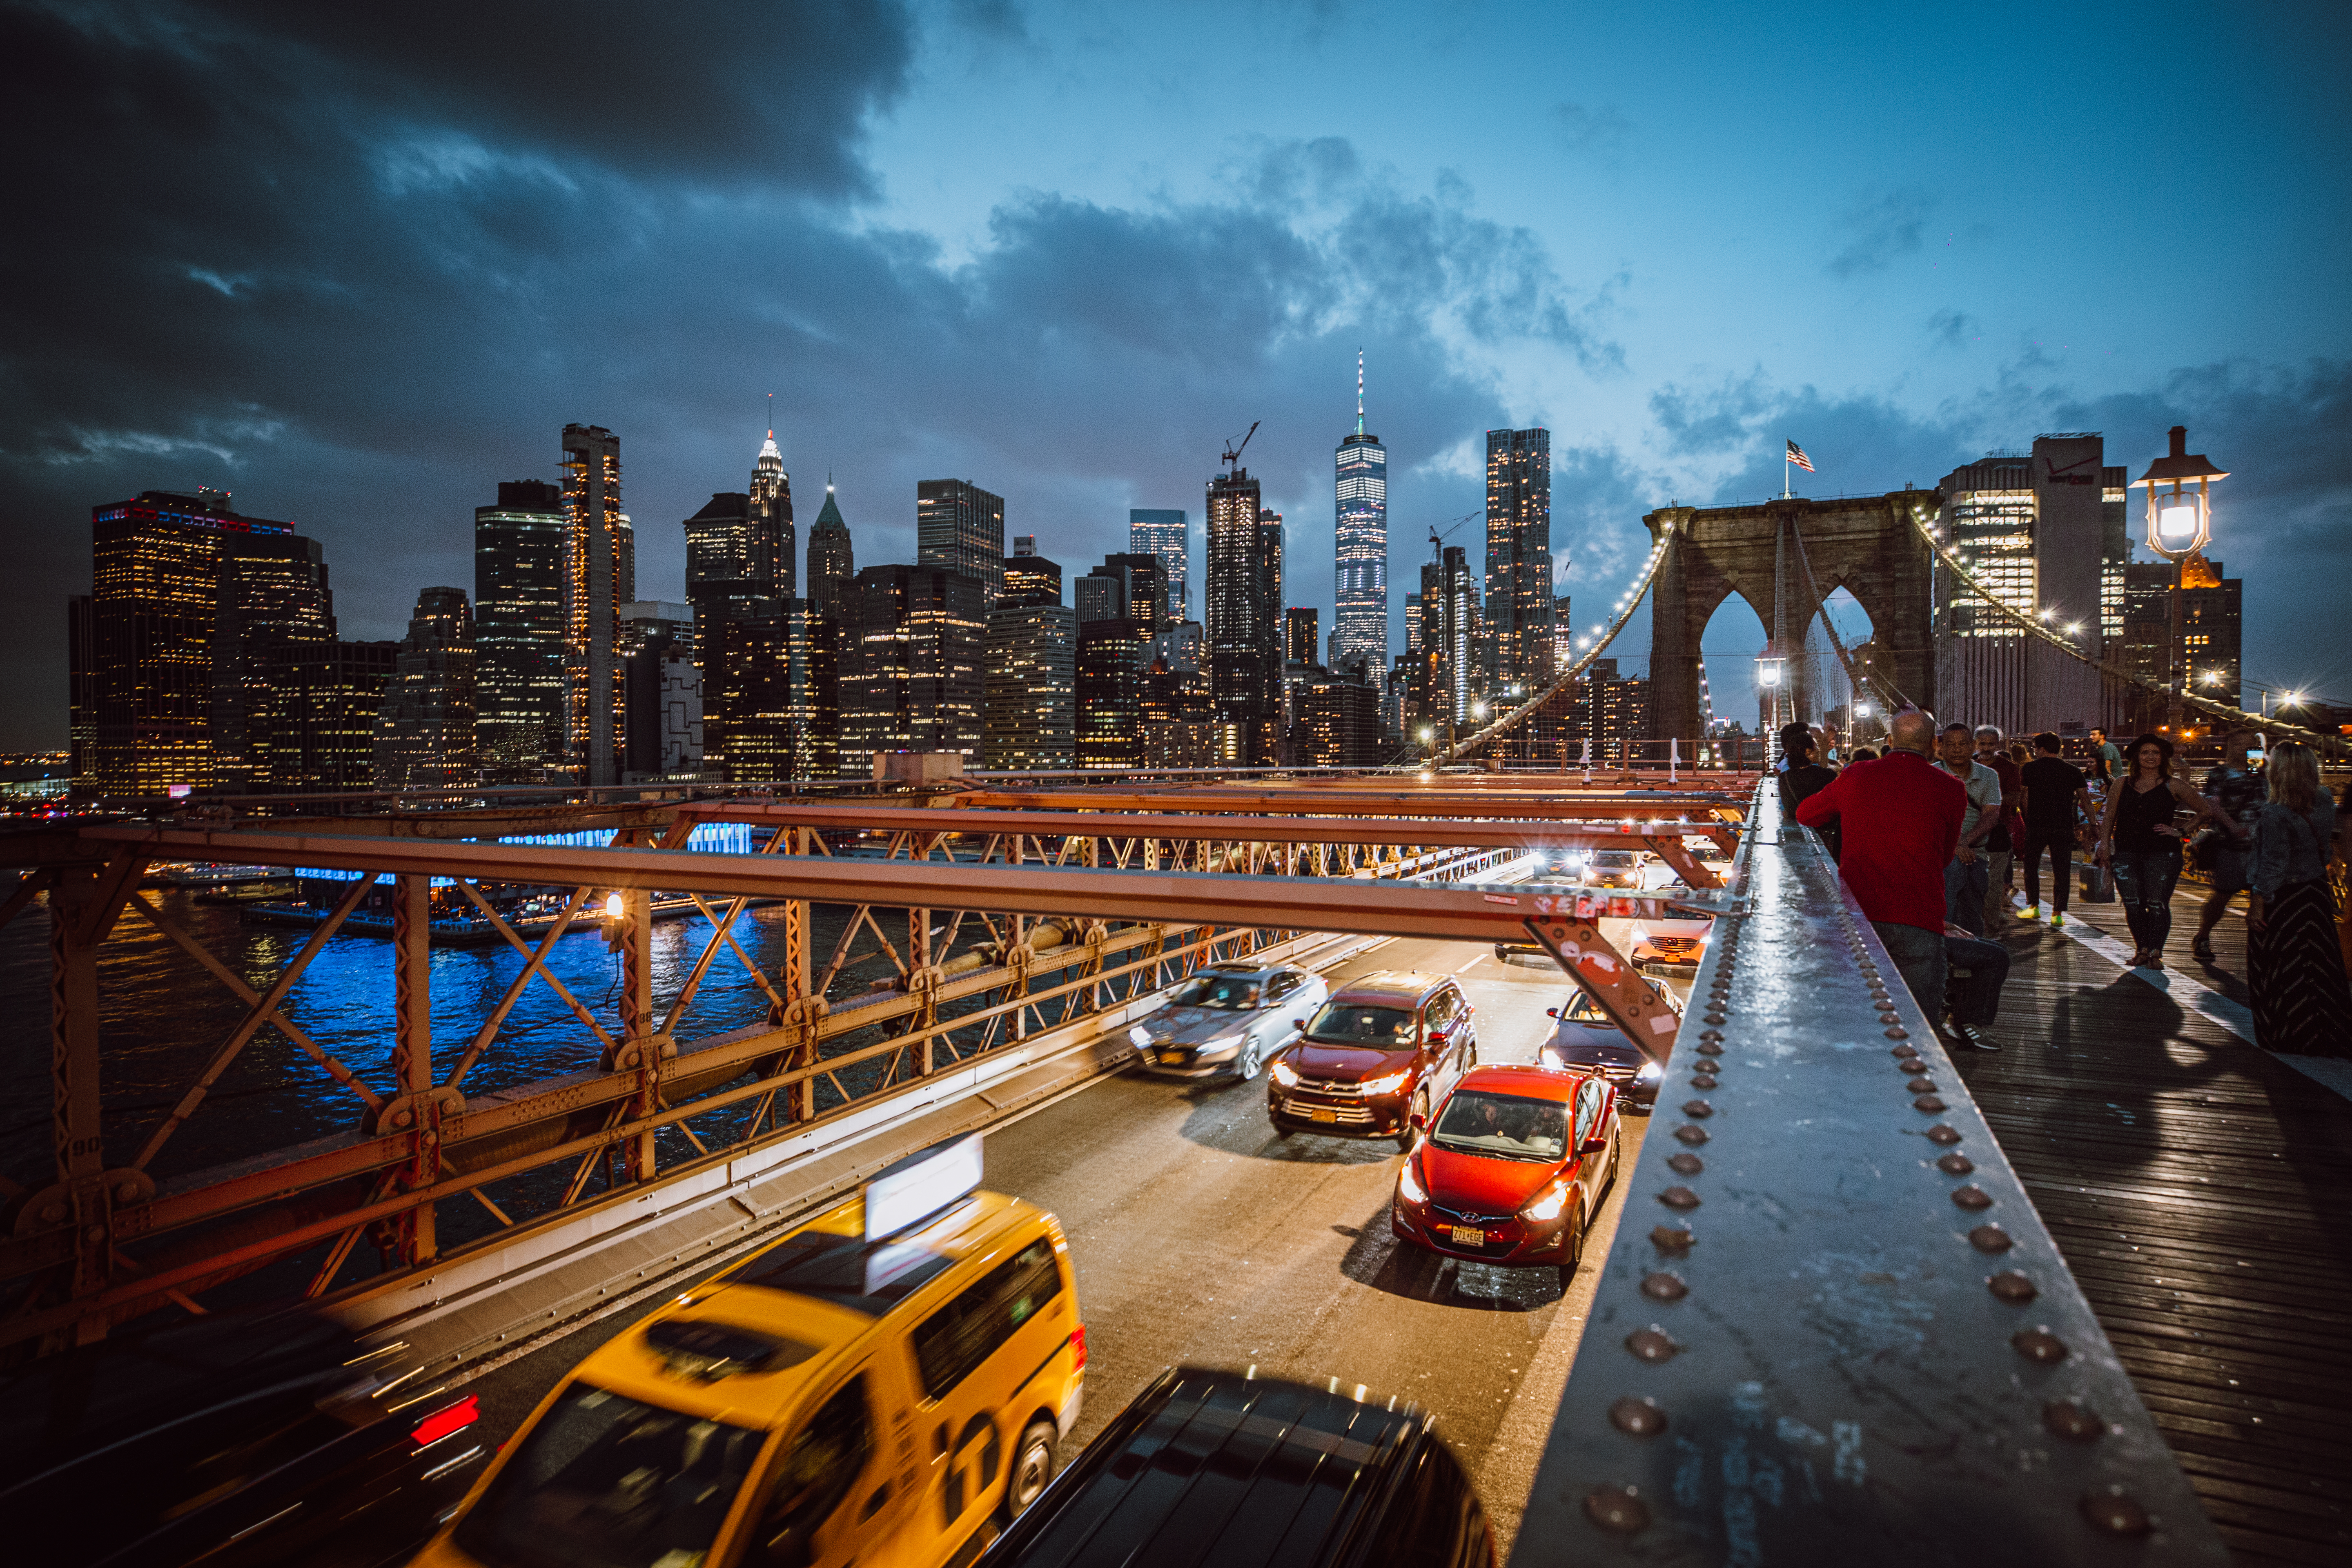
In the second photo I wanted to capture the movement of the cars so I needed a much longer (lower) shutter speed of 15 seconds in order to do a long exposure shot (that means for 15 seconds my camera is processing the photo so you definitely need a tripod or steady surface here!). A low shutter speed lets in a LOT of light so I need to put the ISO as low as possible so it doesn’t let in my light (I used ISO100) and the aperture as high as possible so it doesn’t let in much light (I used f/22).
Learn more about Long Exposure photography.
Photographing stars at night
If you want to capture the stars you will need to have your aperture set at at least ISO1600 (you need the grain to see the stars), and you don’t want your shutter speed too slow as otherwise the stars won’t be clear (I generally put around 1 second) and then the aperture at what is needed to suit the light (probably around f/4).
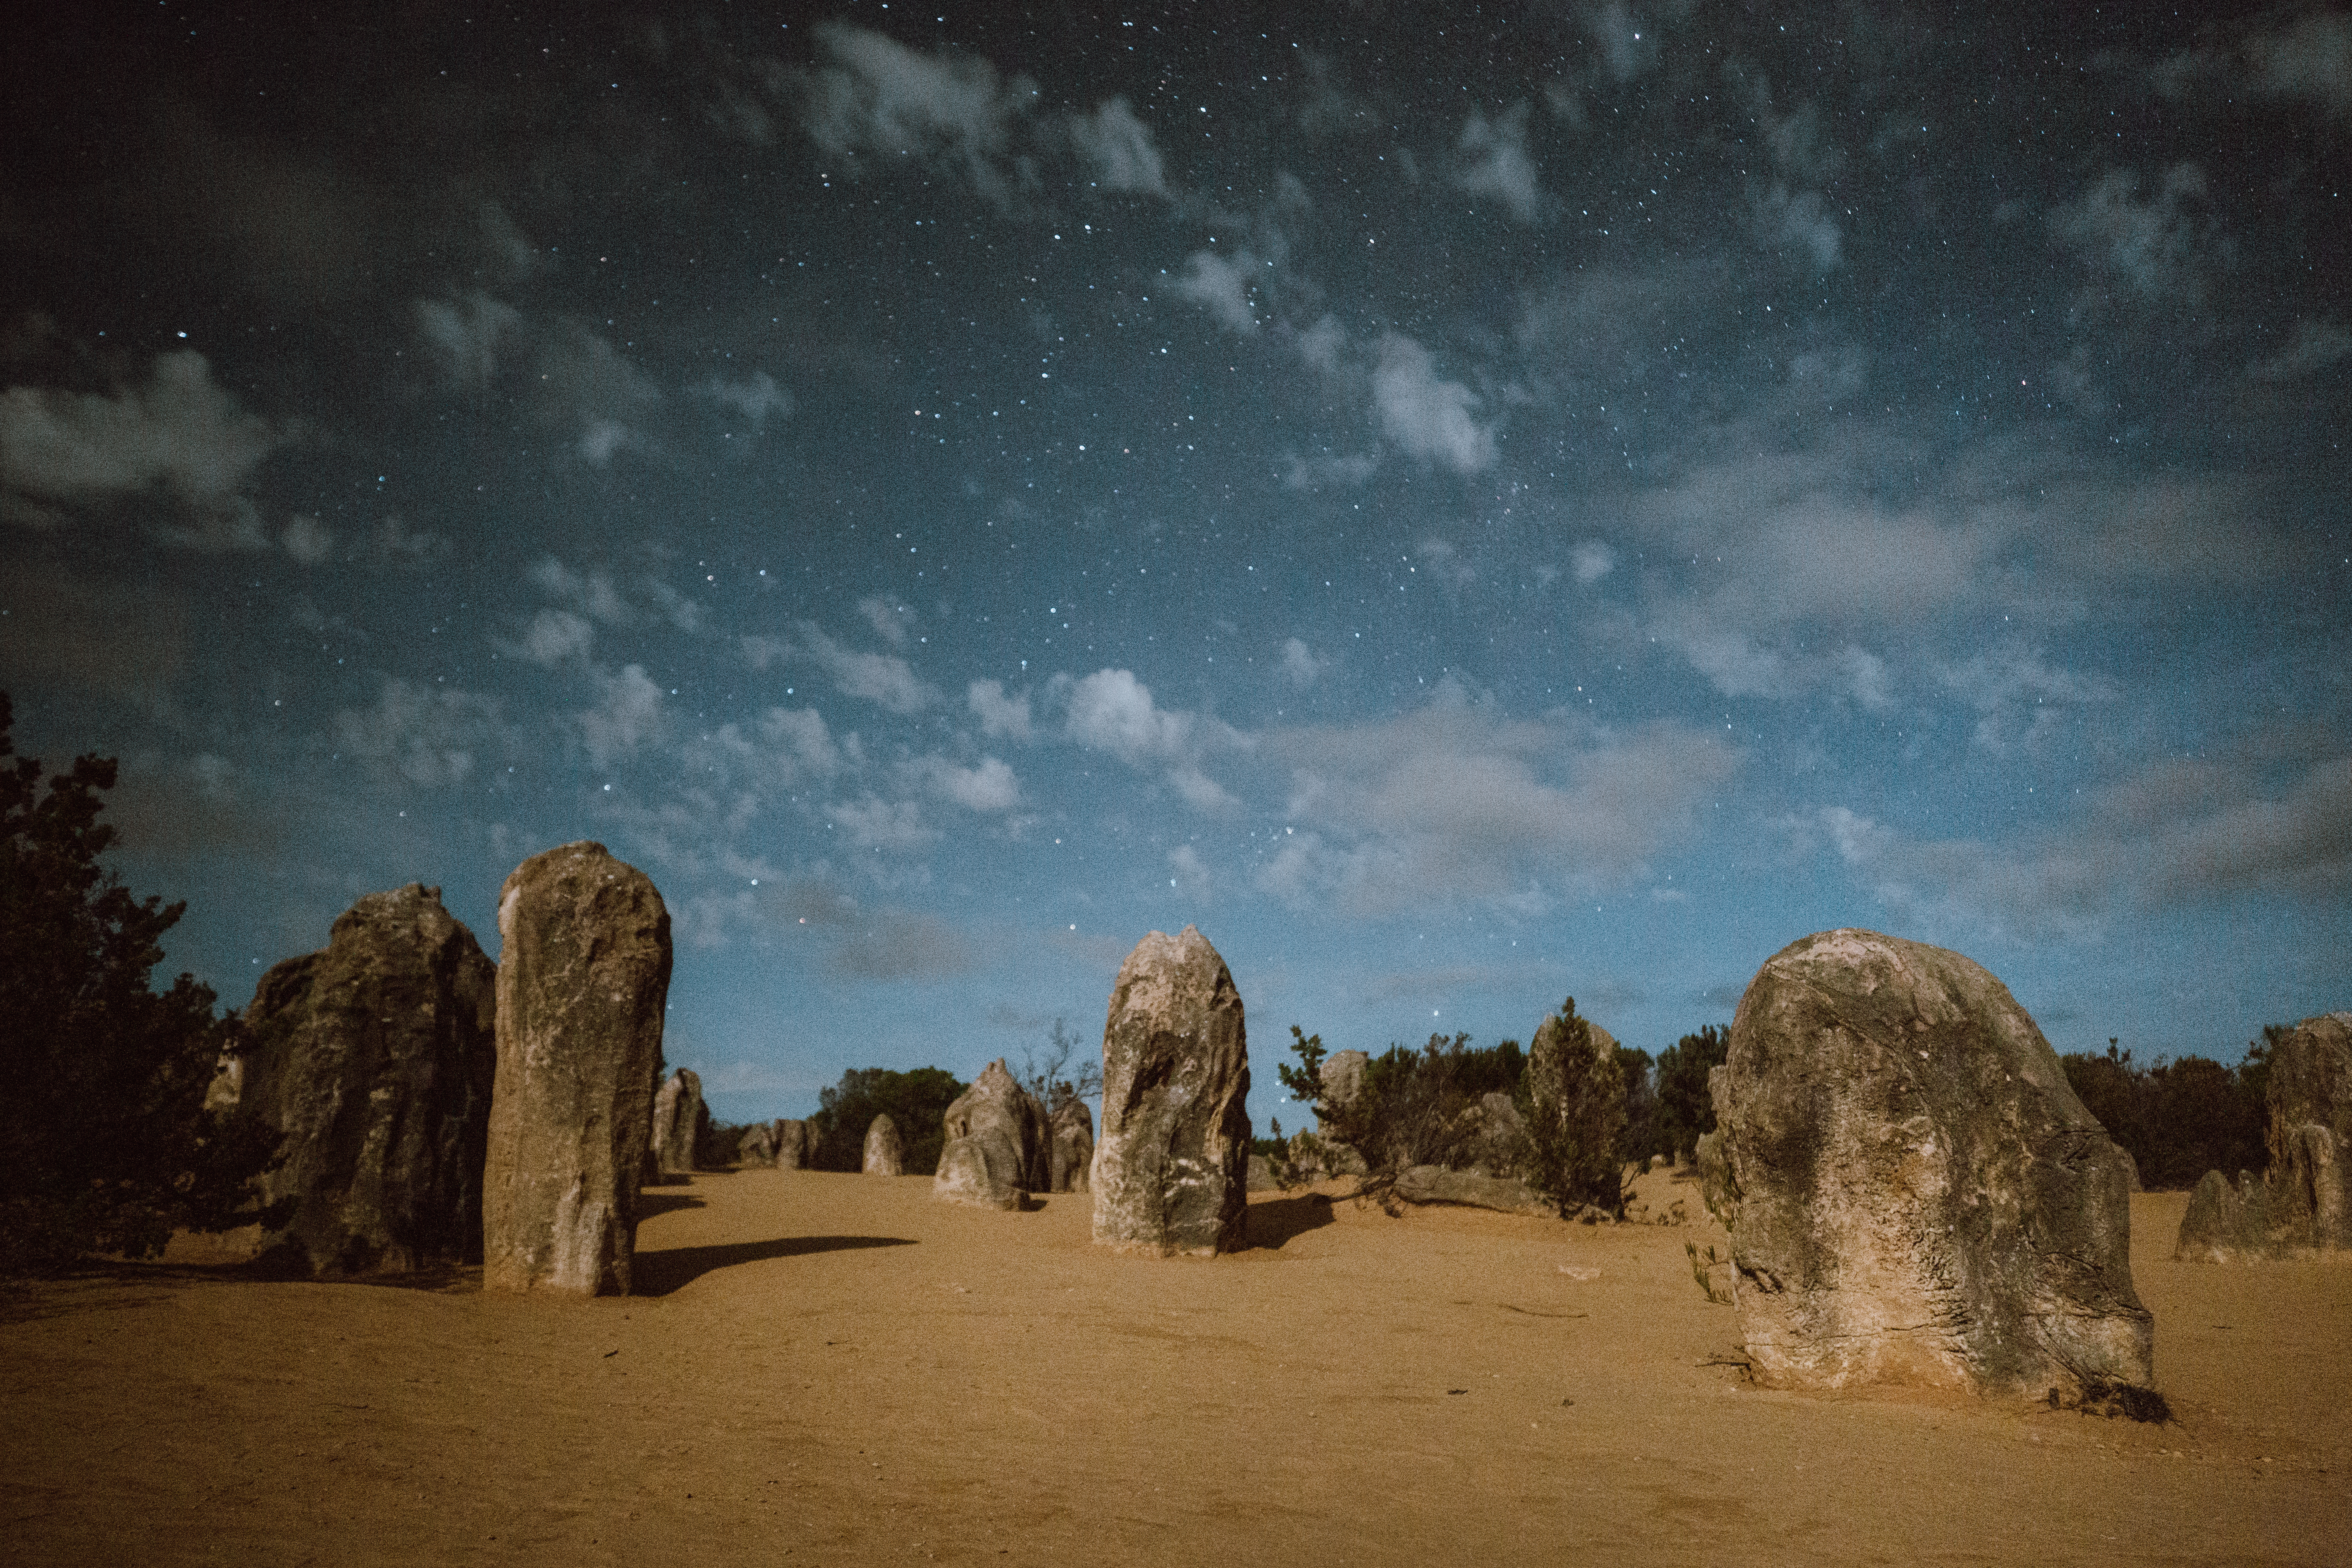
In the below photo I used the following settings: 8 seconds, f/5.6 ISO800. The ISO isn’t so high so the stars aren’t too visible (there’s also a lot of light).
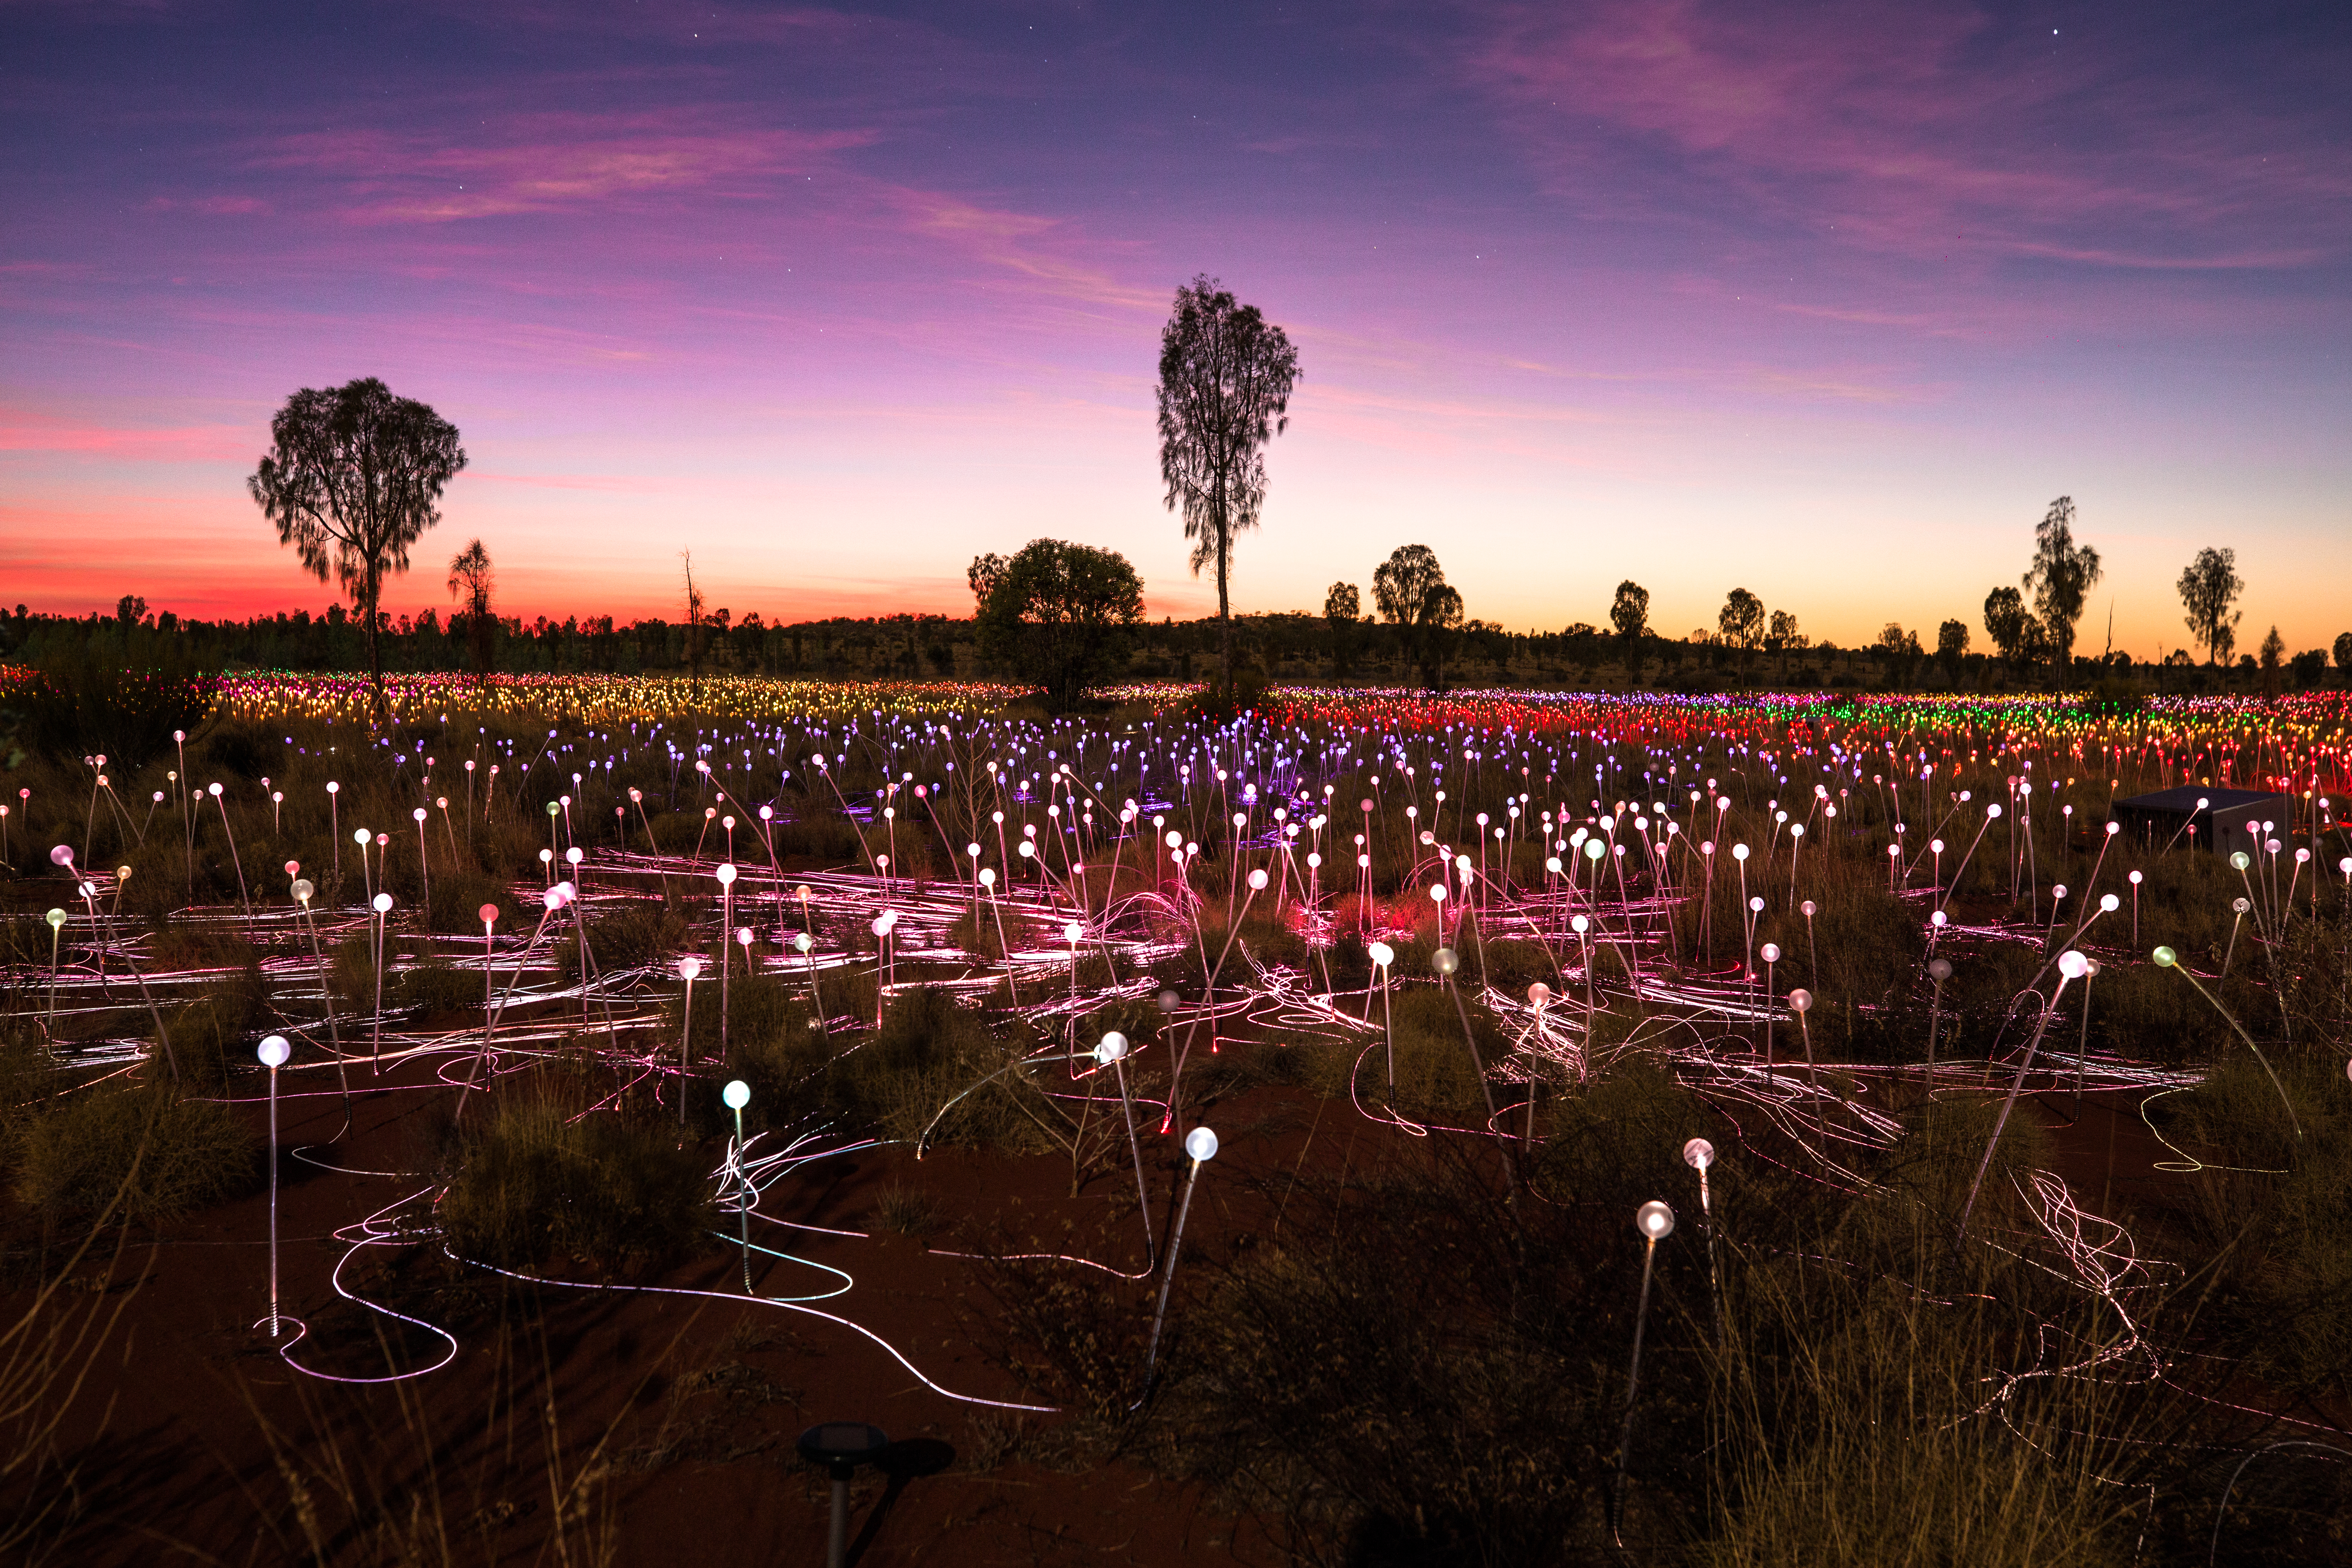
In the below photo I used the following settings: 3 seconds, f.2.8 and ISO4000. You can see that 3 second was a bit too long as the stars are a bit streaky.
As it was so dark I had to use a torch to shine on the rocks so that I could focus on them (I then turned the light off when I took the photo).
I hope this blog post on how to take photos at night helps you to get the motivation to try night photography! If you would like to learn more about photography and editing make sure you check out my ebook on How to Take Better Photos (for Instagram).
Like this post? Pin it to save for later!


3 Comments
Top Tips for taking Long Exposure Shots - The Ginger Wanderlust
September 29, 2019 at 9:22 pm[…] you want to shoot long exposure shots at night check out my top tips on how to shoot at night! I hope my top tips for taking long exposure shots will help you to up your photography game, the […]
How to use Manual on a DSLR - The Ginger Wanderlust
September 29, 2019 at 9:23 pm[…] you shooting at night? The settings will differ depending on if you’re doing a long exposure shot or a […]
gold coast wedding photography
May 4, 2020 at 10:26 amTaking pictures at night can be quite challenging for beginners. It requires you to manipulate ISO, aperture, and shutter speed among many other things. Thanks so much these fabulous tips.