
Improving your photos so that they look professional has never been so easy, and you can do it all from the comfort of your mobile! There are so many free photo editing apps that it can be hard to choose, but my personal favourites are Snapseed and Lightroom.
Editing is so important in photography, it can make an okay photo great and a great photo amazing! and now you don’t even need to worry about it being too expensive or complicated, you can quickly and easily edit on your phone!
Another easy way to edit on Lightroom is by using presets. Presets are filters which you can apply to your photos in one click! Shop my mobile lightroom presets and get 10% off with code editonmobile10.
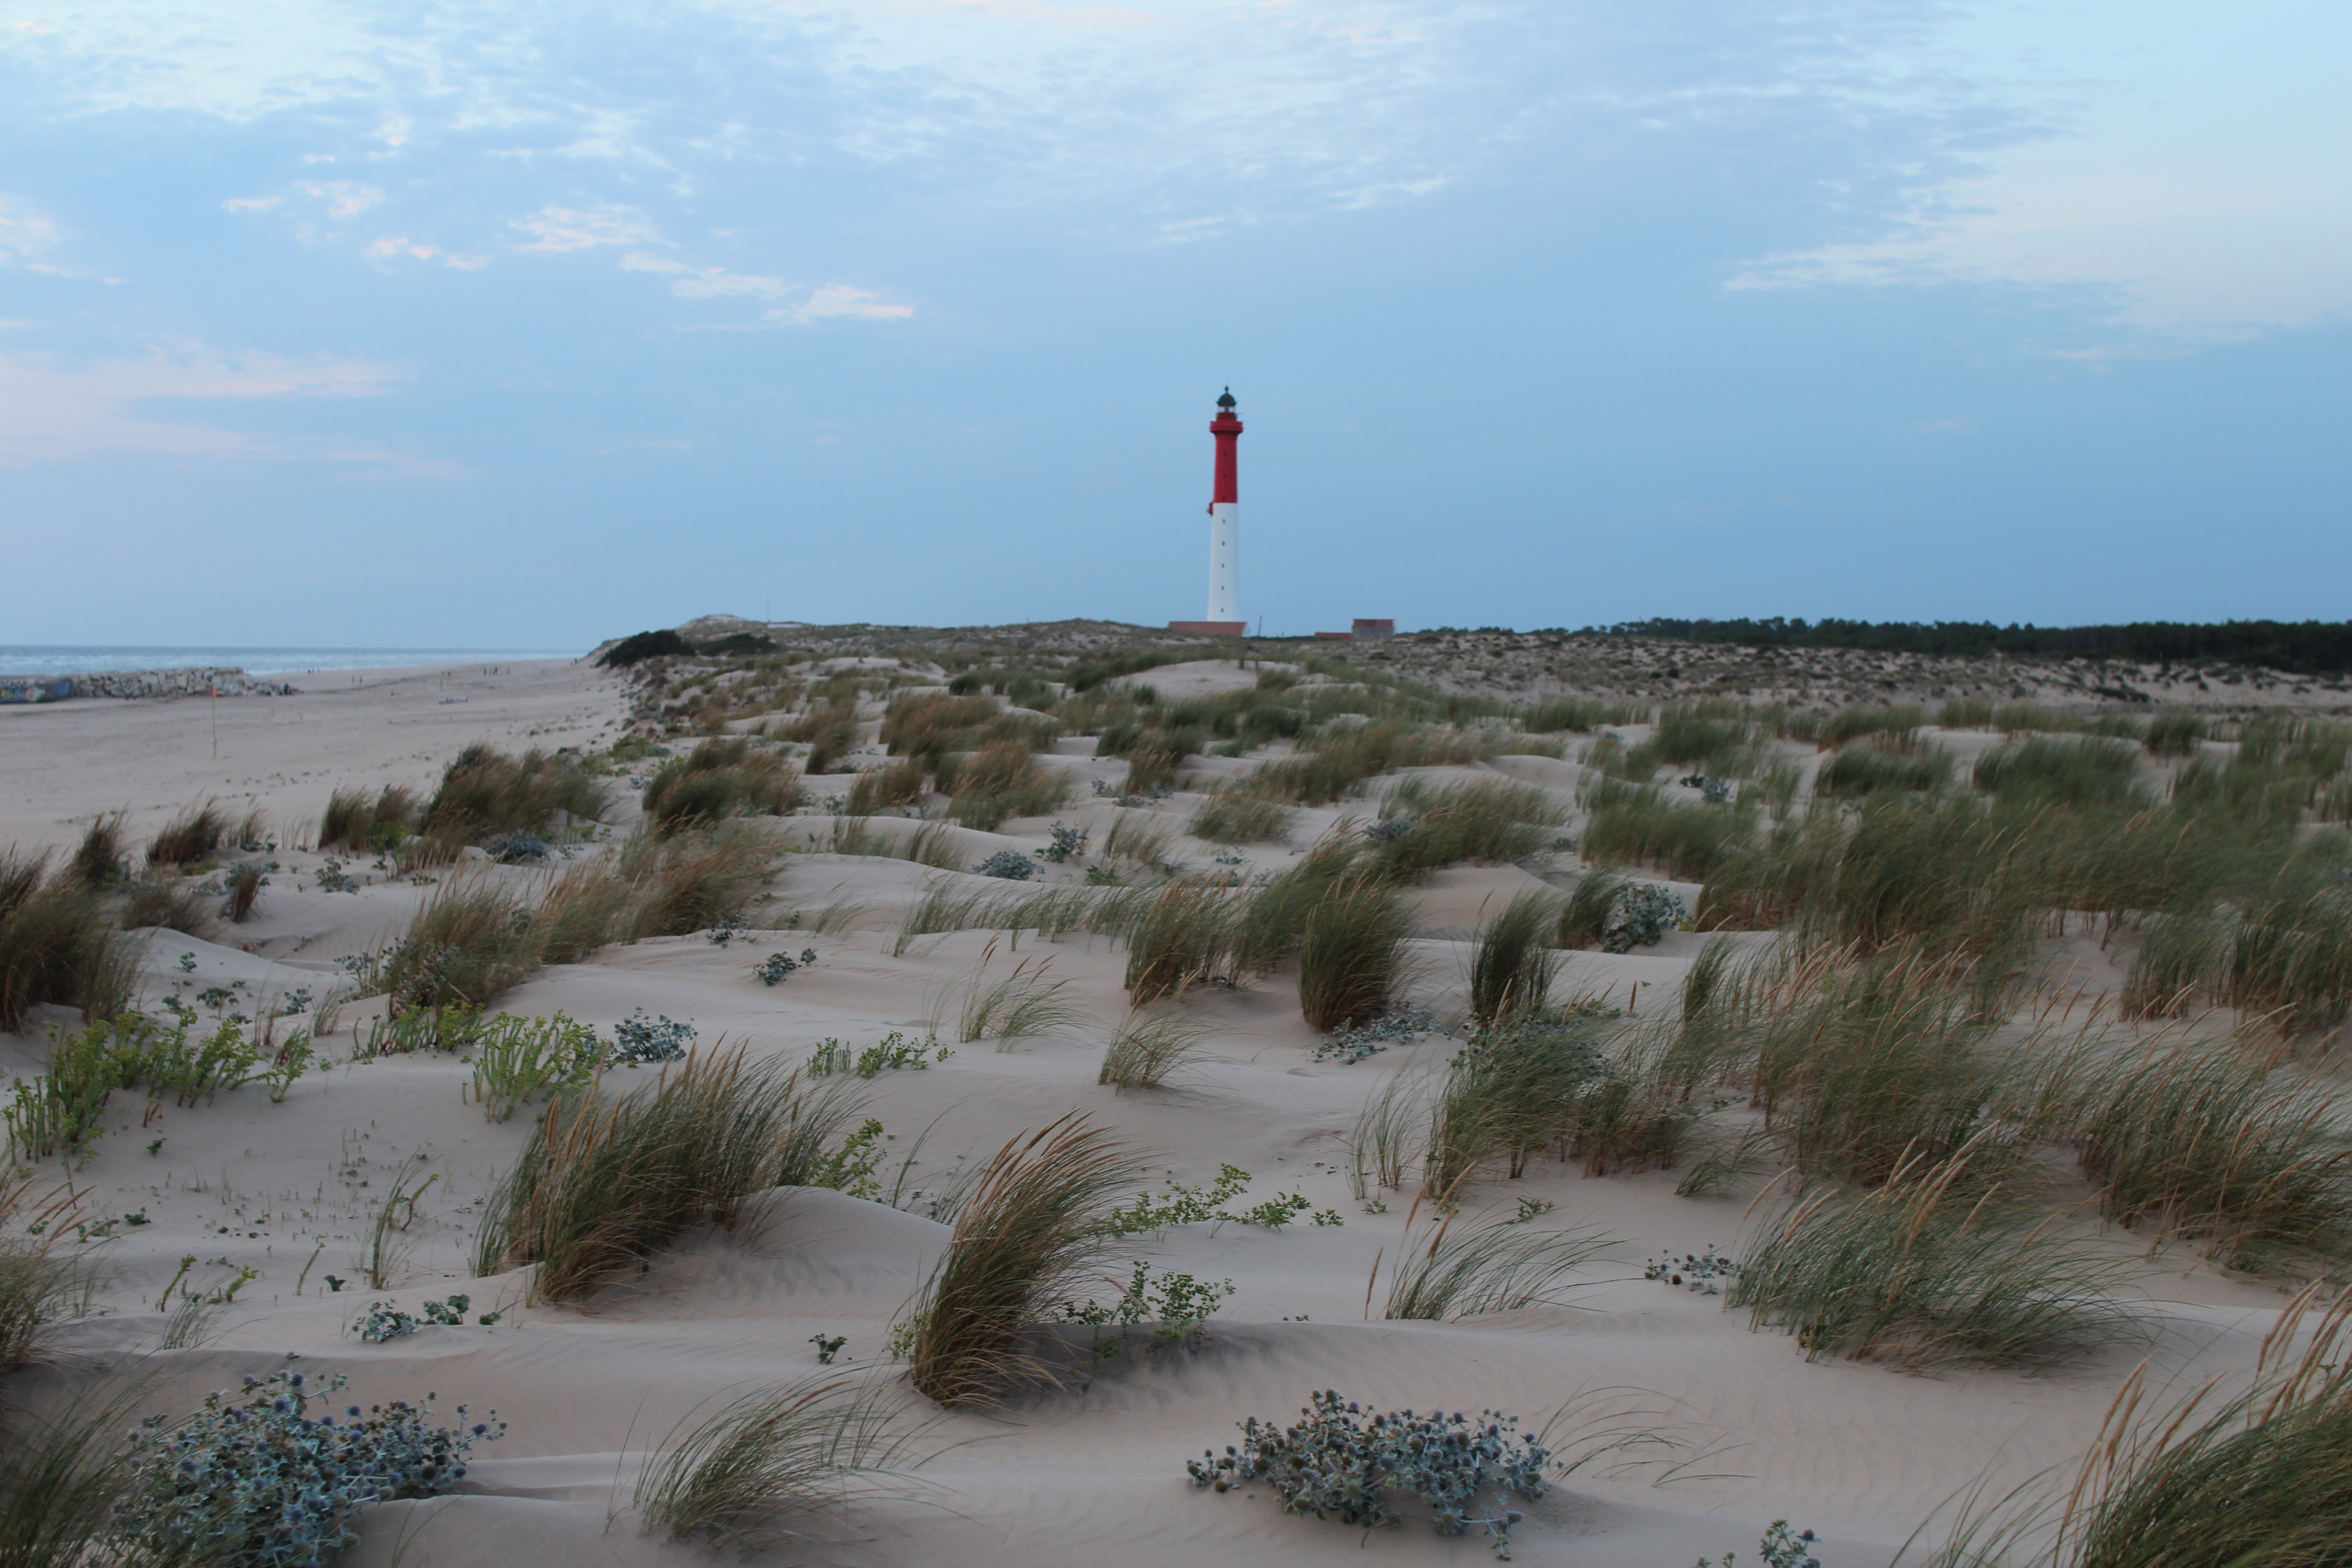
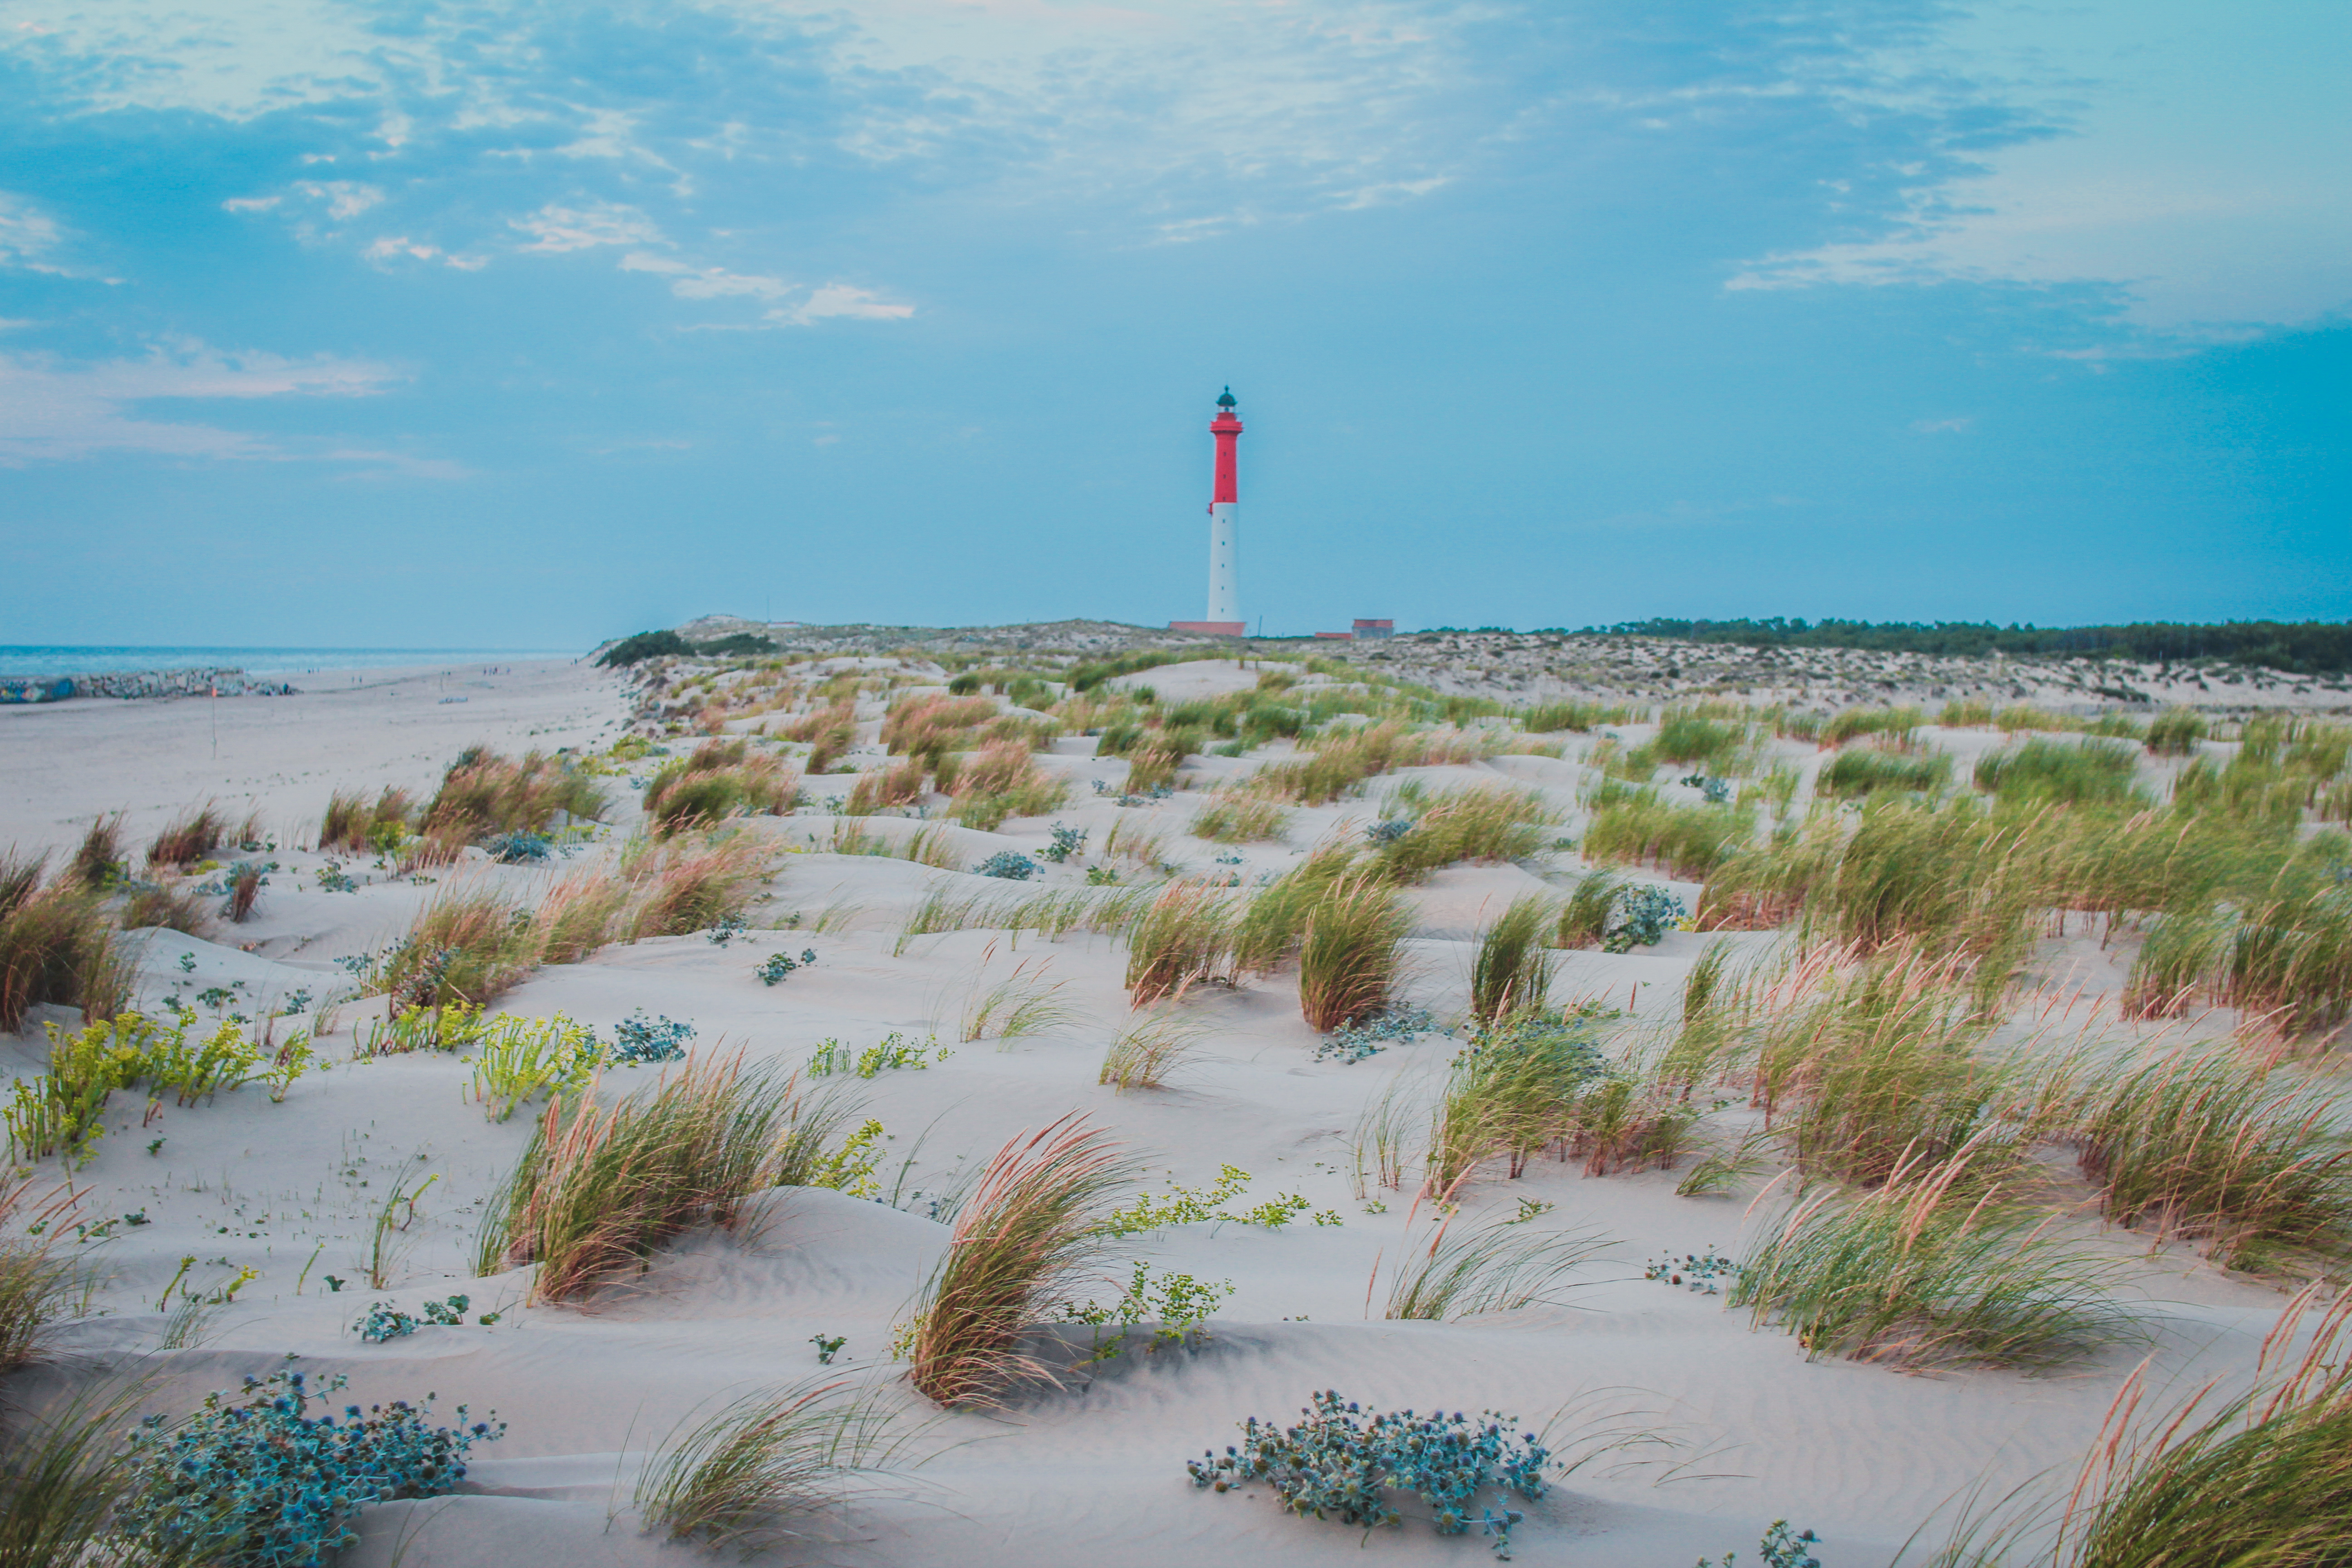
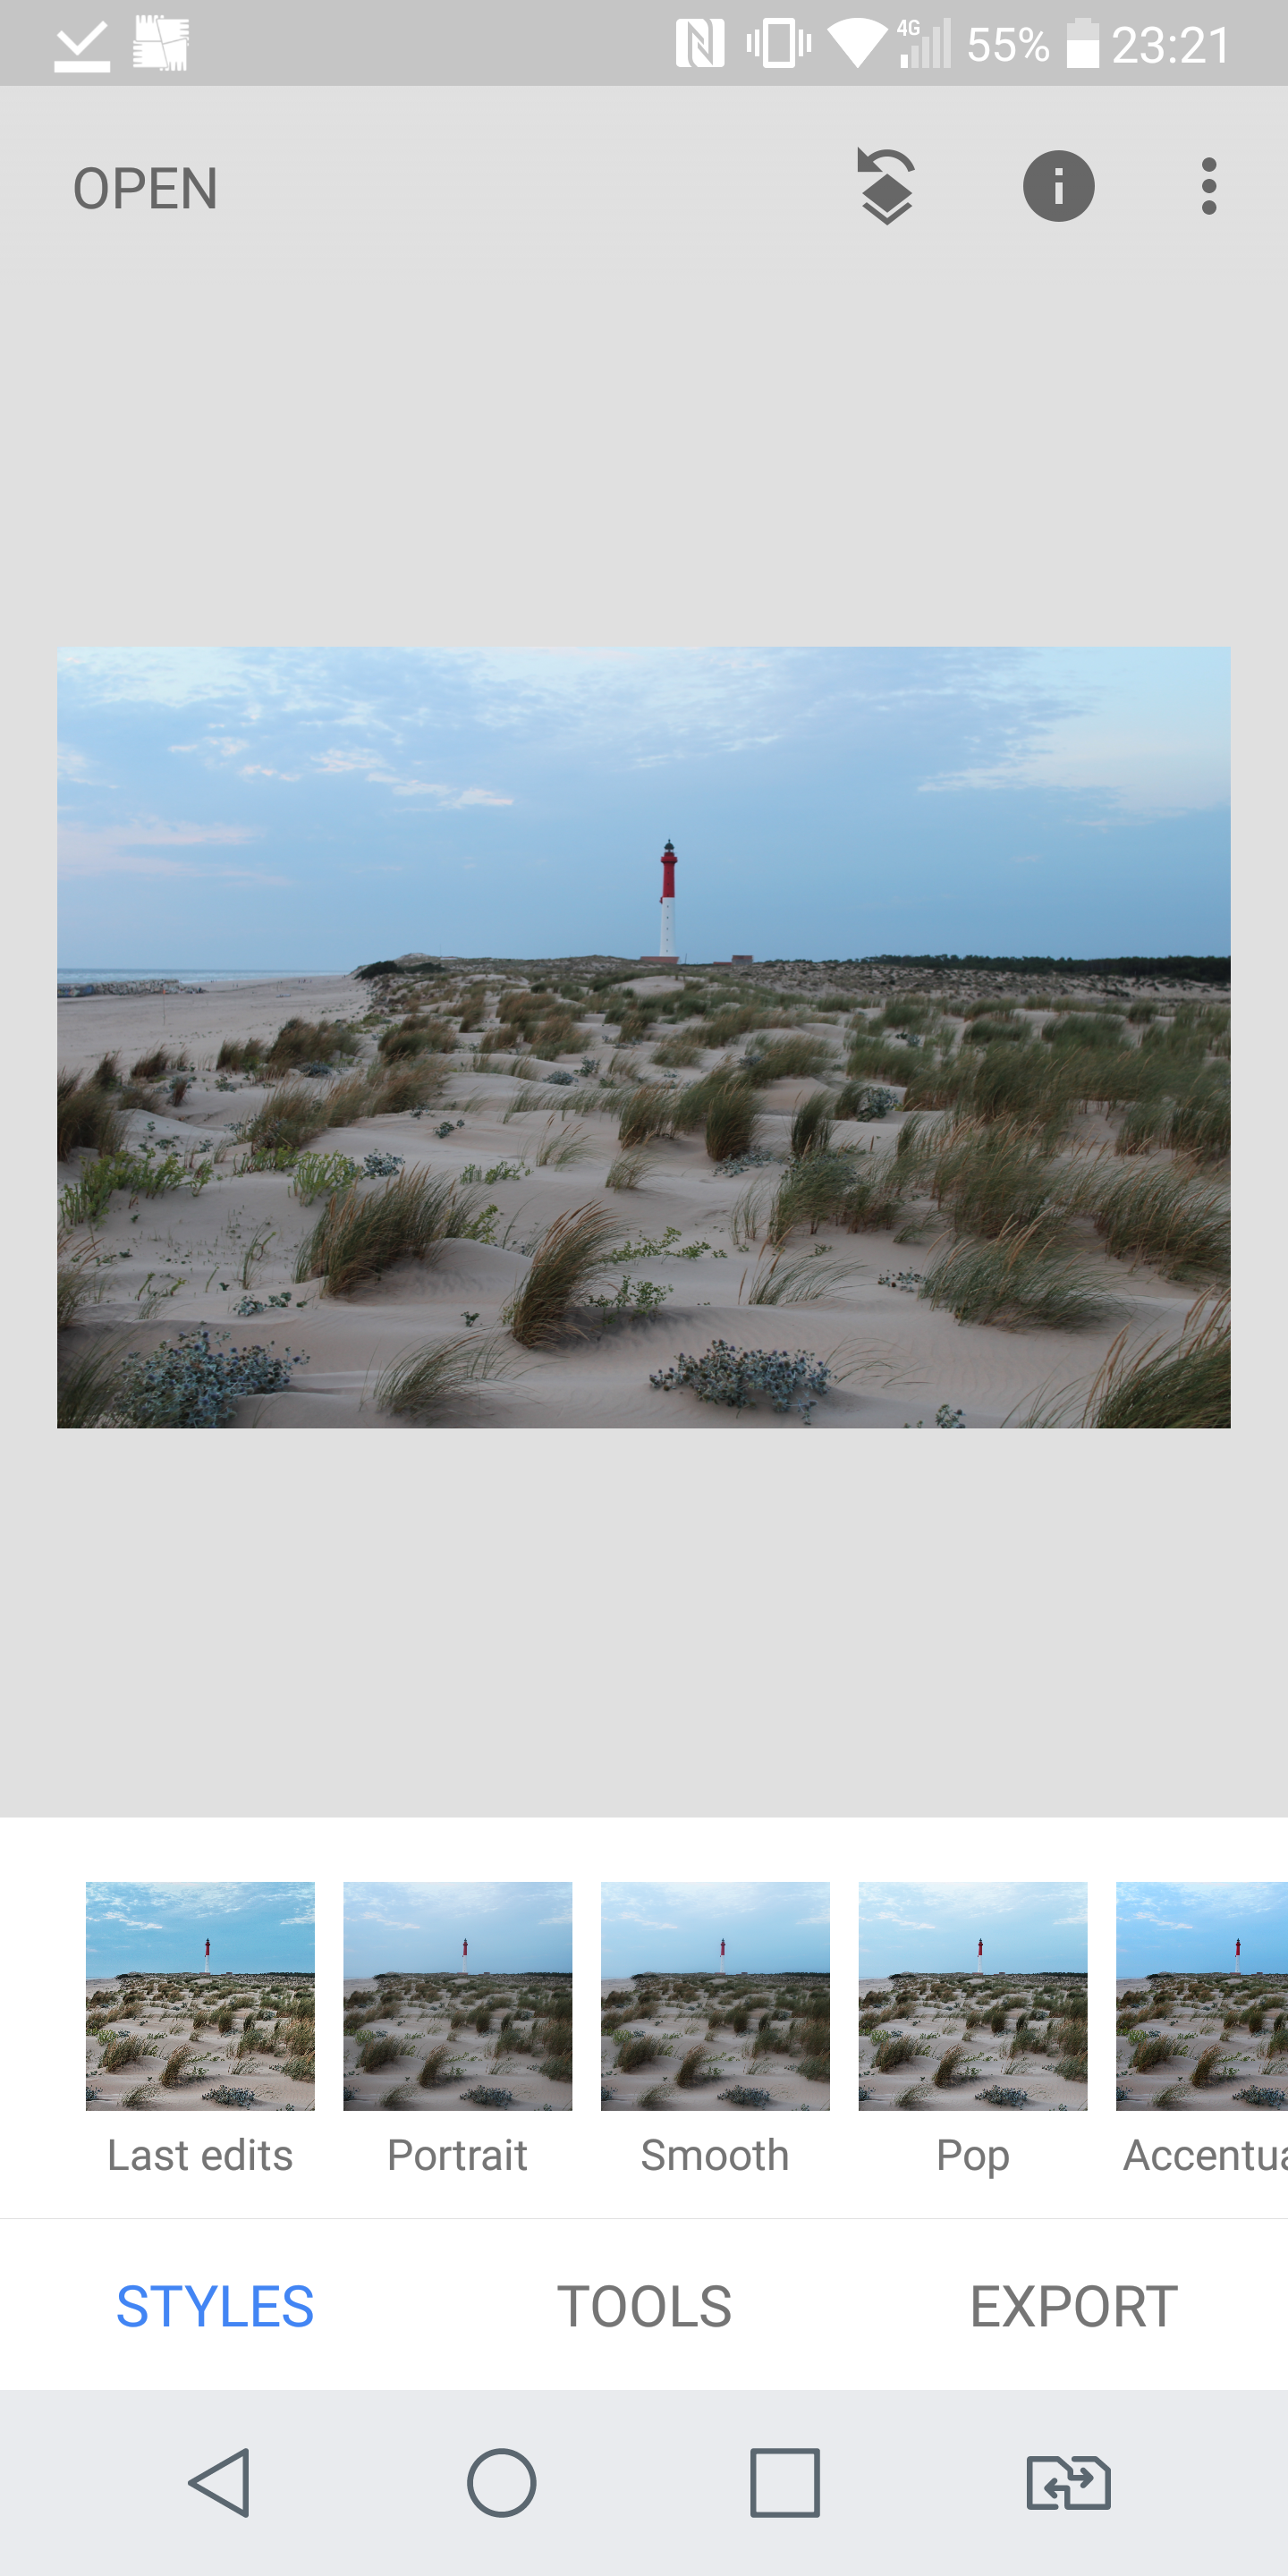
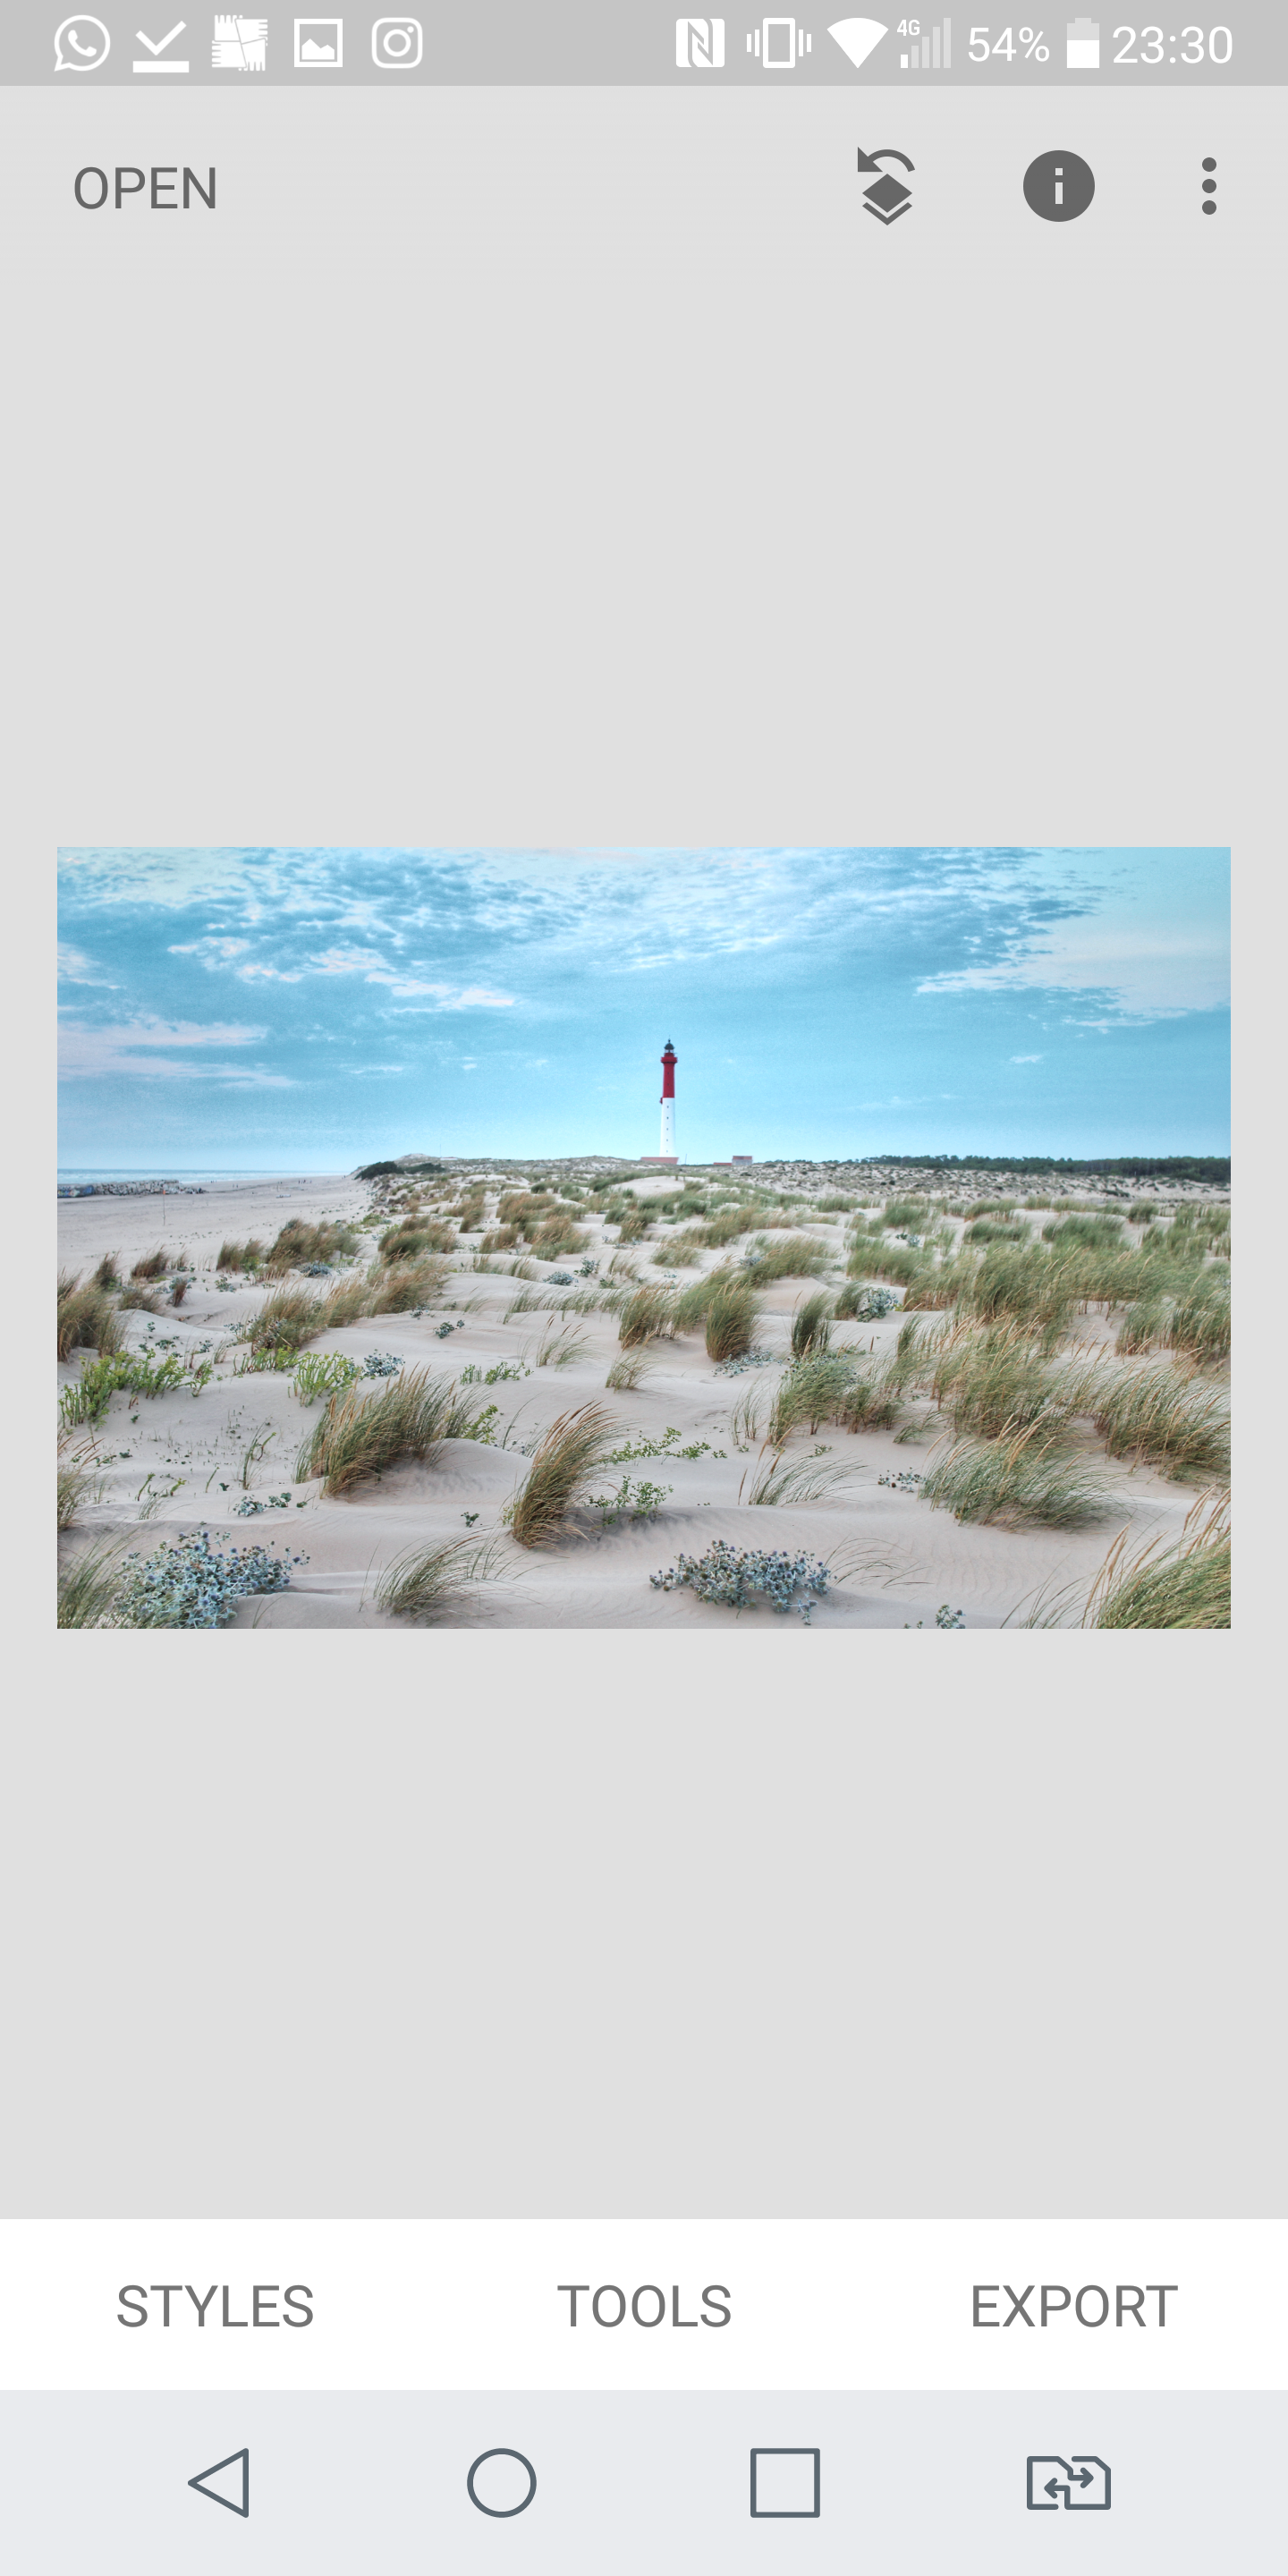
In this blog I will give you a step to step guide on how to edit using both Snapseed and Lightroom, showing you pictures along the way so you can follow the improvements and also comparing the two apps. Below is the BEFORE picture of the photo I will be editing.
LIGHTROOM
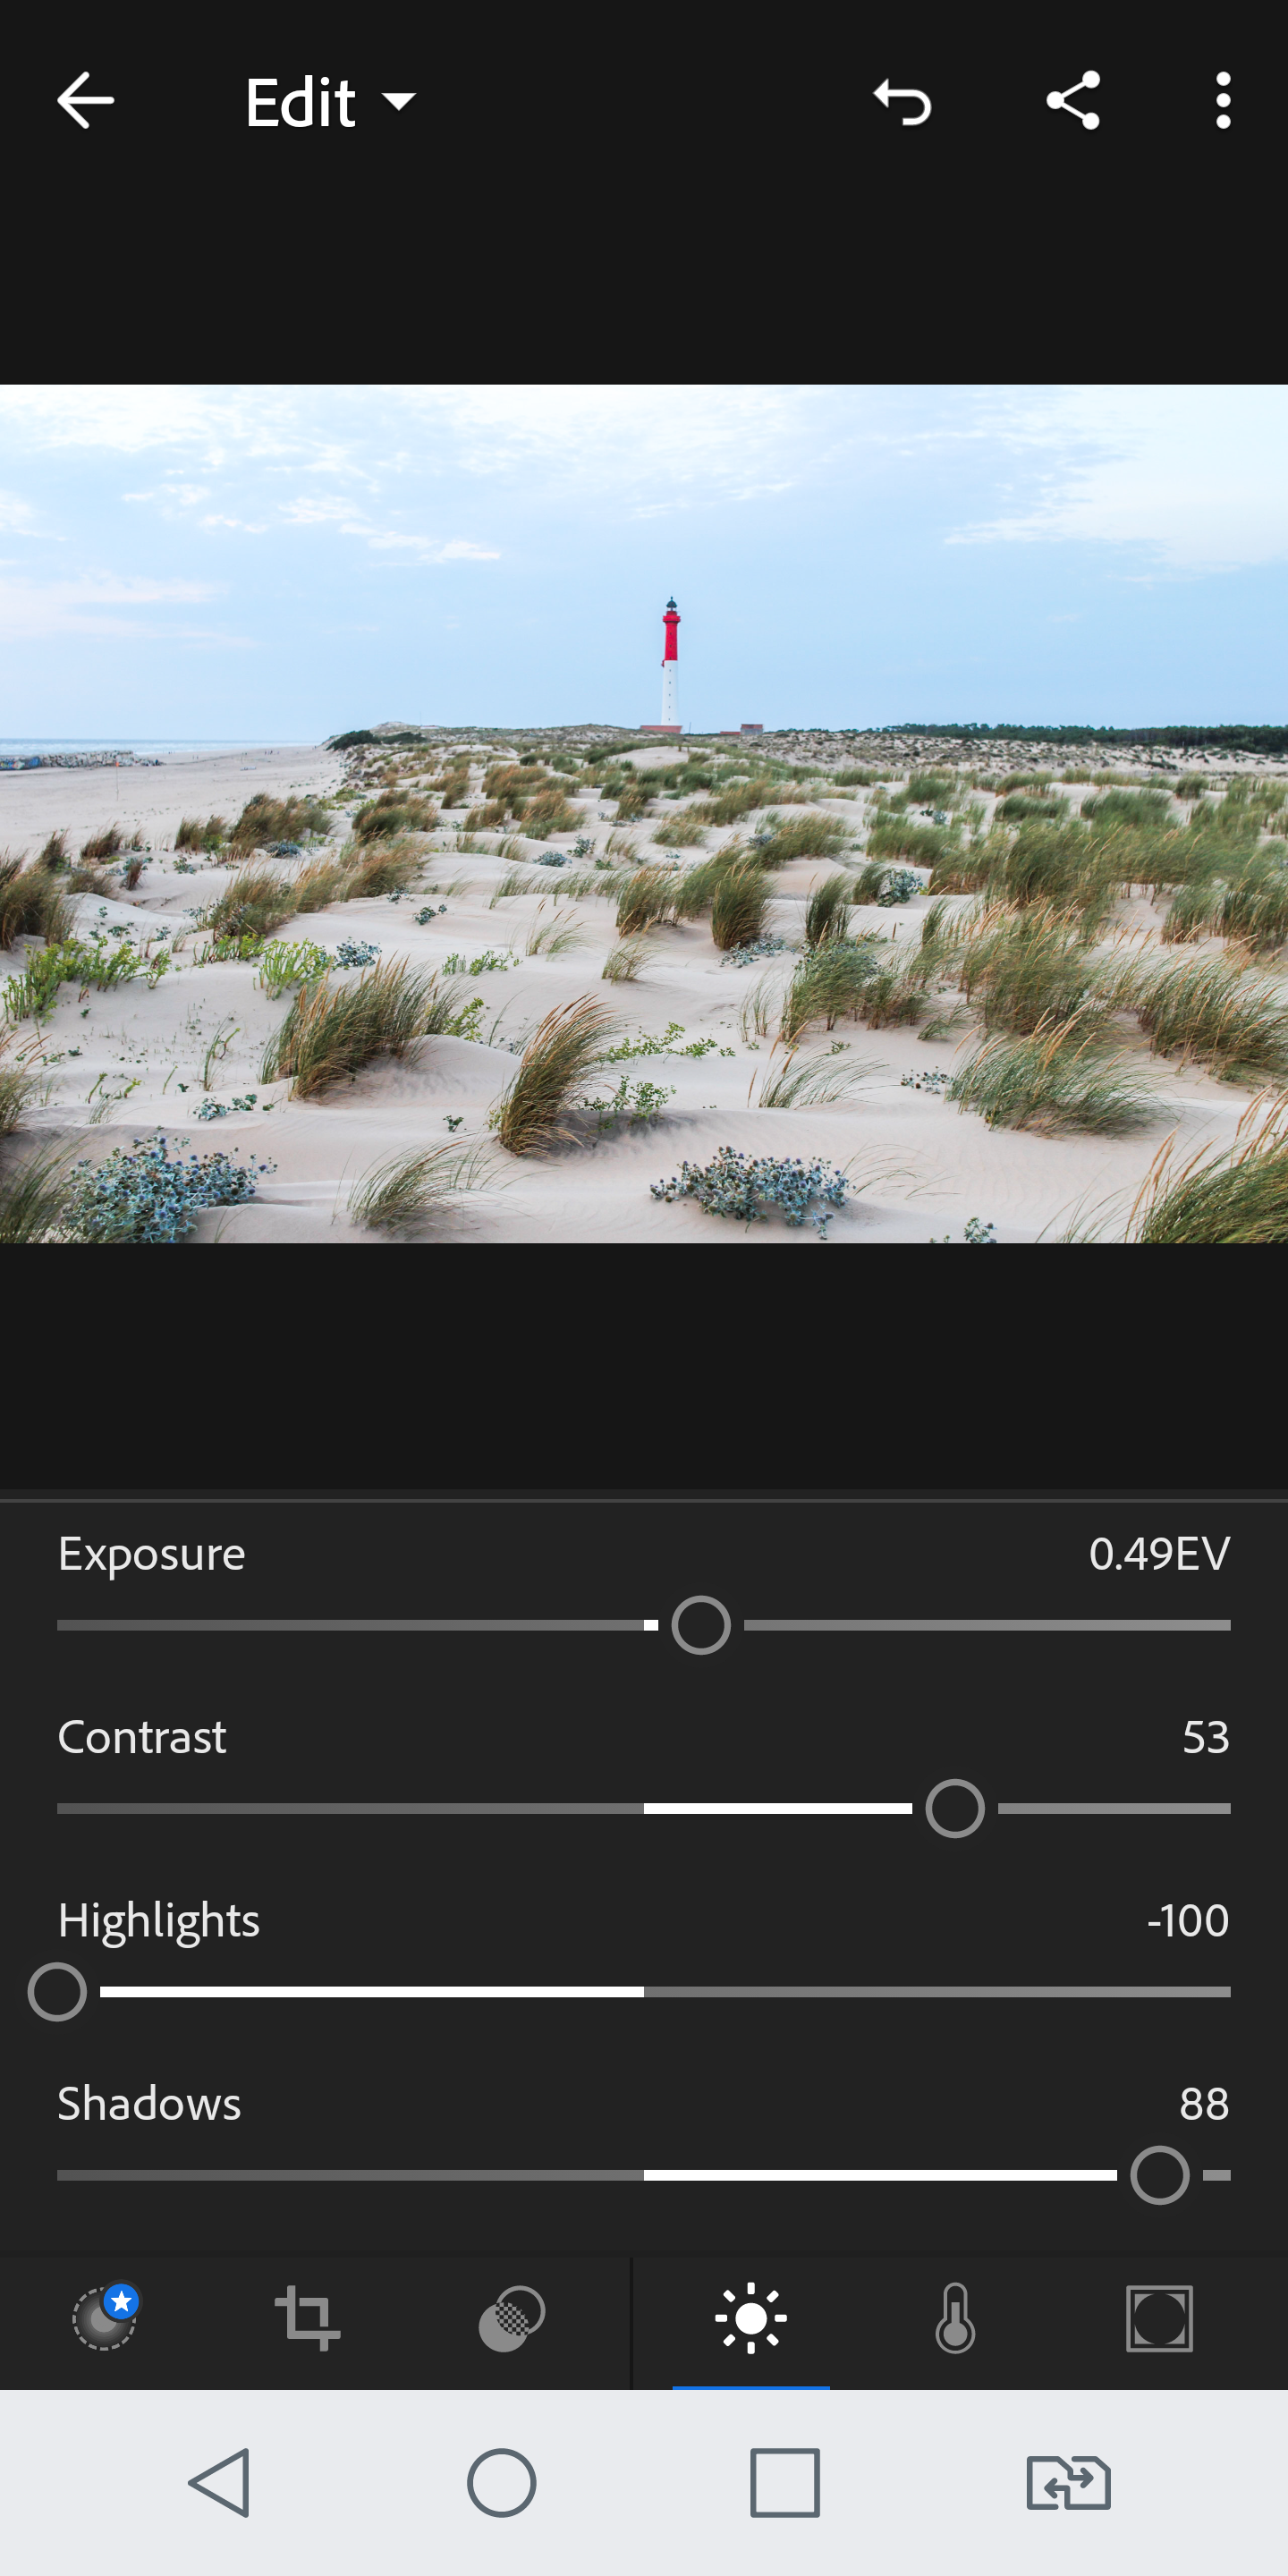
1) Open up your image in Lightroom and you want to click on the “light” section (with the sun image).
The first thing I do when editing is improve the lighting, generally this means increasing the exposure by up to 1 (but for images that are too bright you will want to decrease the exposure), increasing the contrast between 30 and 60, decreasing the highlights (this makes the colours of the background stand out more) and increasing the shadow (brightens up the foreground). Already you’ll be able to see that the photo is looking much better than the original.
What I like about Lightroom is that you can also edit the whites and blacks to further change the brightness of the image. Generally I always increase the whites and then the blacks I decrease for portraits and sharper landscape photos (makes the colours pop) and I increase for softer landscape photos.

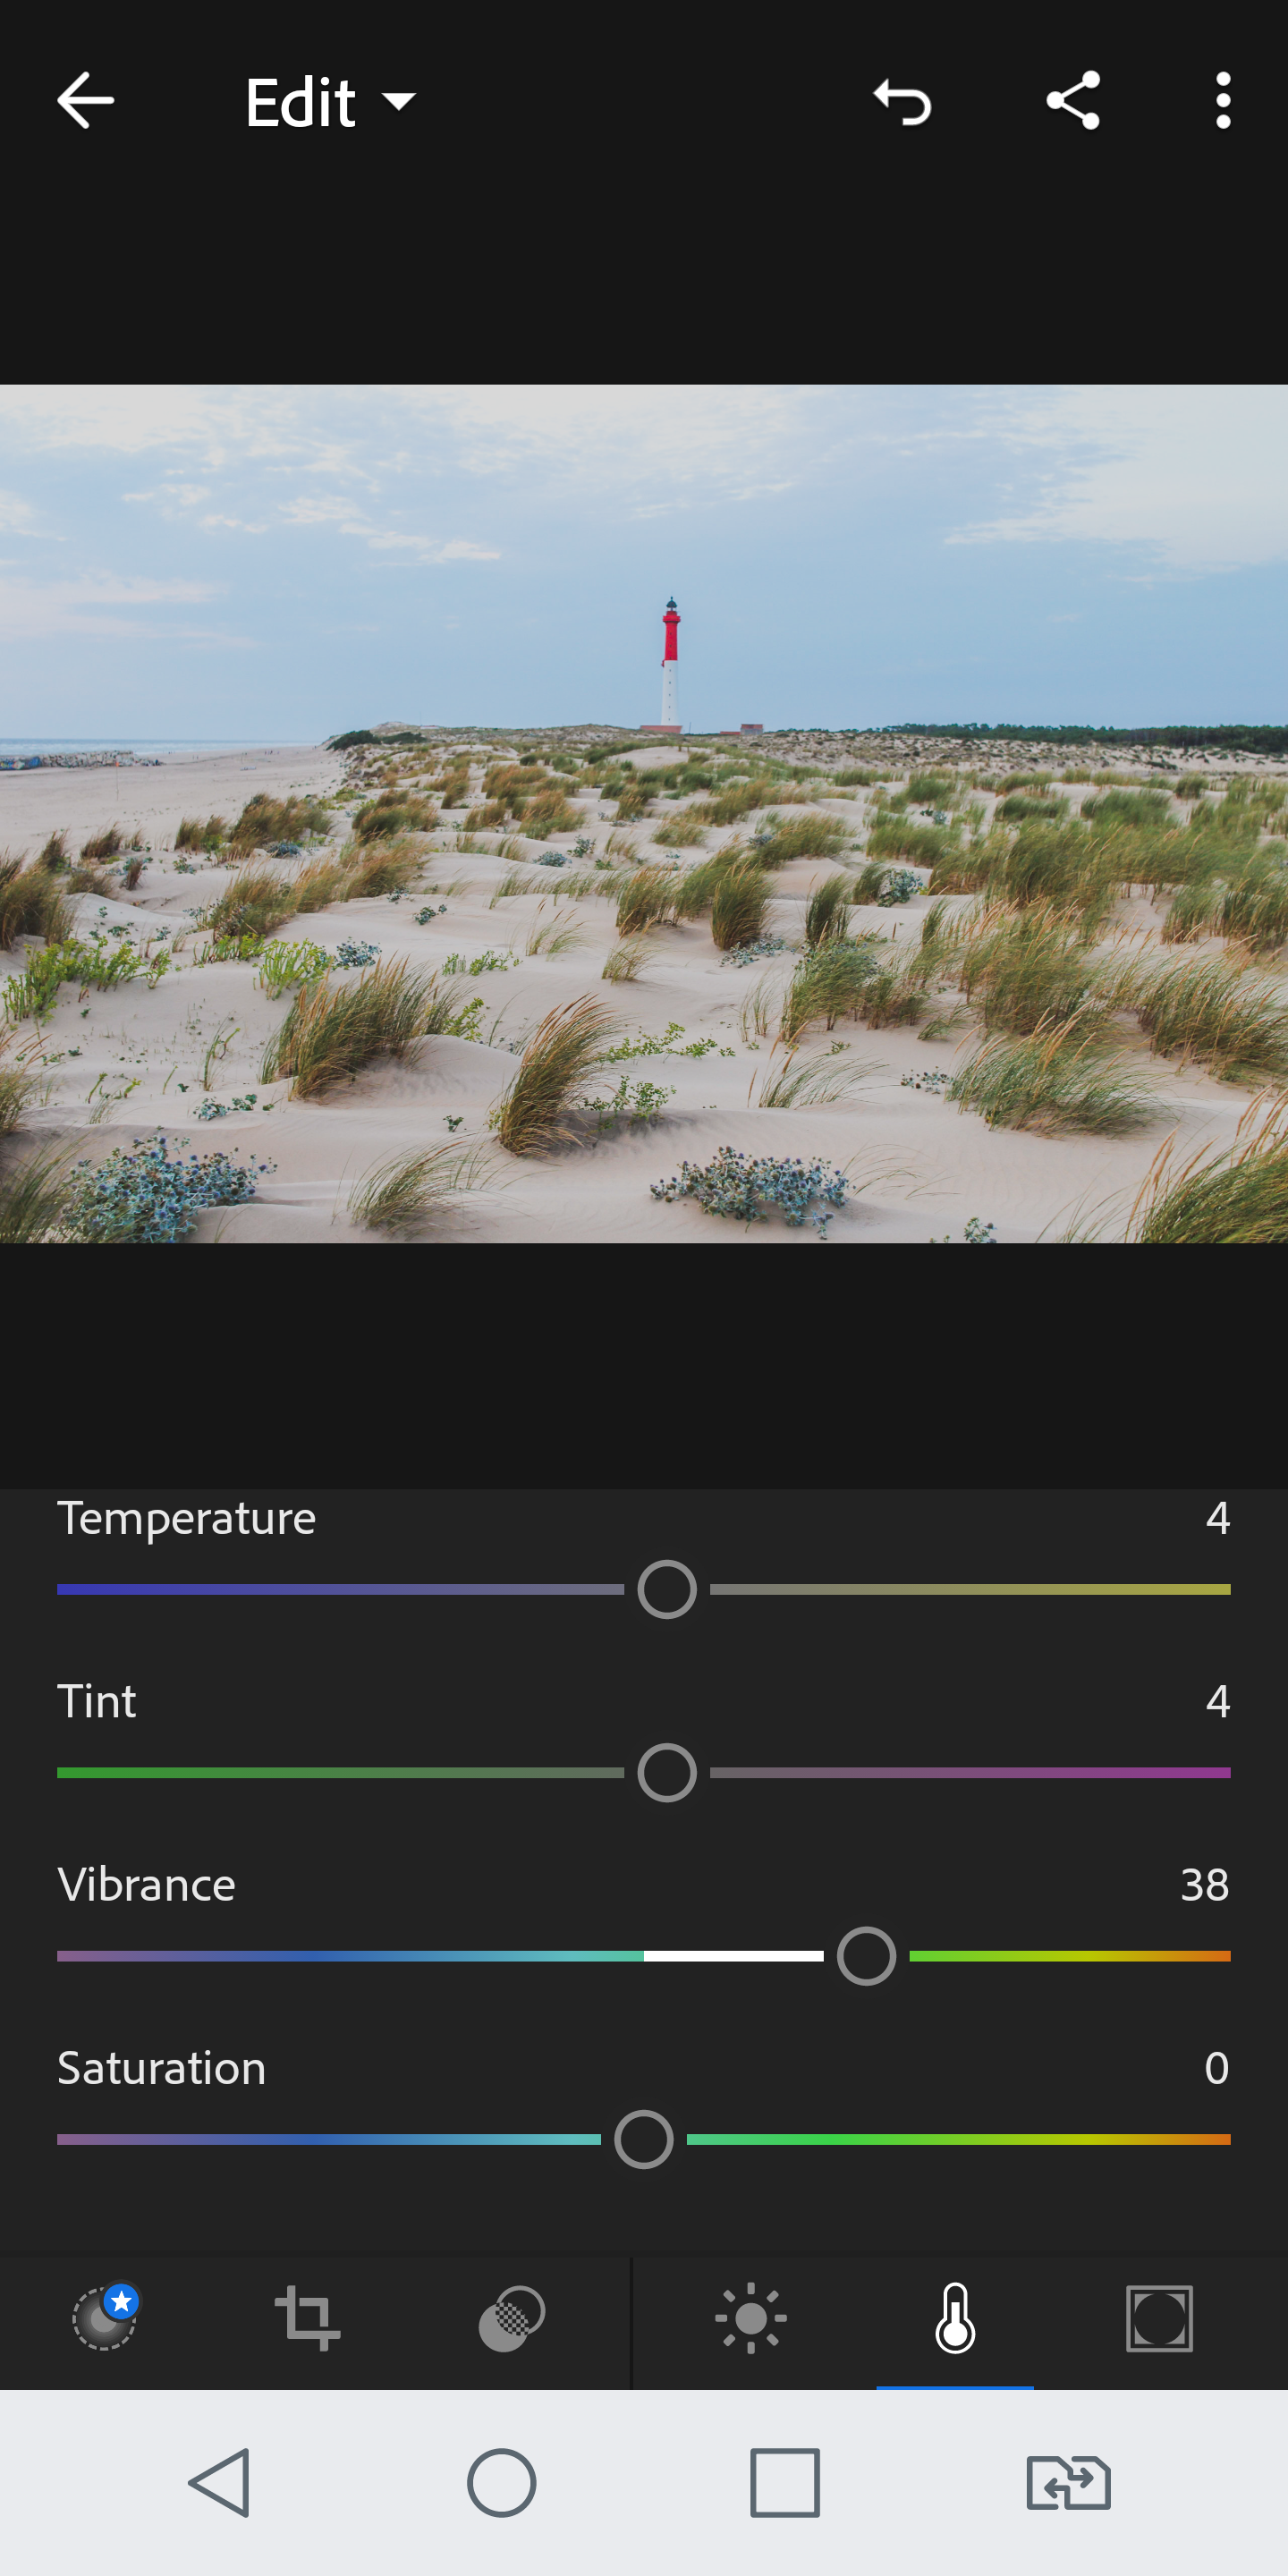
2) Next step is to edit the colours so you’ll need to click on the “color” section (with the thermometer image). The temperature will change the warmth of the image, so you can either decrease it to add cold blue hues or increase it to add warm orange hues. As my image is already a bit cold I increased the temperature by 4. The “tint” can add green or purple hues to your image, slide it around and see if either work for your image. Finally I ALWAYS increase the vibrancy to around 20 to 50 and I never touch the saturation (in my opinion it gives makes the photo look fake).
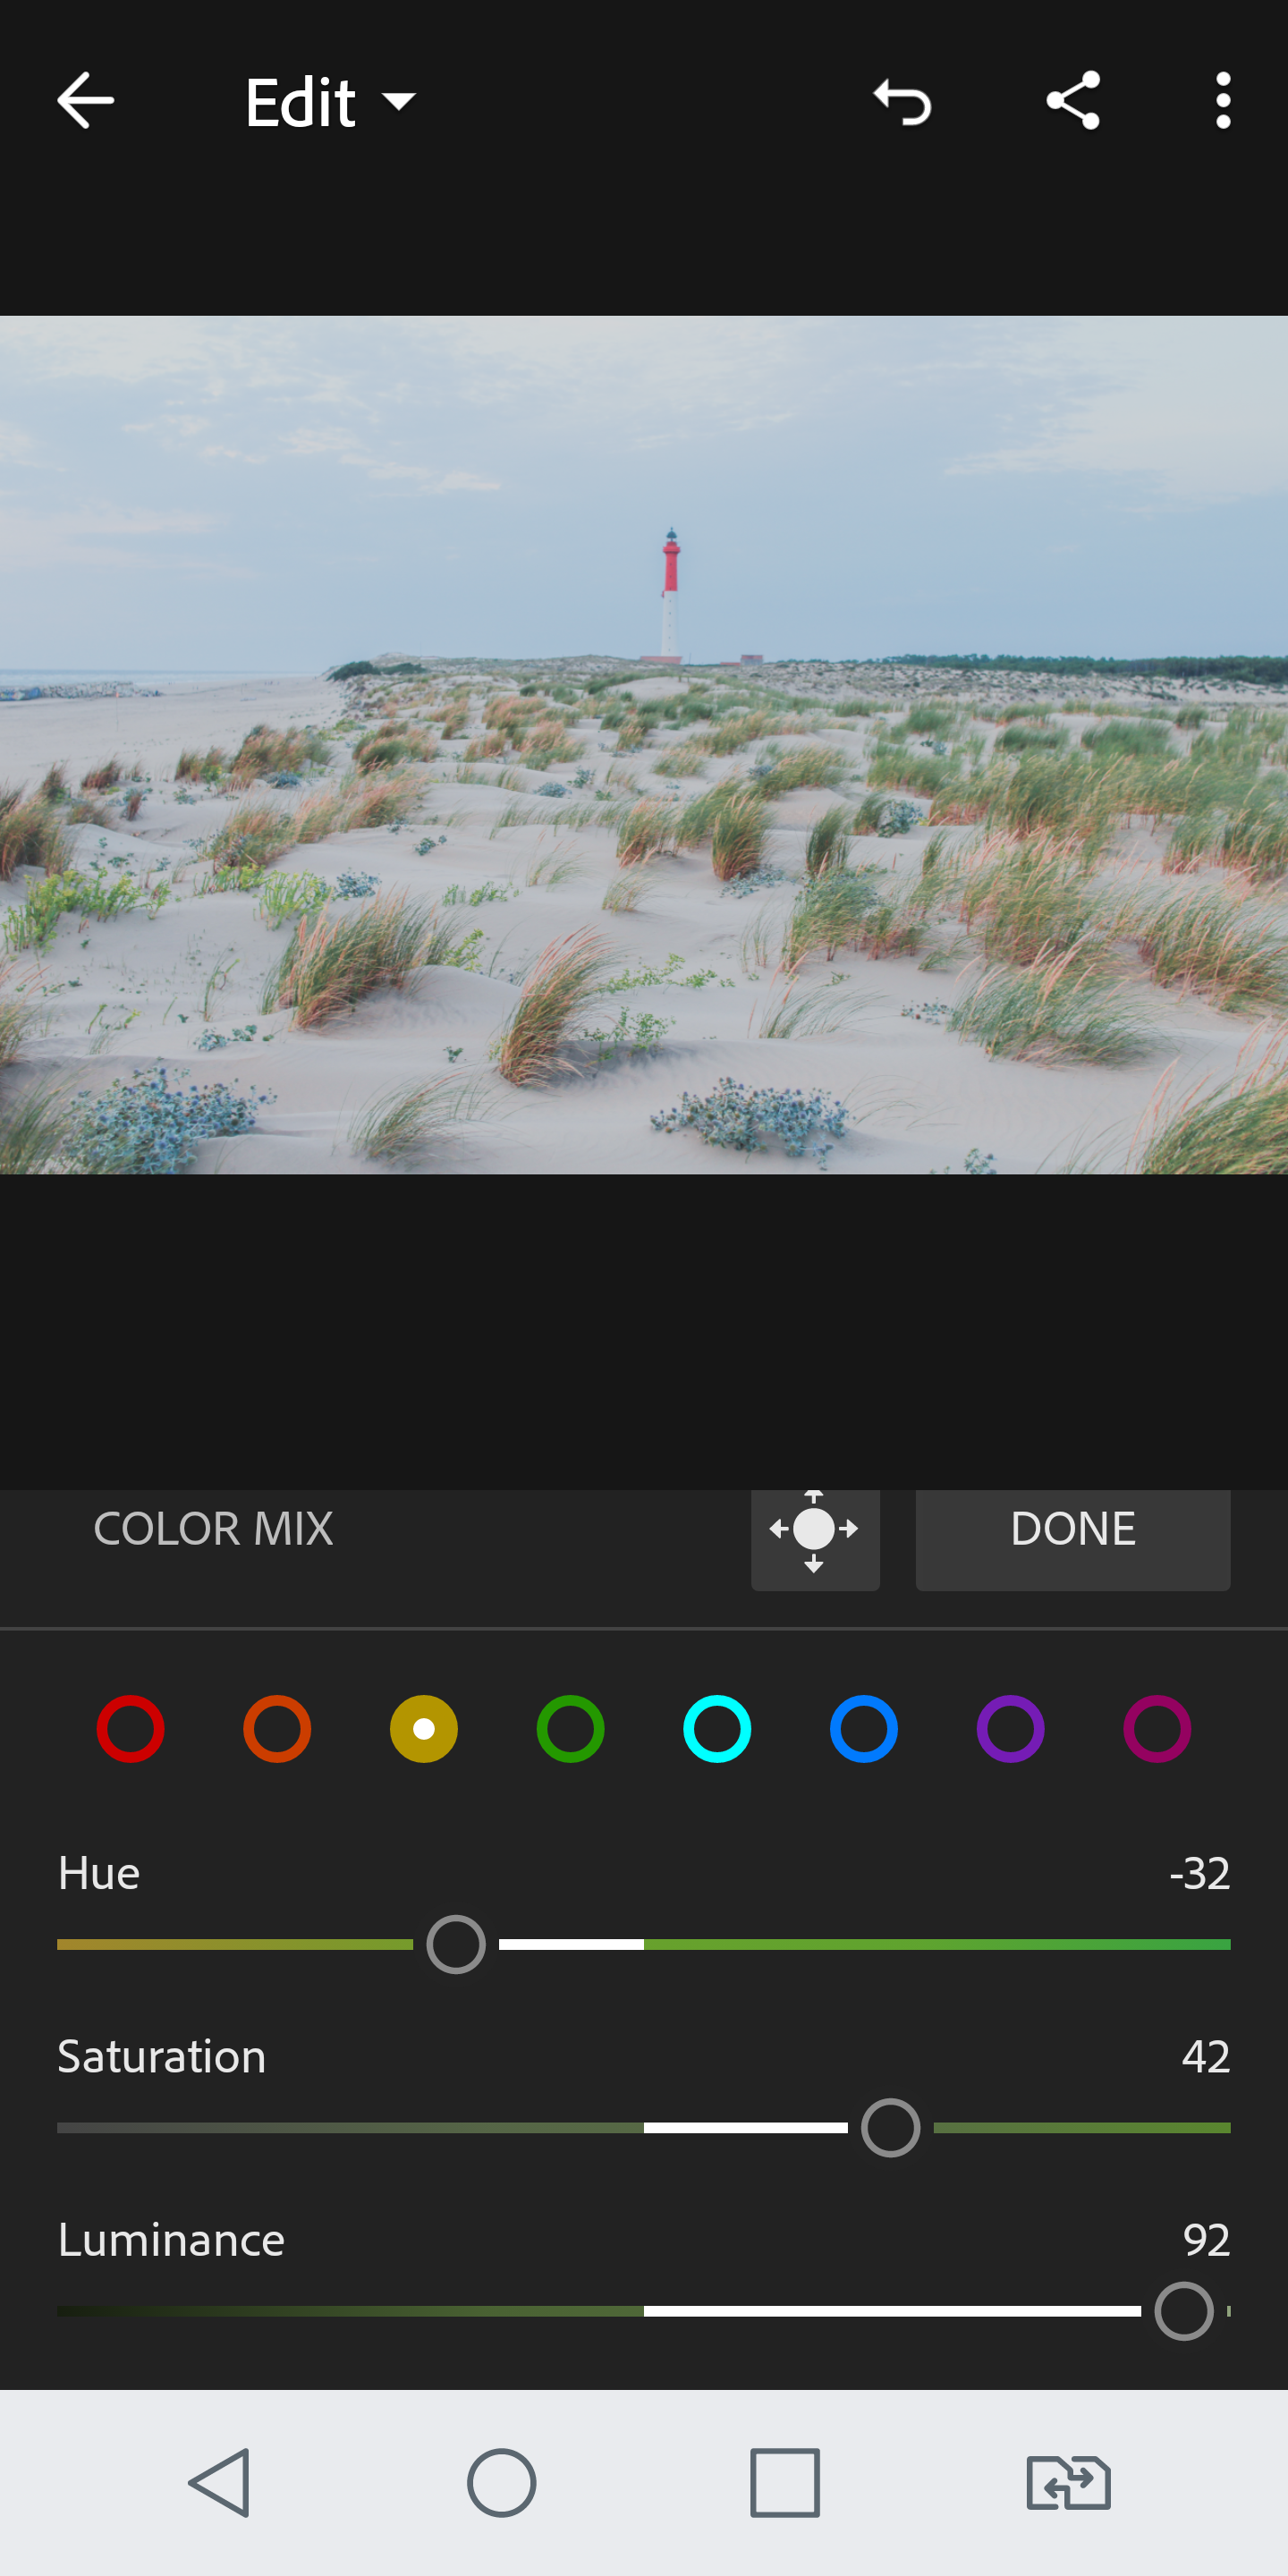
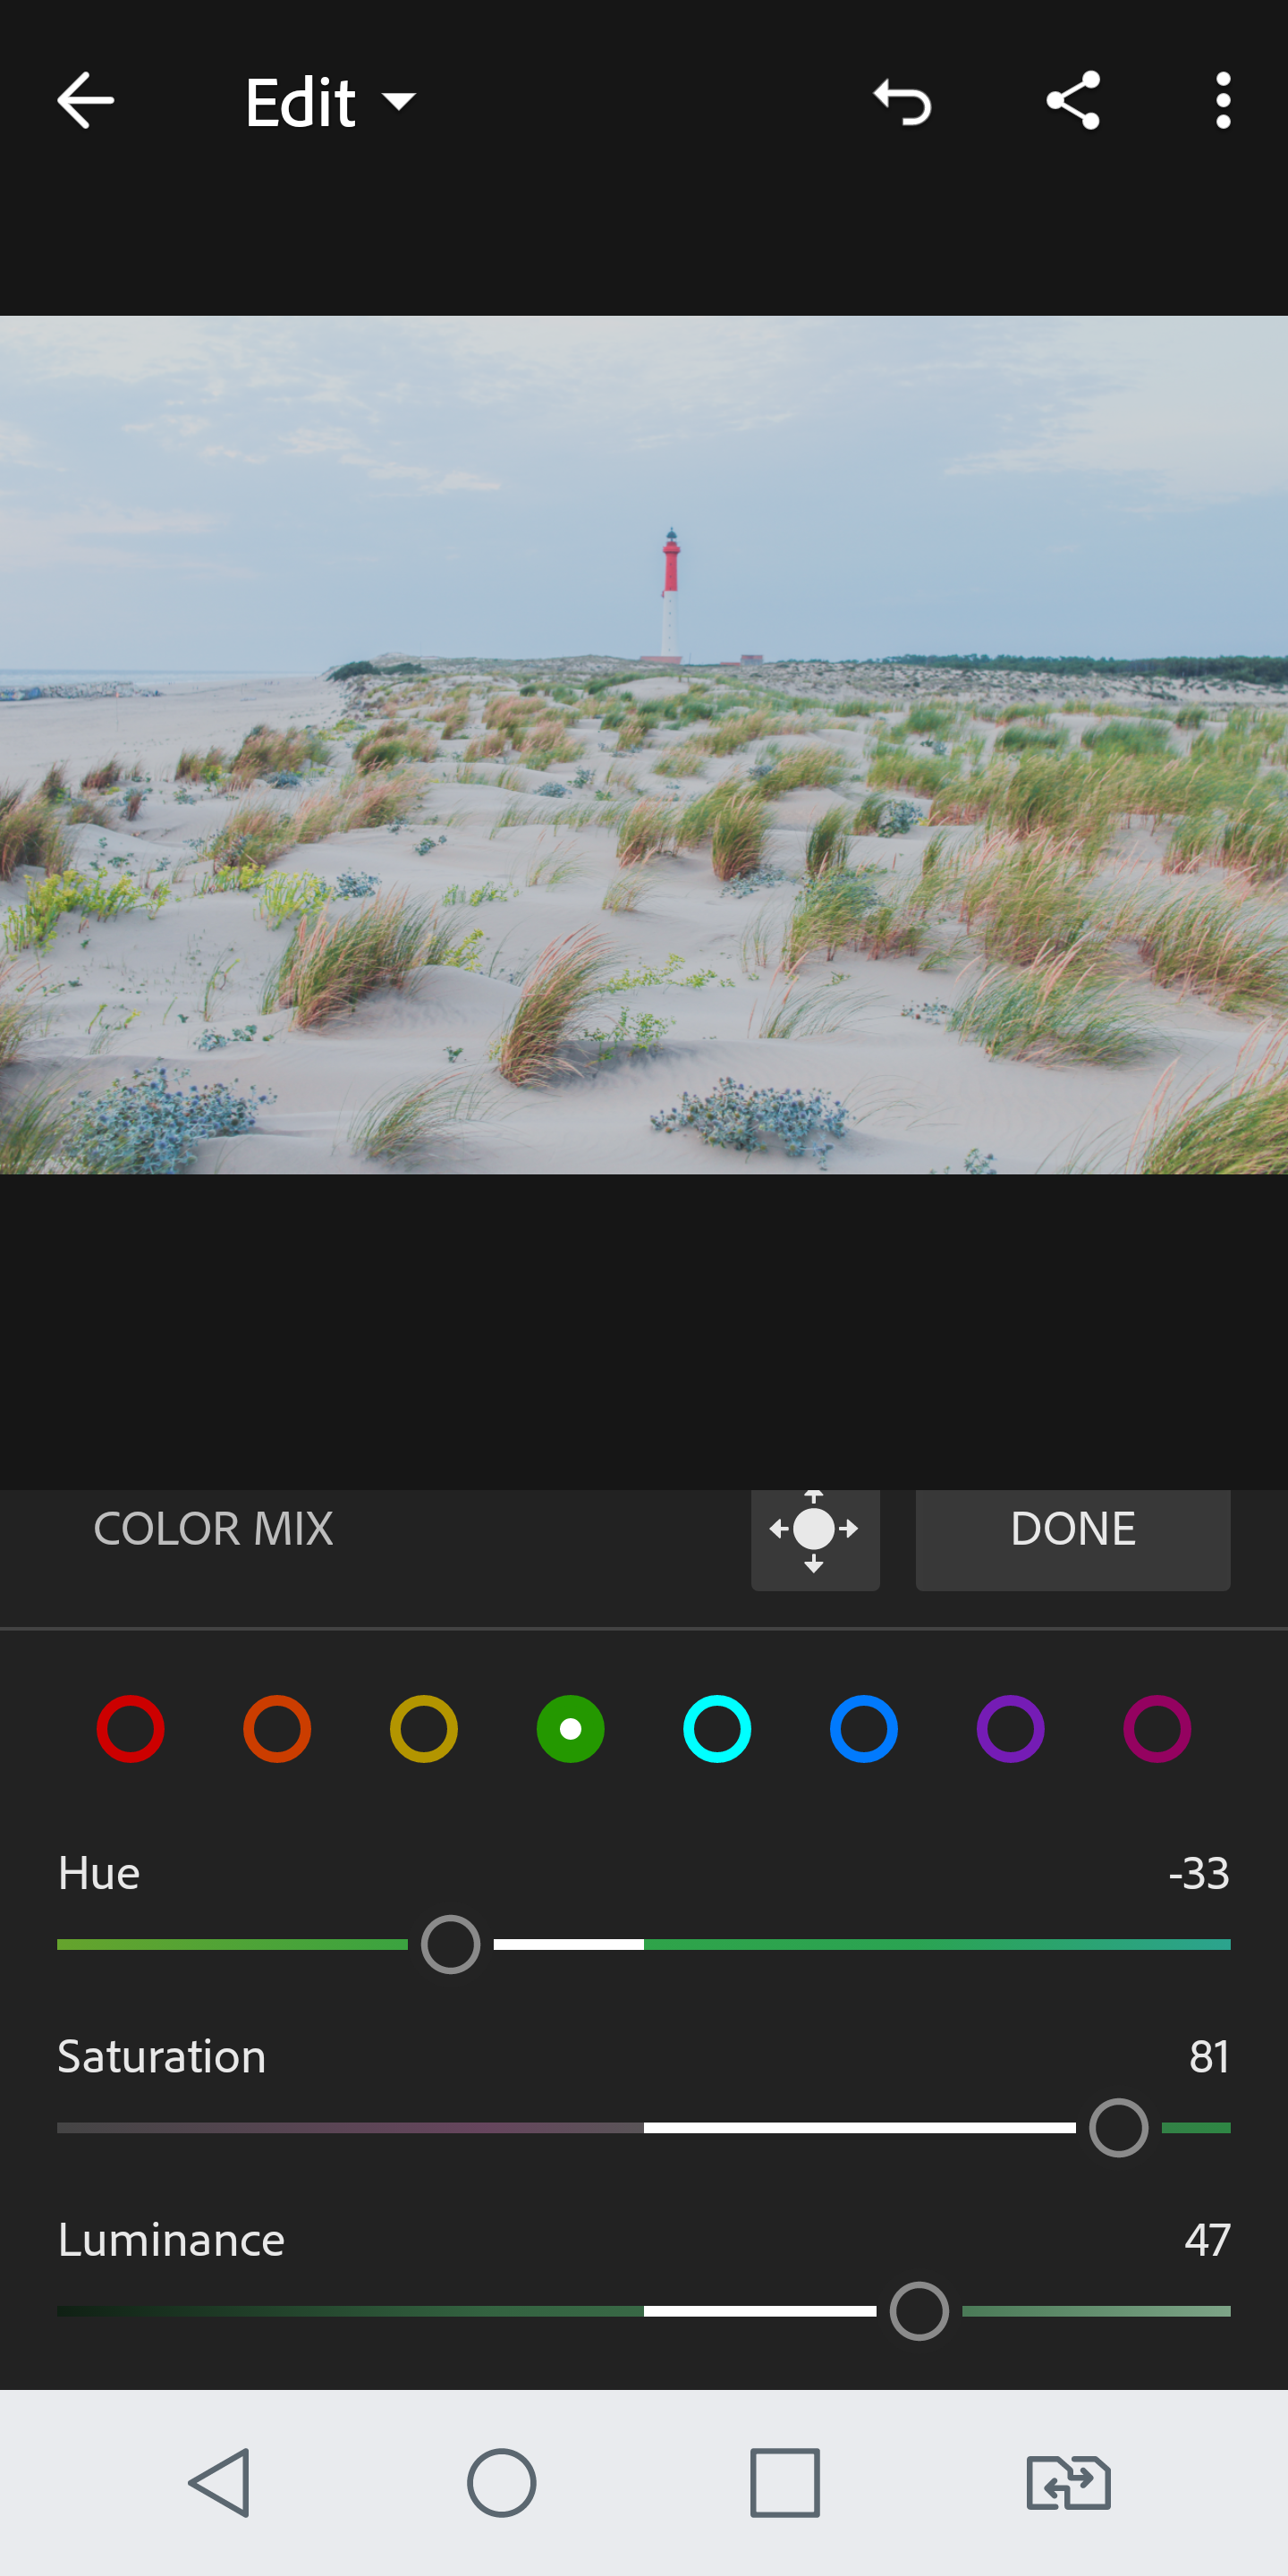
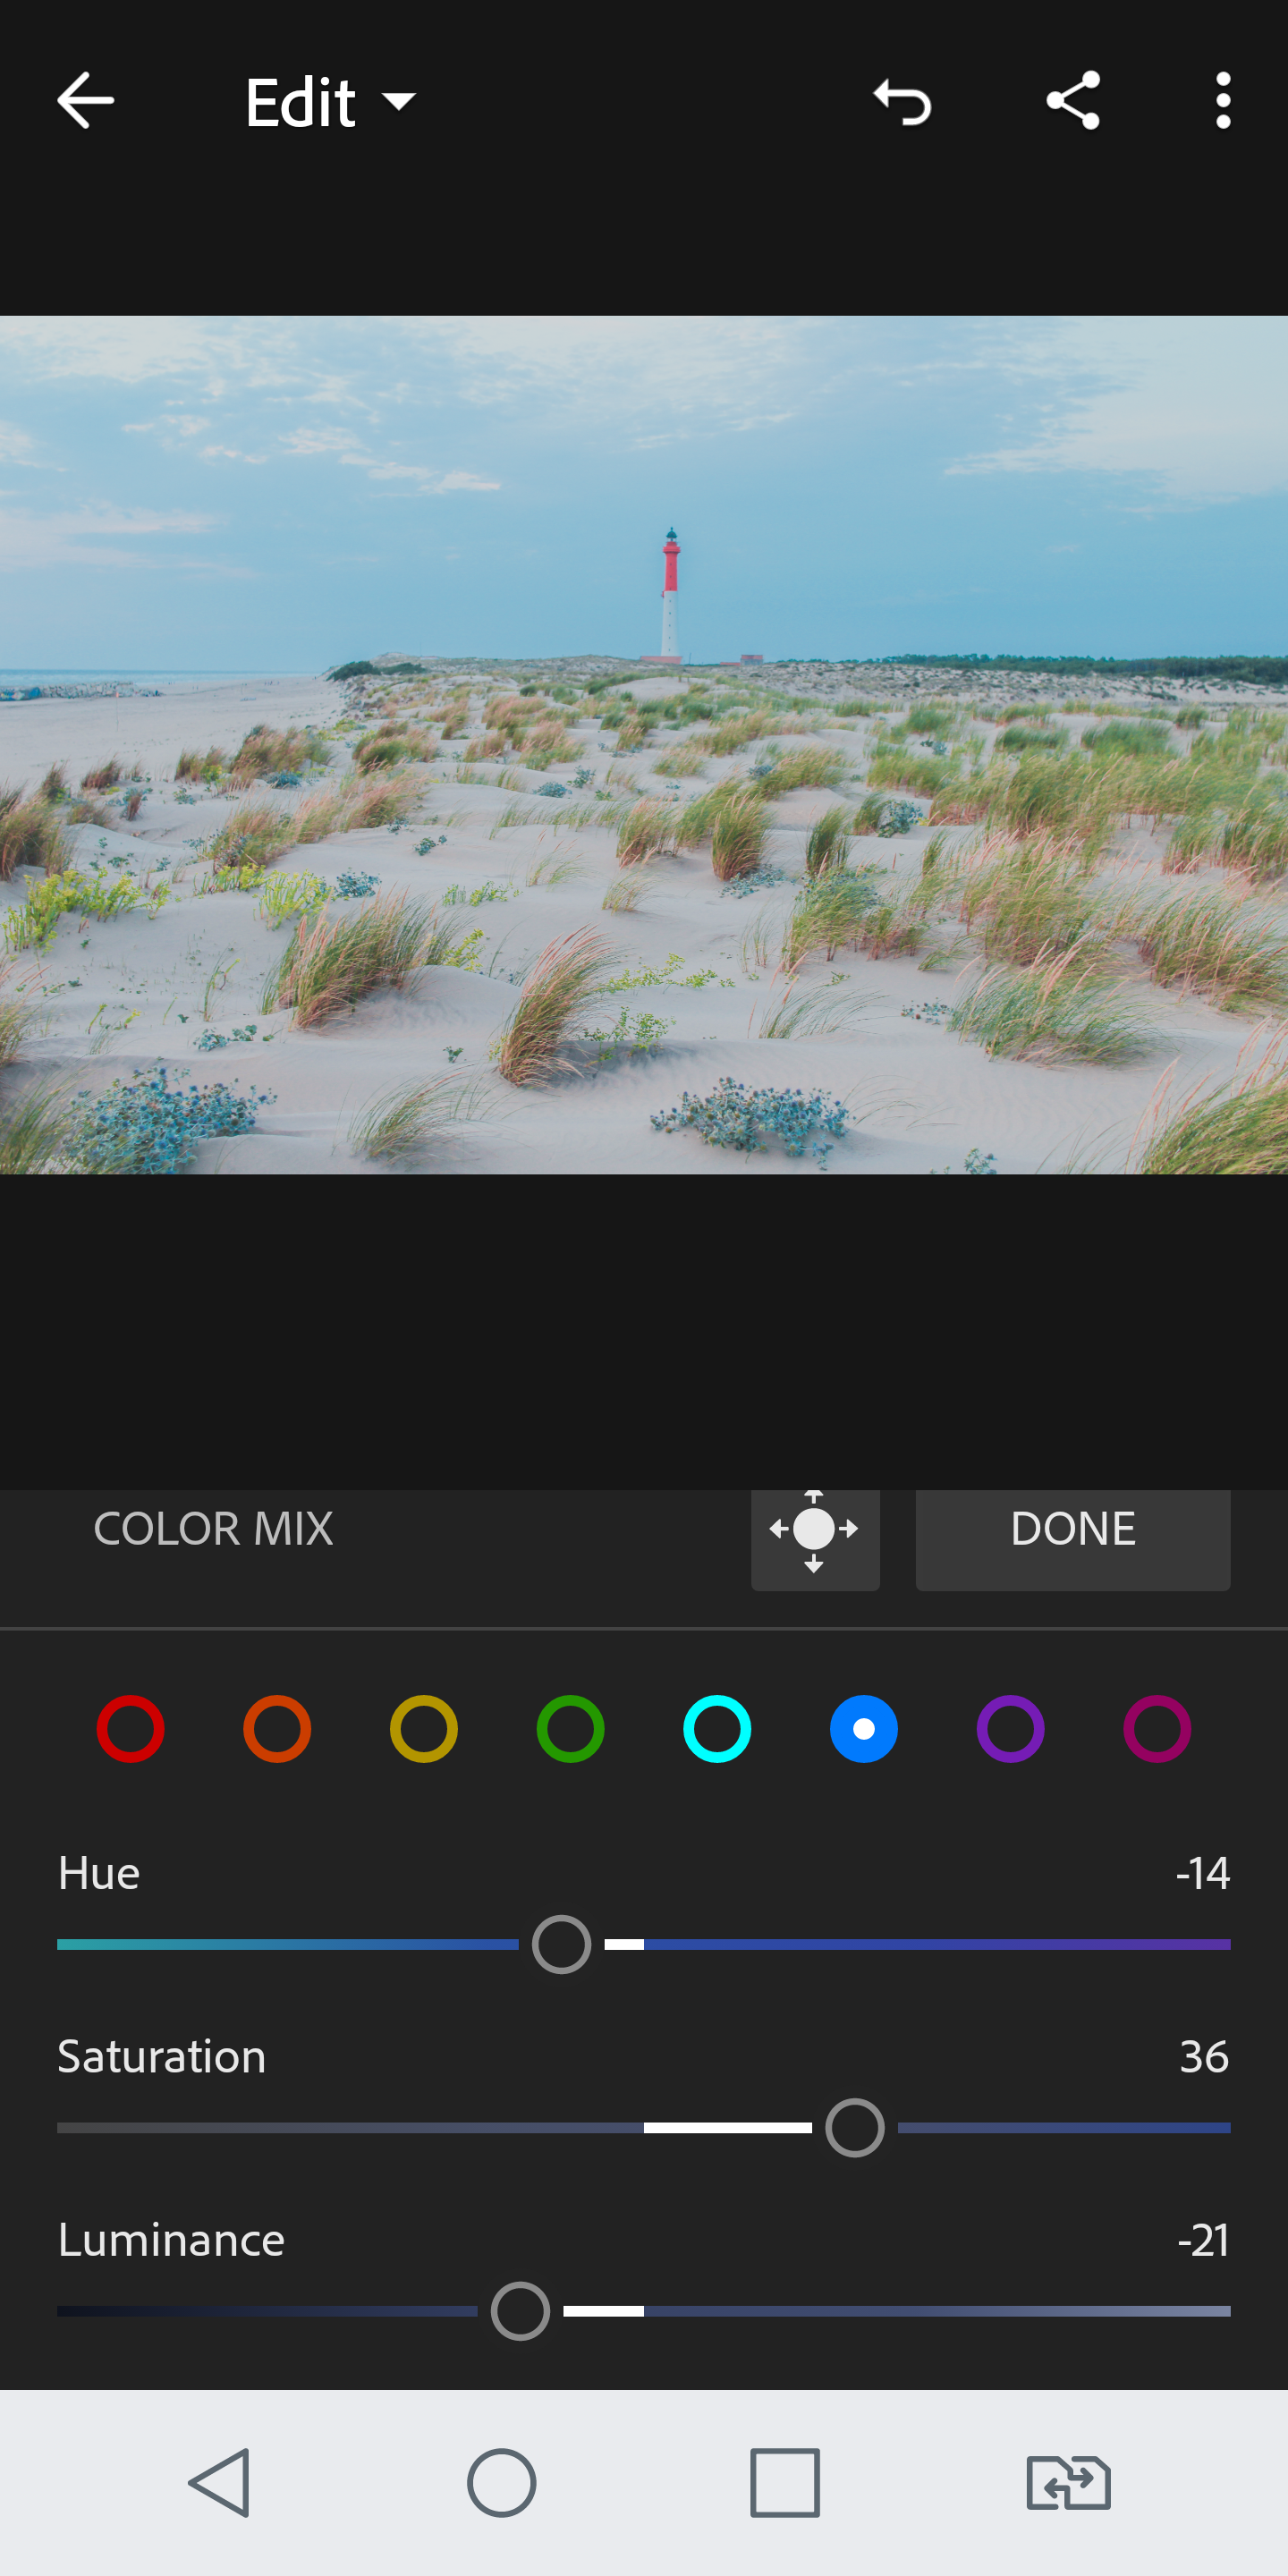
3) Staying in the “color” section you want to click on the “mix” button (at the top). Here you can edit the individual colours within your photo (something you can’t do in Snapseed). This is great for making certain colours pop, for example if you want to make the sand whiter or the sky more blue like I want to do for my image!
For each colour you can edit the hue (the shade – so if you’re on yellow you can decrease the hue to make it more orange or increase to make it more green), the saturation (the intensity of the colour – here it’s ok to change the saturation!) and the luminance (the brightness of the colour).
When editing your photo make sure you think about the colours in your picture and how you want them to look, if you’re not sure try playing around with the hue, saturation and luminence and seeing what looks best to you. The colours in my photo are orange, yellow, green and blue and as I said before I want the sand to look whiter and the sky to look more blue.

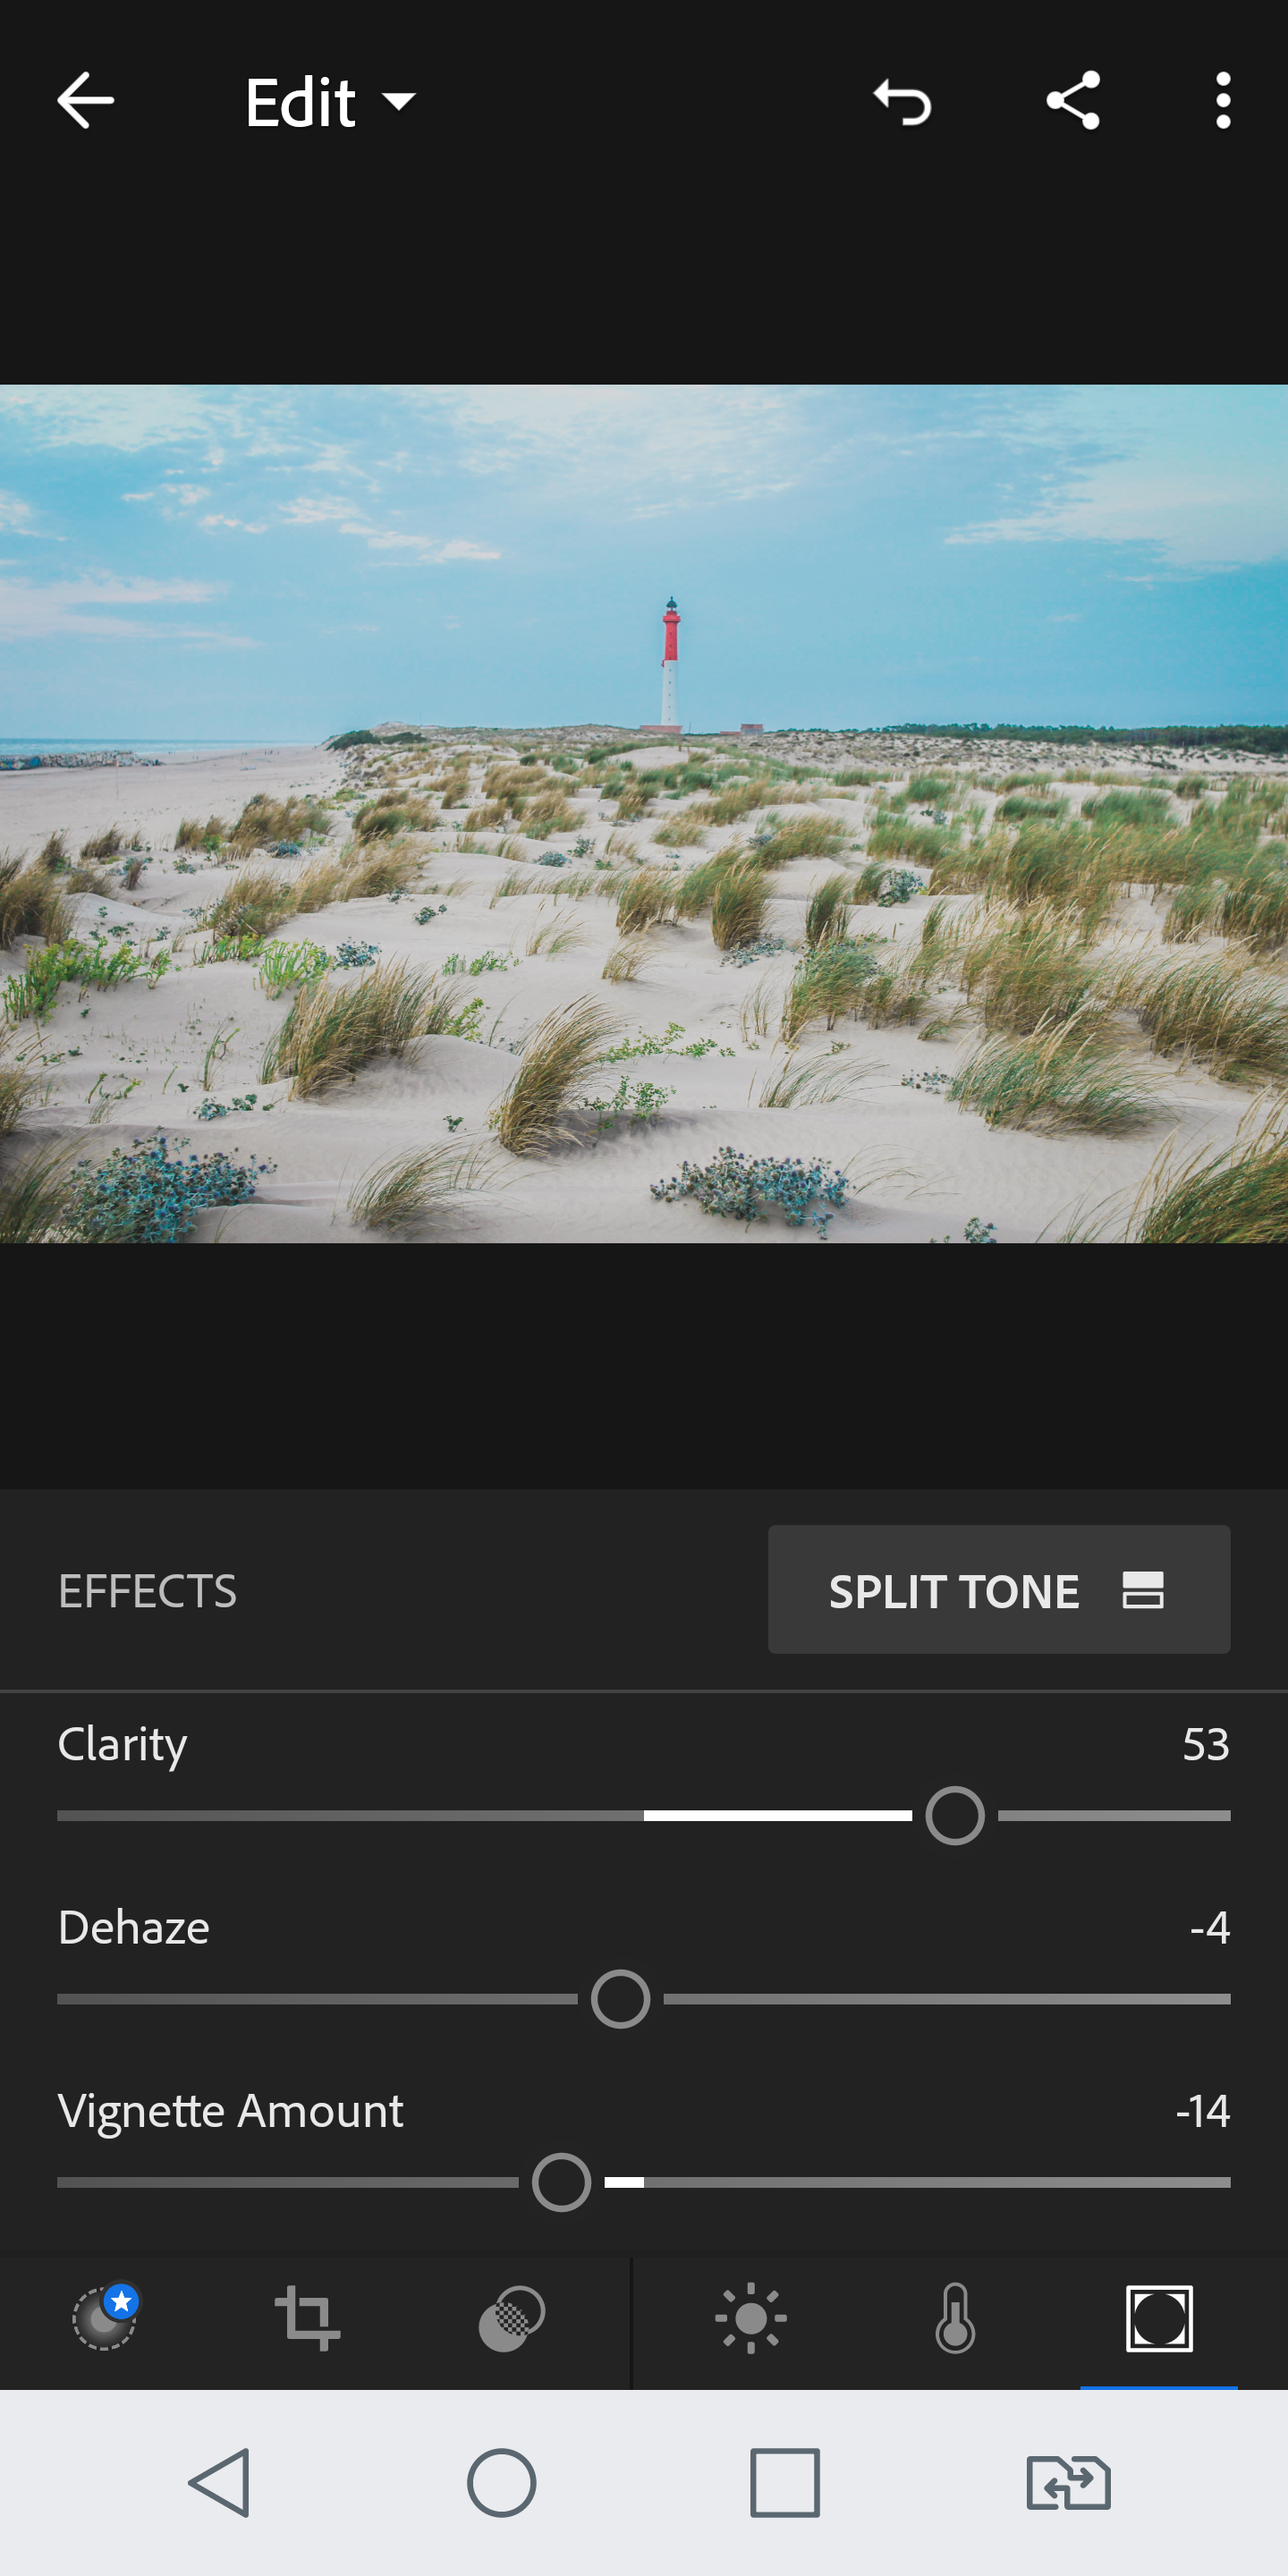
4) Finally you can head into the “effects” section where you can edit the clarity (usually I increase this between 30 and 60) this tool is similar to the HDR edit on the Snapseed app, the haze (make the image clearer or add a haze filter) and the vignette (a black or white border around the photo – I usually decrease the vignette to add a slight black border).
5) Now click on the 3 dots in the top right hand corner of the app to export your image!
If at any point you wish to see what your image looked like “before” you can just hold your finger down on the image you are editing.
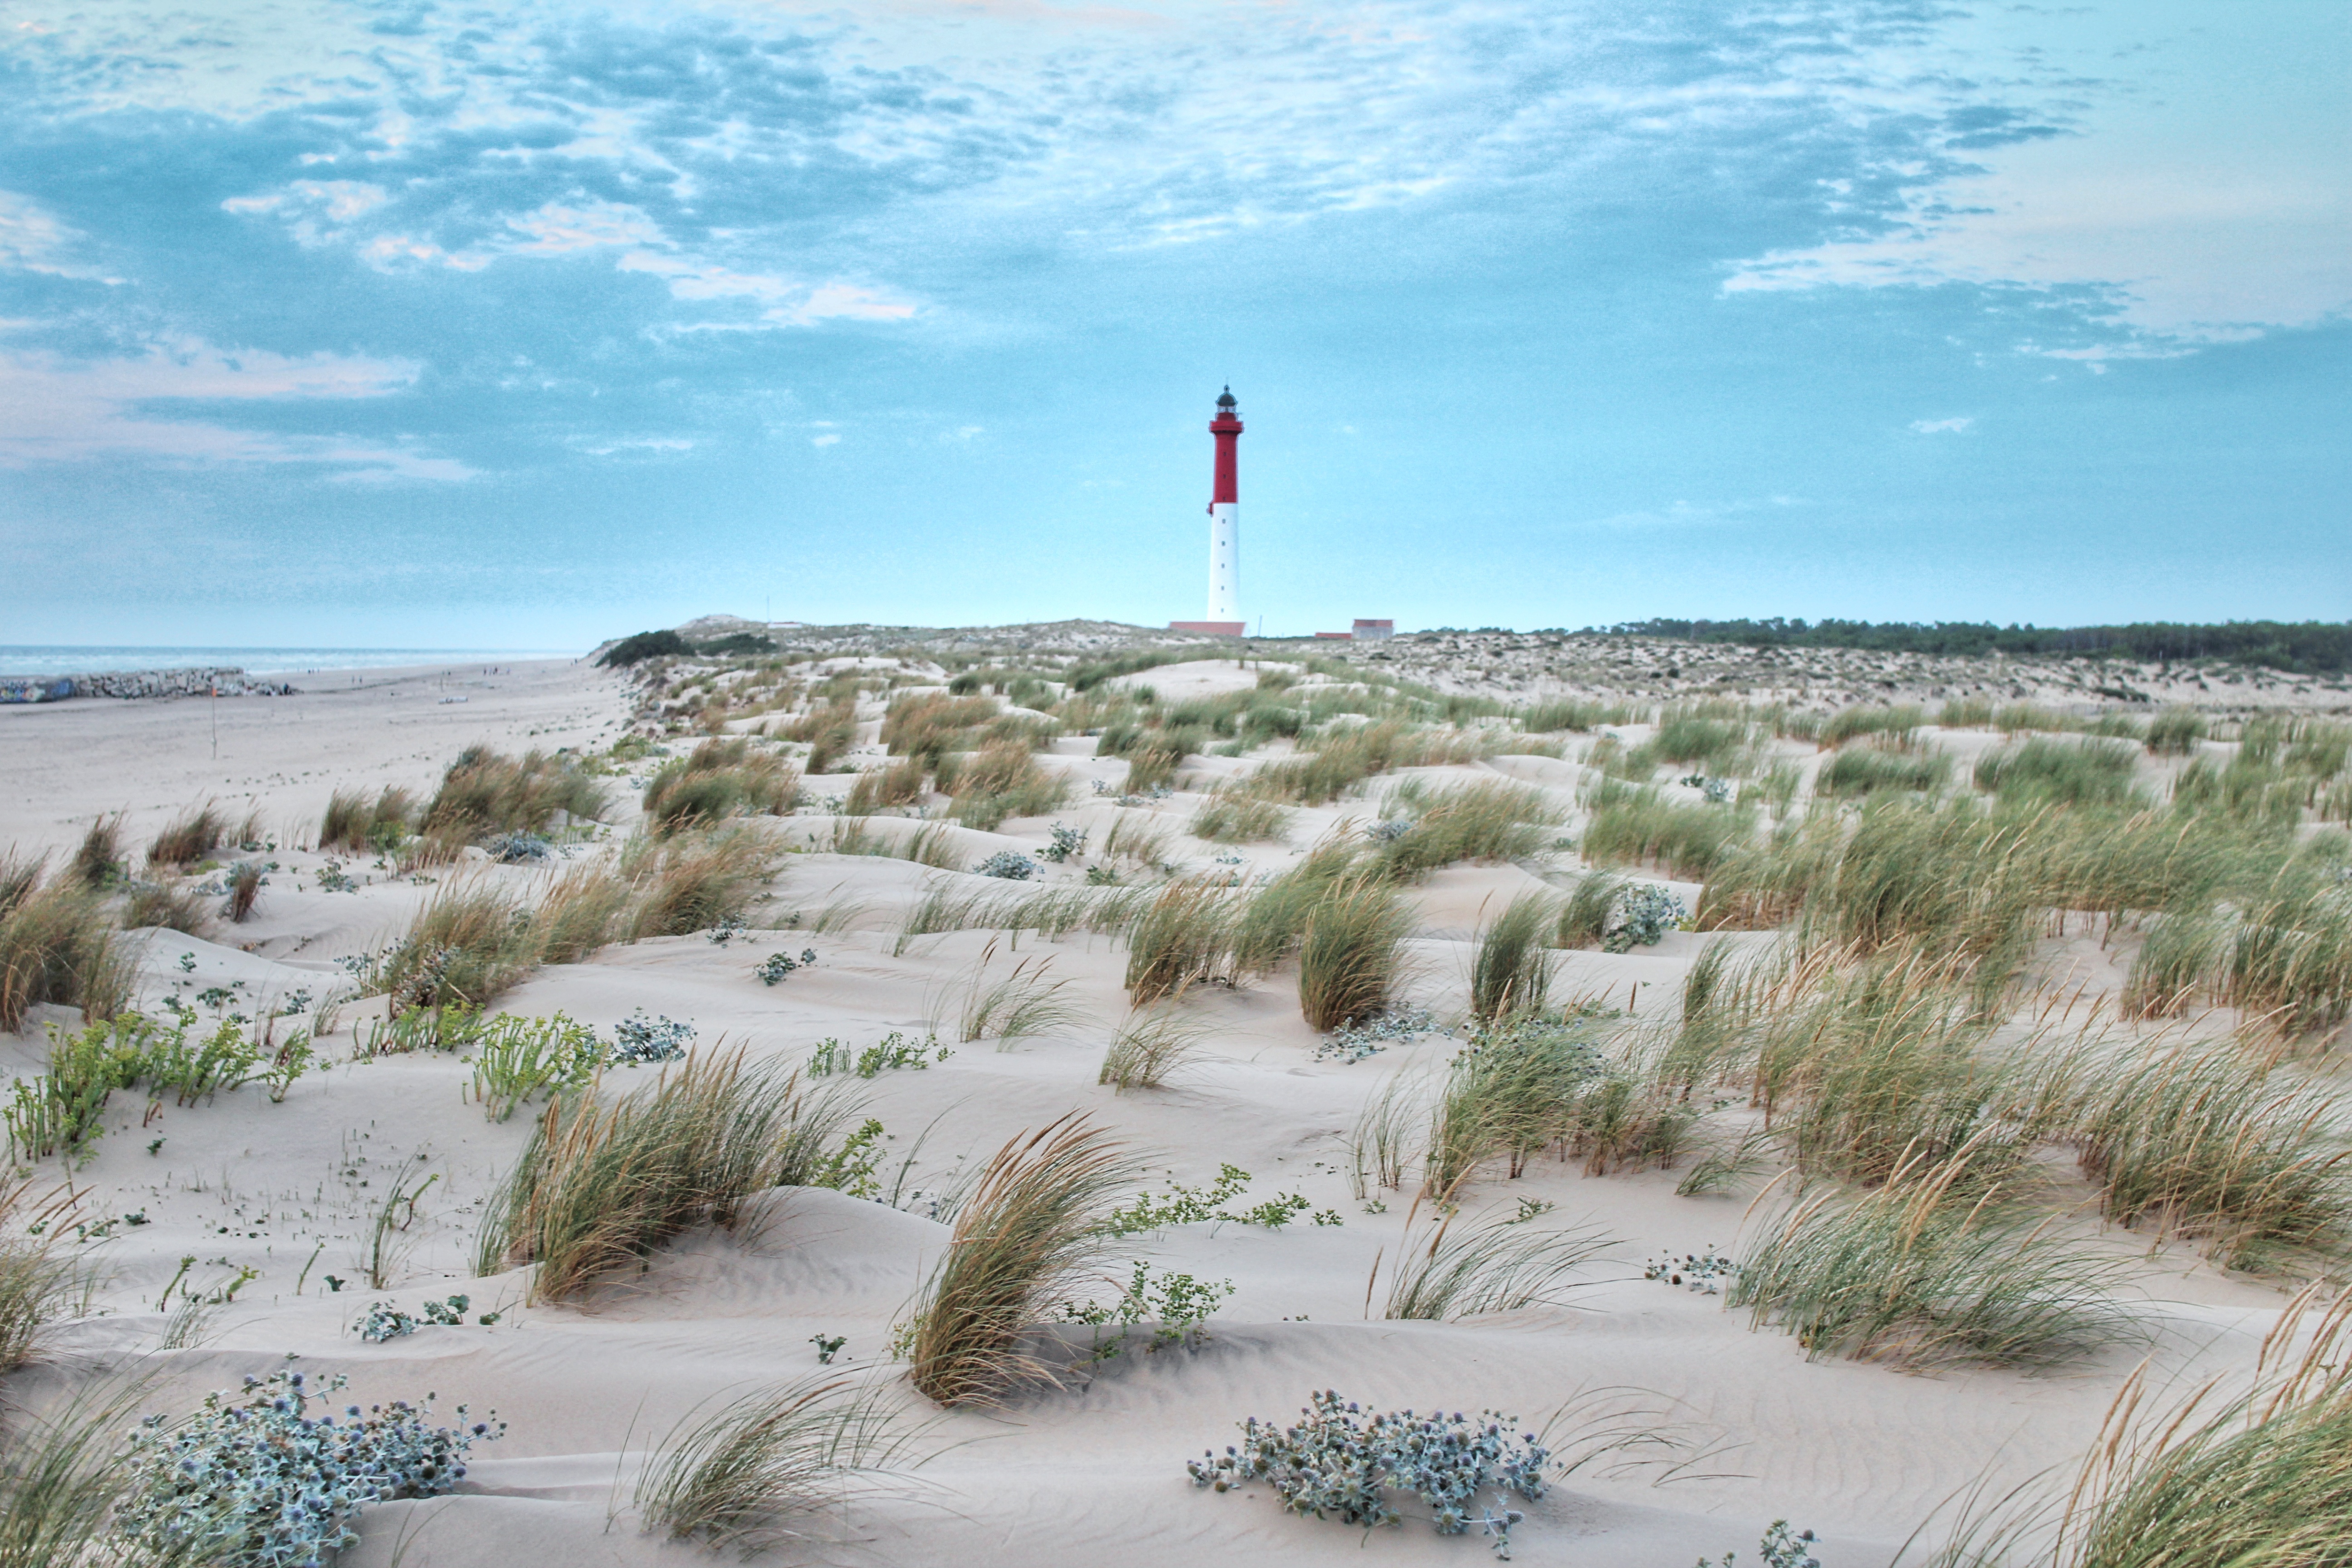
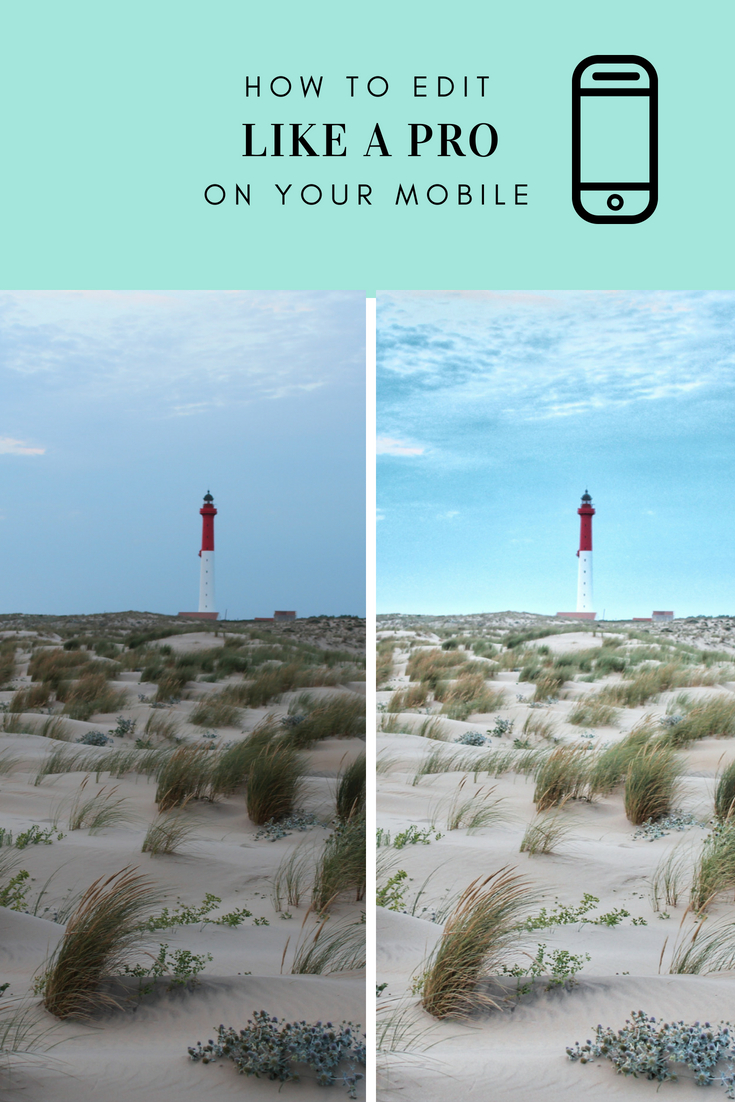
Here is the before and after editing shot:
SNAPSEED
1) Open the image that you want to edit in Snapseed and then click on the “tools” section.
What I like about Snapseed is that it remembers your previous edits so you could then easily apply it to your new image (from within the “styles” section).
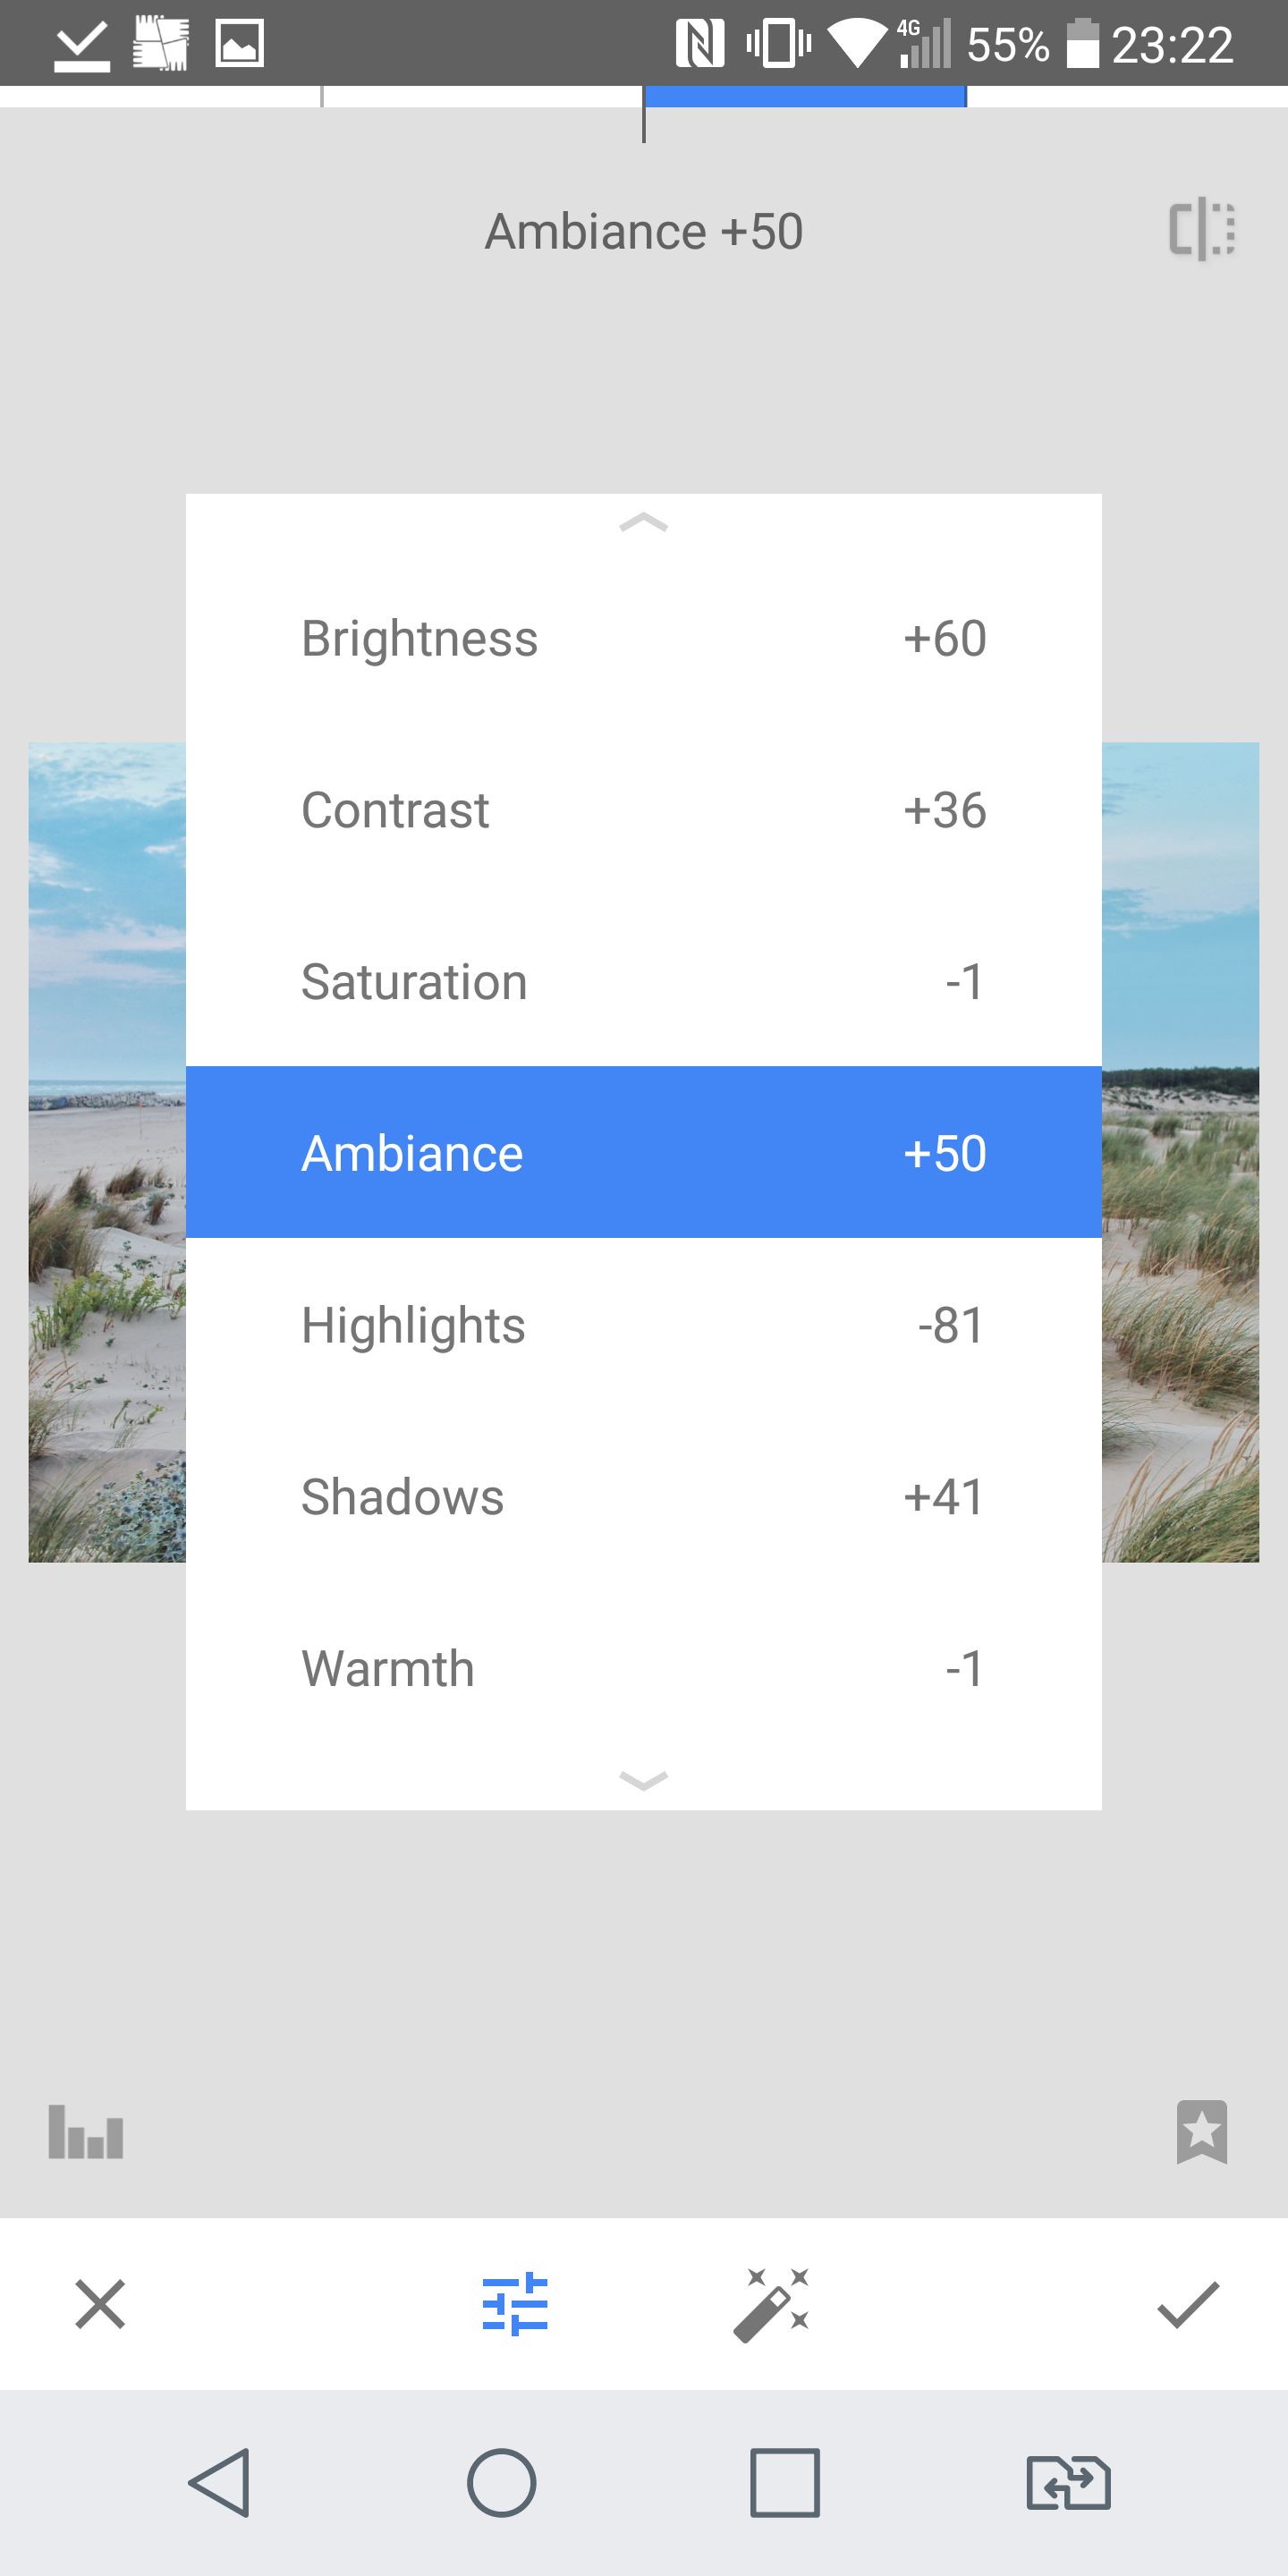
Once you’re in tools select “tune image”, here you can again begin by editing the brightness of the photo. I tend to increase the brightness, contract, ambiance and shadows and decrease the highlights (this makes the background colours more visible).
On snapseed you need to use your fingers vertically on the screen to scroll down to different tools and then horizontally to modify that specific tool.
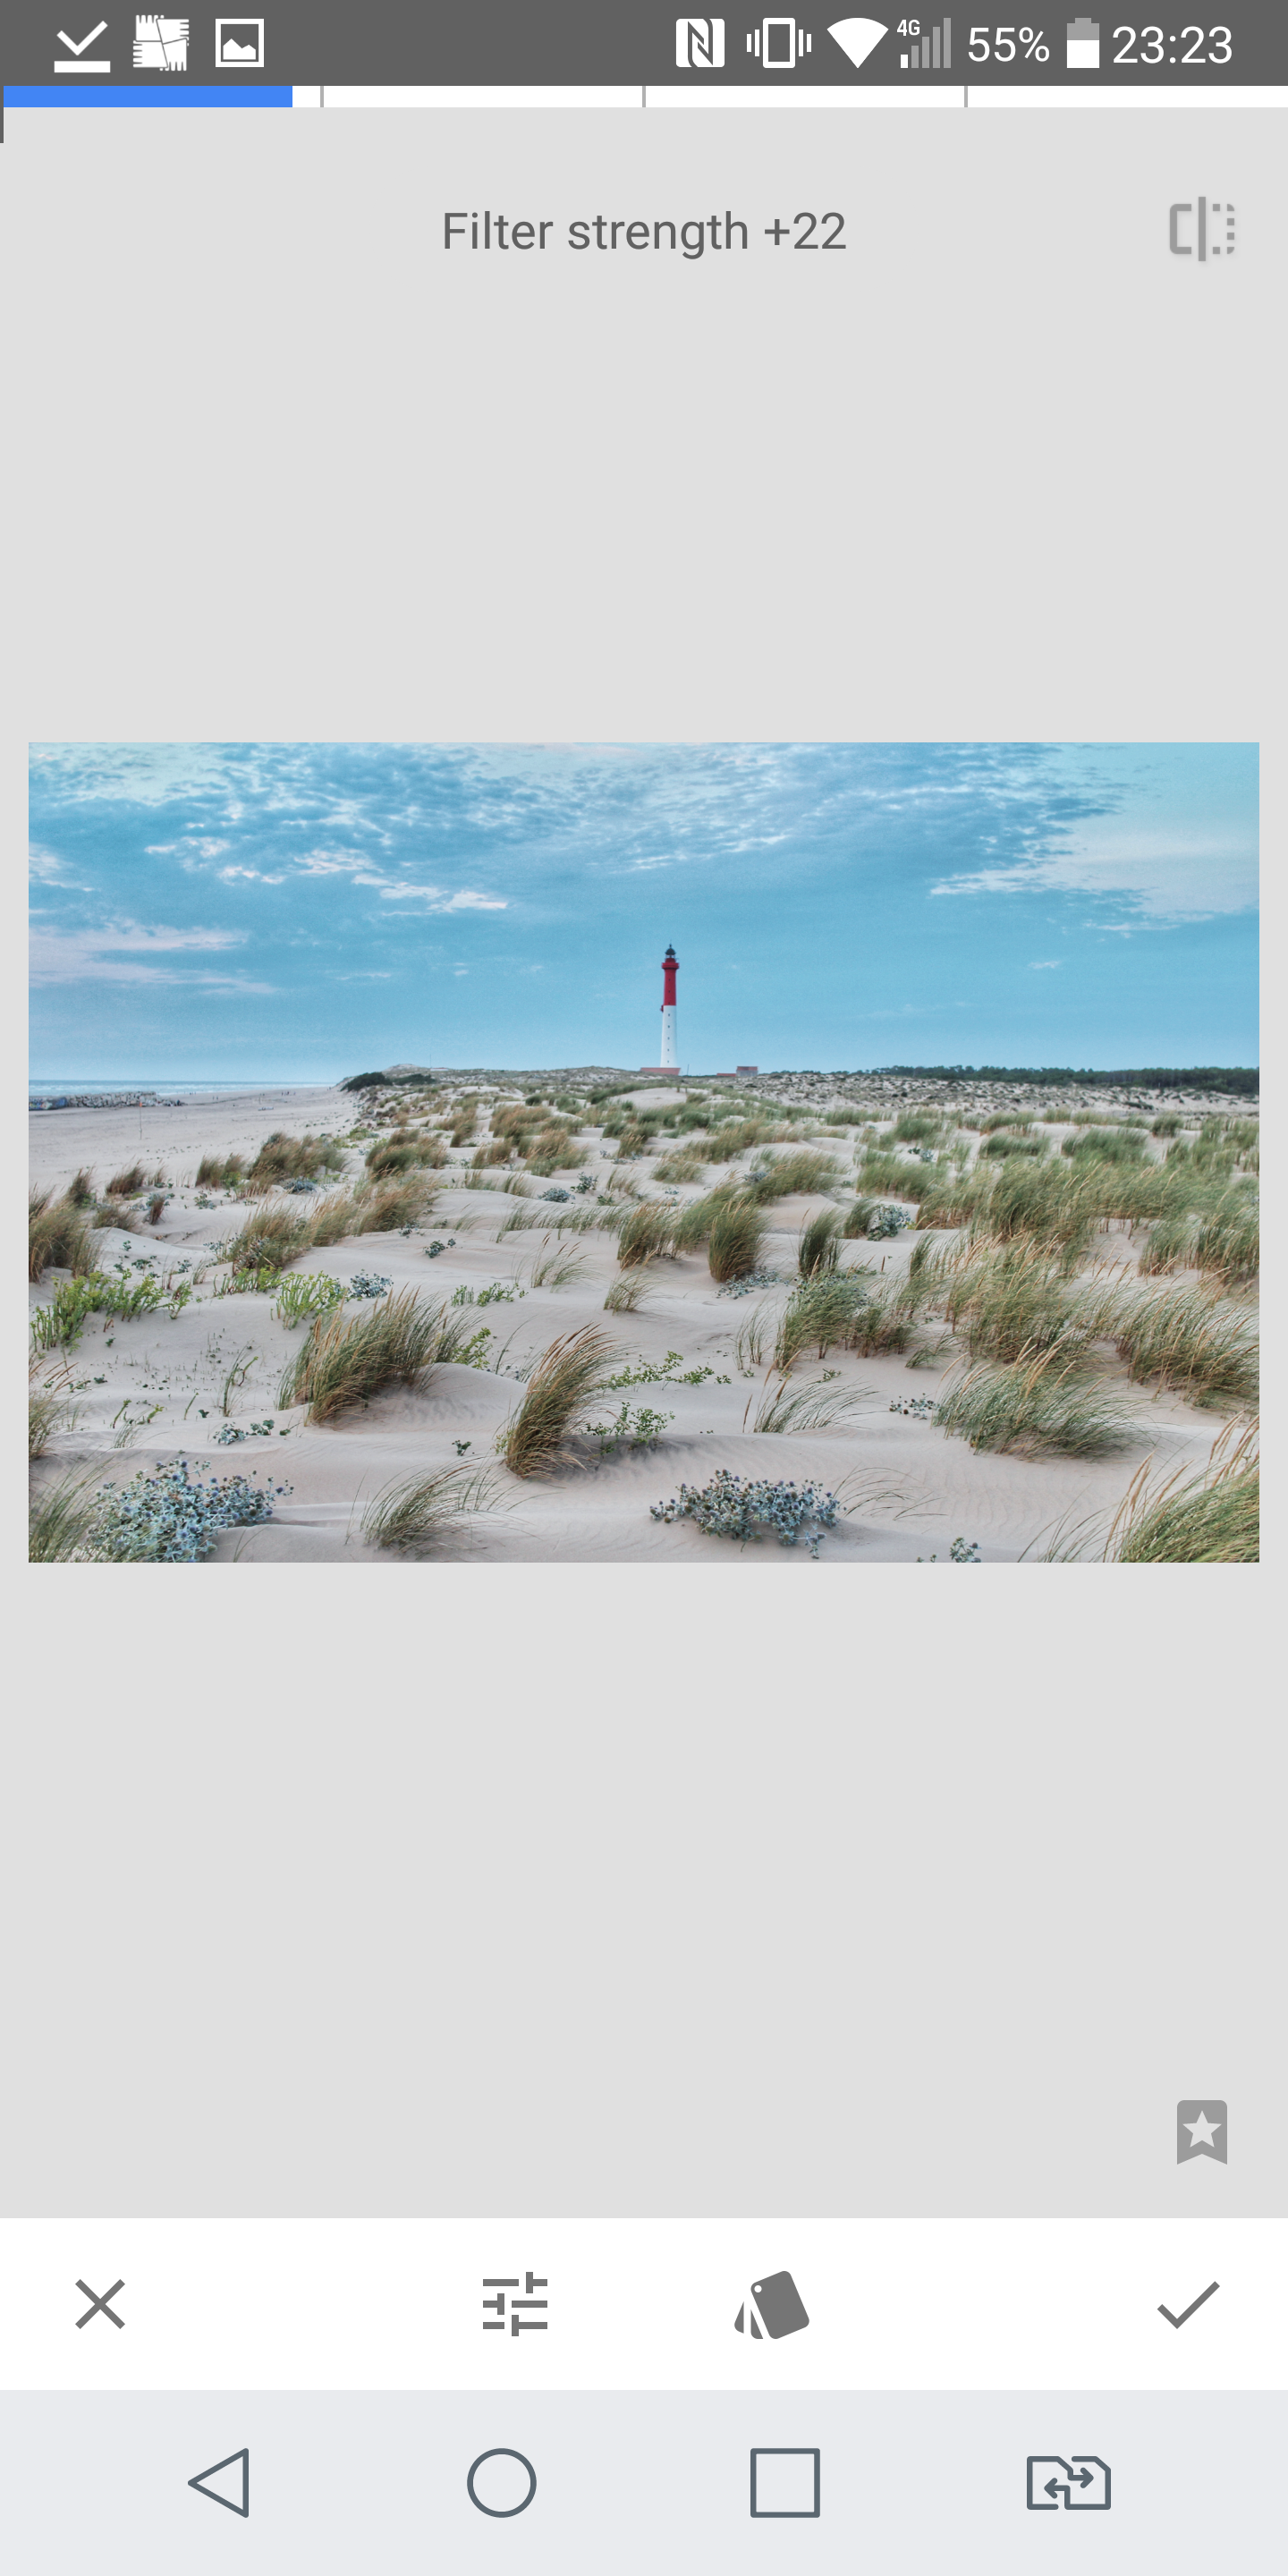
2) The next tool I use is HDR-scape (similar to the “clarity” tool in Lightroom), this helps to increase the detail seen in the image – be careful not to over-do the strength of this filter though or you face the photo looking really fake.
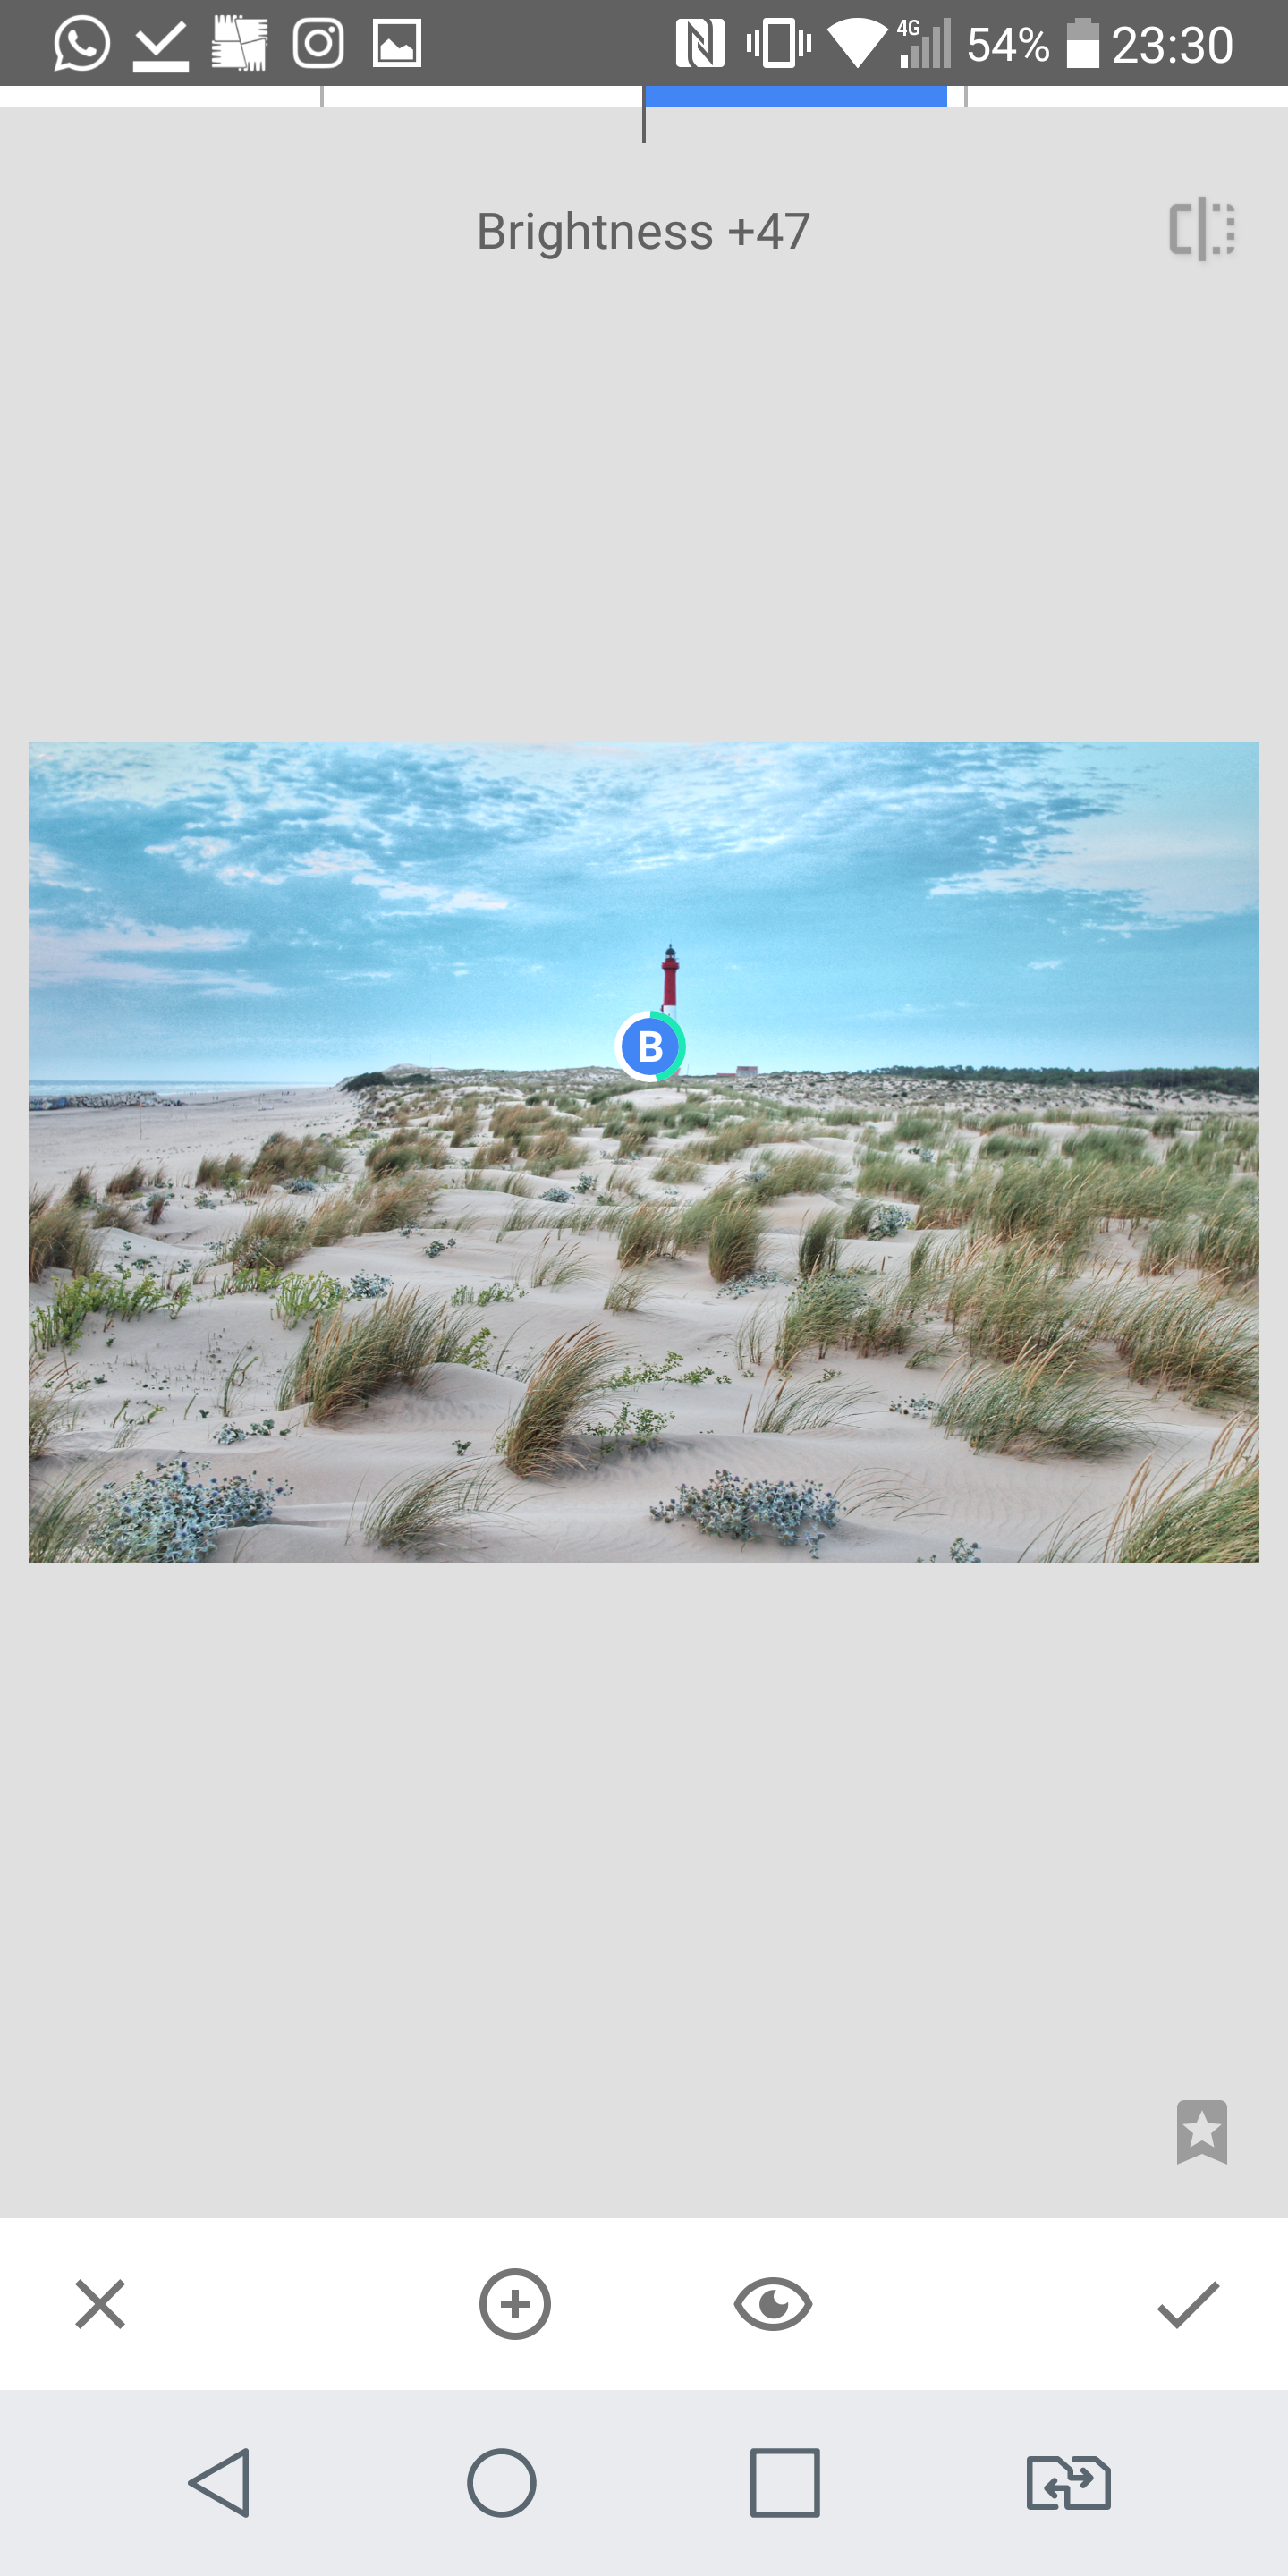
3) The final tool I used on my image is “selective”, this is a great tool and not available on Lightroom and it is where you select a certain part of the photo you wish to touch up, and you’ll be able to edit the brightness, contrast, saturation and structure of that particular area.
For my image I selected the lighthouse as I wished to increase the brightness around it to make it stand out. I didn’t edit the contract, saturation or structure this time.
4) Now all you need to do is click export, easy!
A few other tools I like on snapseed is the healing (get rid of spots and blemishes!) and lens blur (focus on one area of the photo and make the rest blurry).
If at any point you wish to see what your image looked like “before” you can just hold your finger down on the image you are editing.
Here is the before and after editing shot:
LIGHTROOM V SNAPSEED
Each app has it’s own unique qualities, Lightroom for the ability to edit individual colours plus the blacks and whites and Snapseed for the numerous amount of tools. I like and use both apps and usually it depends on the photo I’m editing as to which I choose. In the case of this particular photo I prefer the results created by Snapseed.
Lightroom and Snapseed are my favourite apps to edit on but I also use a variety of others to add special effects like a fake sun, or remove people from my photos. Find out more here.
What’s your favourite app to edit on? Comment below! And make sure you subscribe to my blog for more photography tips.
For more information on editing in general (specially on a laptop), check out my ultimate guide to editing on Lightroom.
Like this post? Pin it to save for later!
3 Comments
The Ultimate Guide to Editing on Lightroom – The Ginger Wanderlust
June 30, 2018 at 10:54 am[…] If you prefer to edit on your phone, Lightroom does have a free app! You can learn more about editing on your phone here. […]
Top 8 Mobile Apps for Photo Editing – The Ginger Wanderlust
July 16, 2018 at 10:40 am[…] If you don’t know much about editing, Snapseed does have a few filters. Learn more about editing on your phone using Snapseed here. […]
syed wajid
July 14, 2020 at 2:27 pmThis is a great editing app. Congratulations for finding such a wonderful new tool.