I started using Adobe Lightroom about a year ago, and I have spent a lot of time playing around with all the various tools and trying out lots of different editing techniques. In this post I will go over my numerous editing hacks to help improve your photos and hopefully help you to better understand editing in Lightroom. Make sure you also check out my ultimate guide to editing on Lightroom for more explanations on what all the different tools do.
If you’re a complete beginner purchasing presets can give you the tools you need to get started with editing in Lightroom. Presets are filters for Lightroom where you can save the editing adjustments you have made. By using other people’s presets you can start to understand what tools control what, and thus what you need to do to make your photo look better.
In this post I’m sharing 8 editing hacks that I use to add the finishing touches to my pictures. These all use either the radial or graduated filter, the heal/clone tool or the brush tool. My editing hacks are best used once you have already applied the preset to your photo.
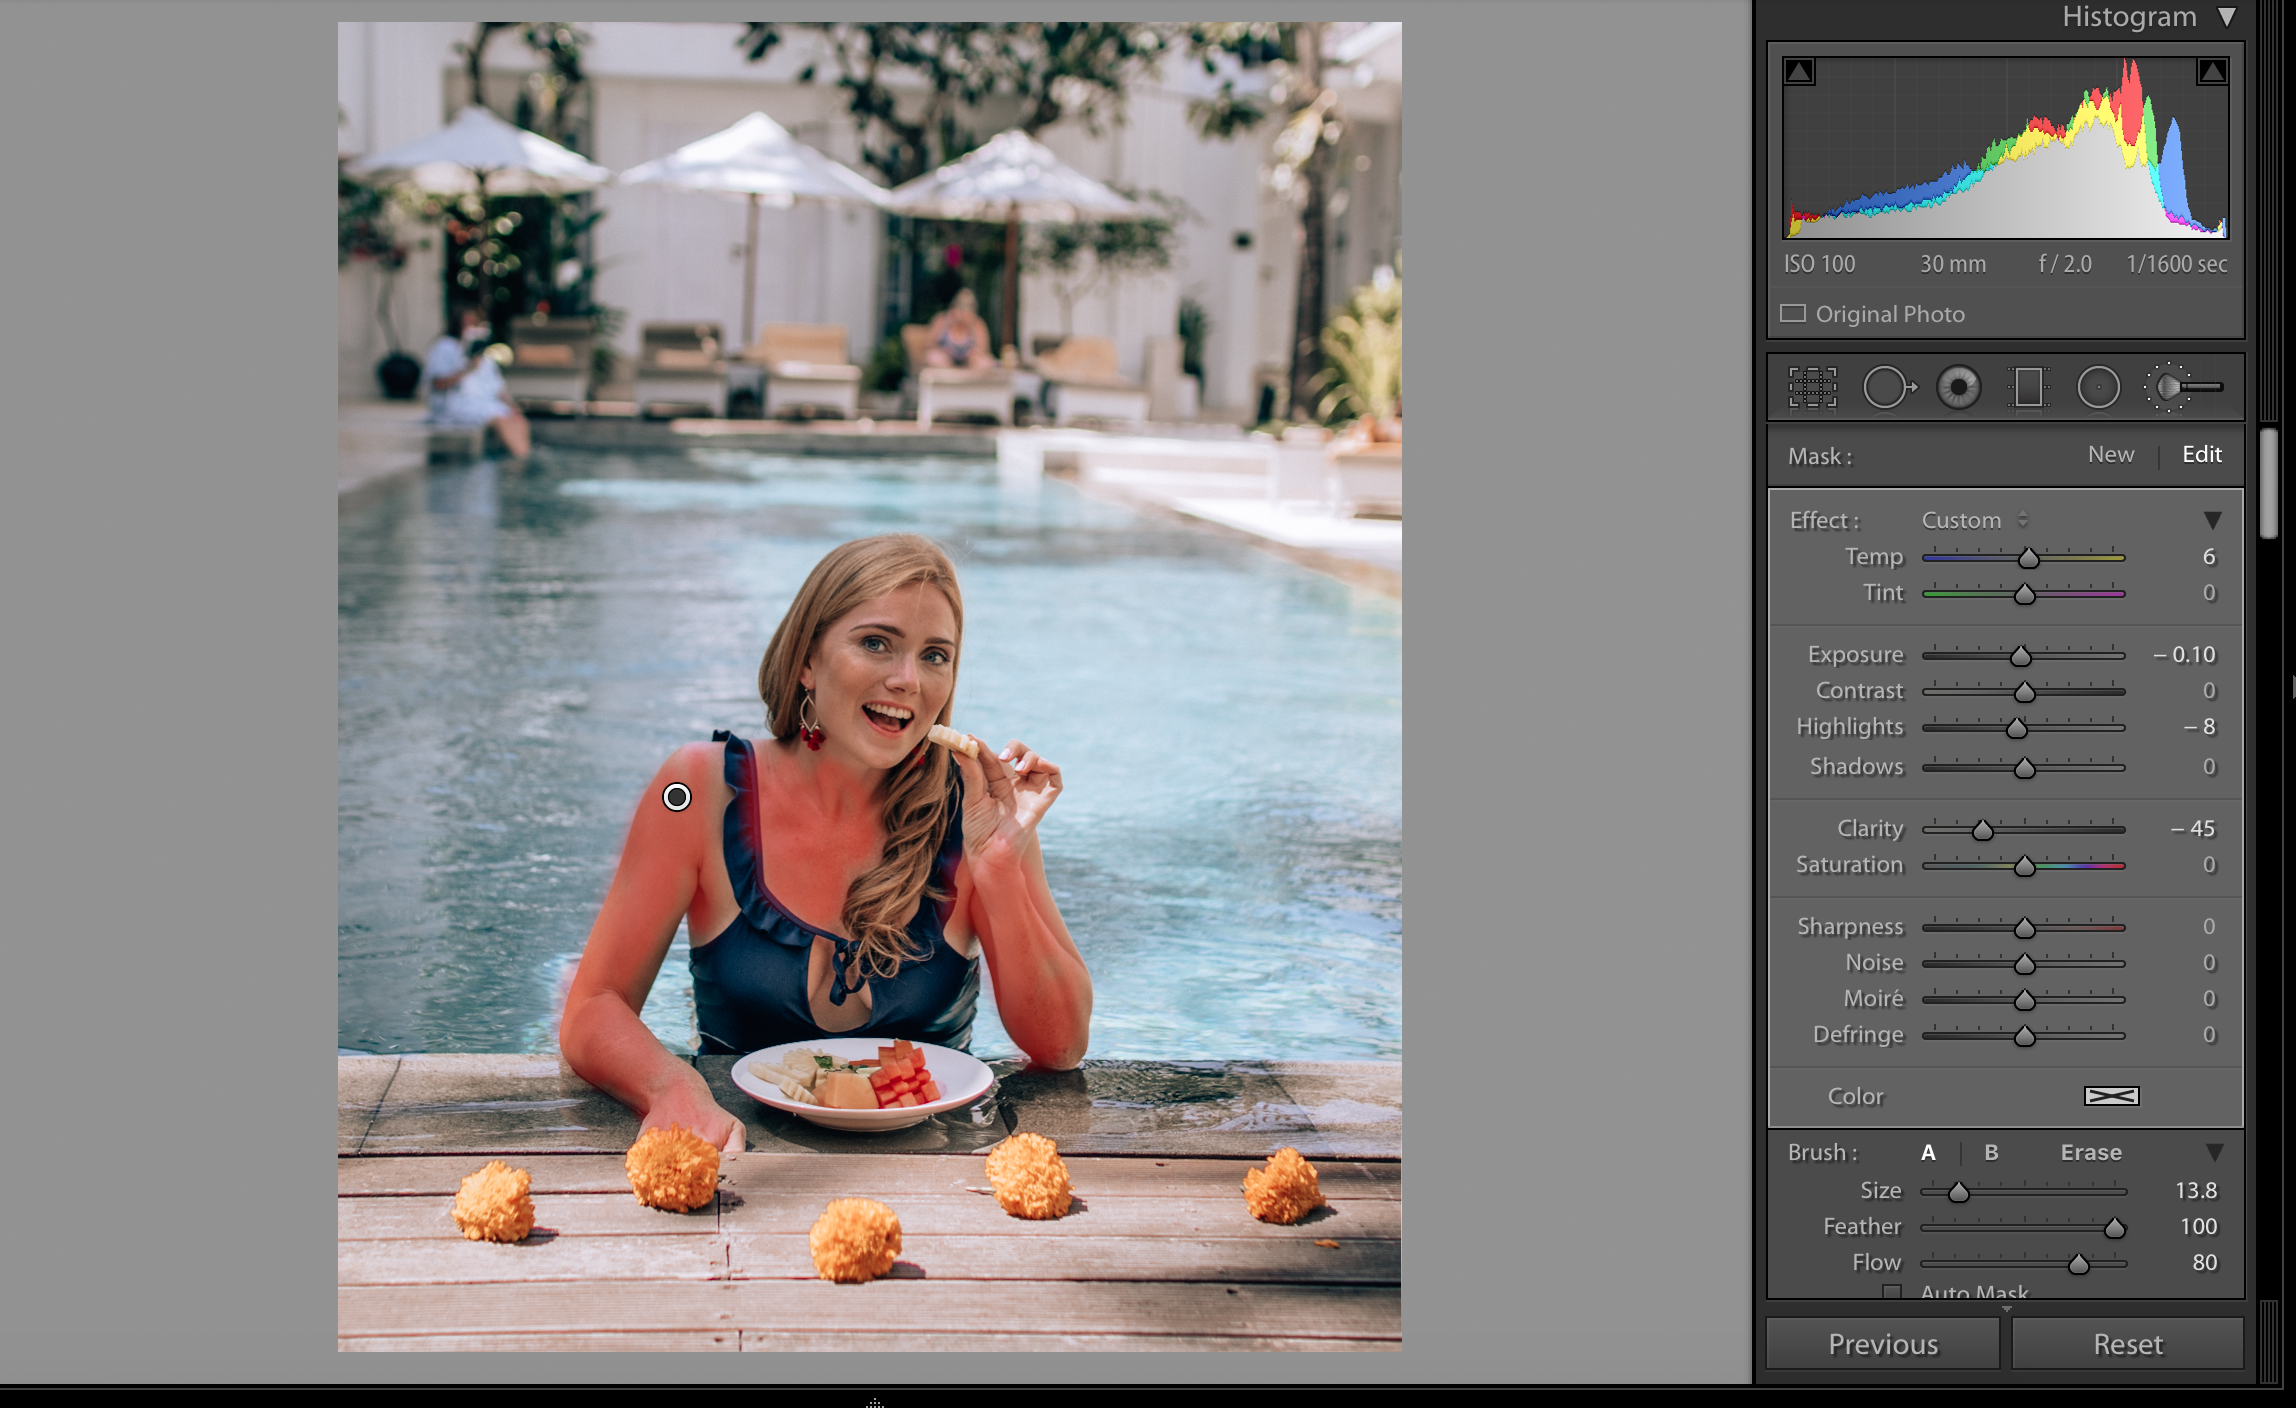
1) How to make skin appear smoother
- You might want to zoom in on the subject for this.
- Using the brush tool you want to brush over all revealed skin.
- If you select ‘show selected mask overlay’ (or o on a mac), the area you highlight will show in red, this way you can ensure that you’ve selected the right areas.
- Decrease clarity and slightly increase exposure to make skin look smoother.
- To further enhance a tan you can decrease exposure and slightly increase warmth.
Photo edited with my Smooth Blues 7 preset.
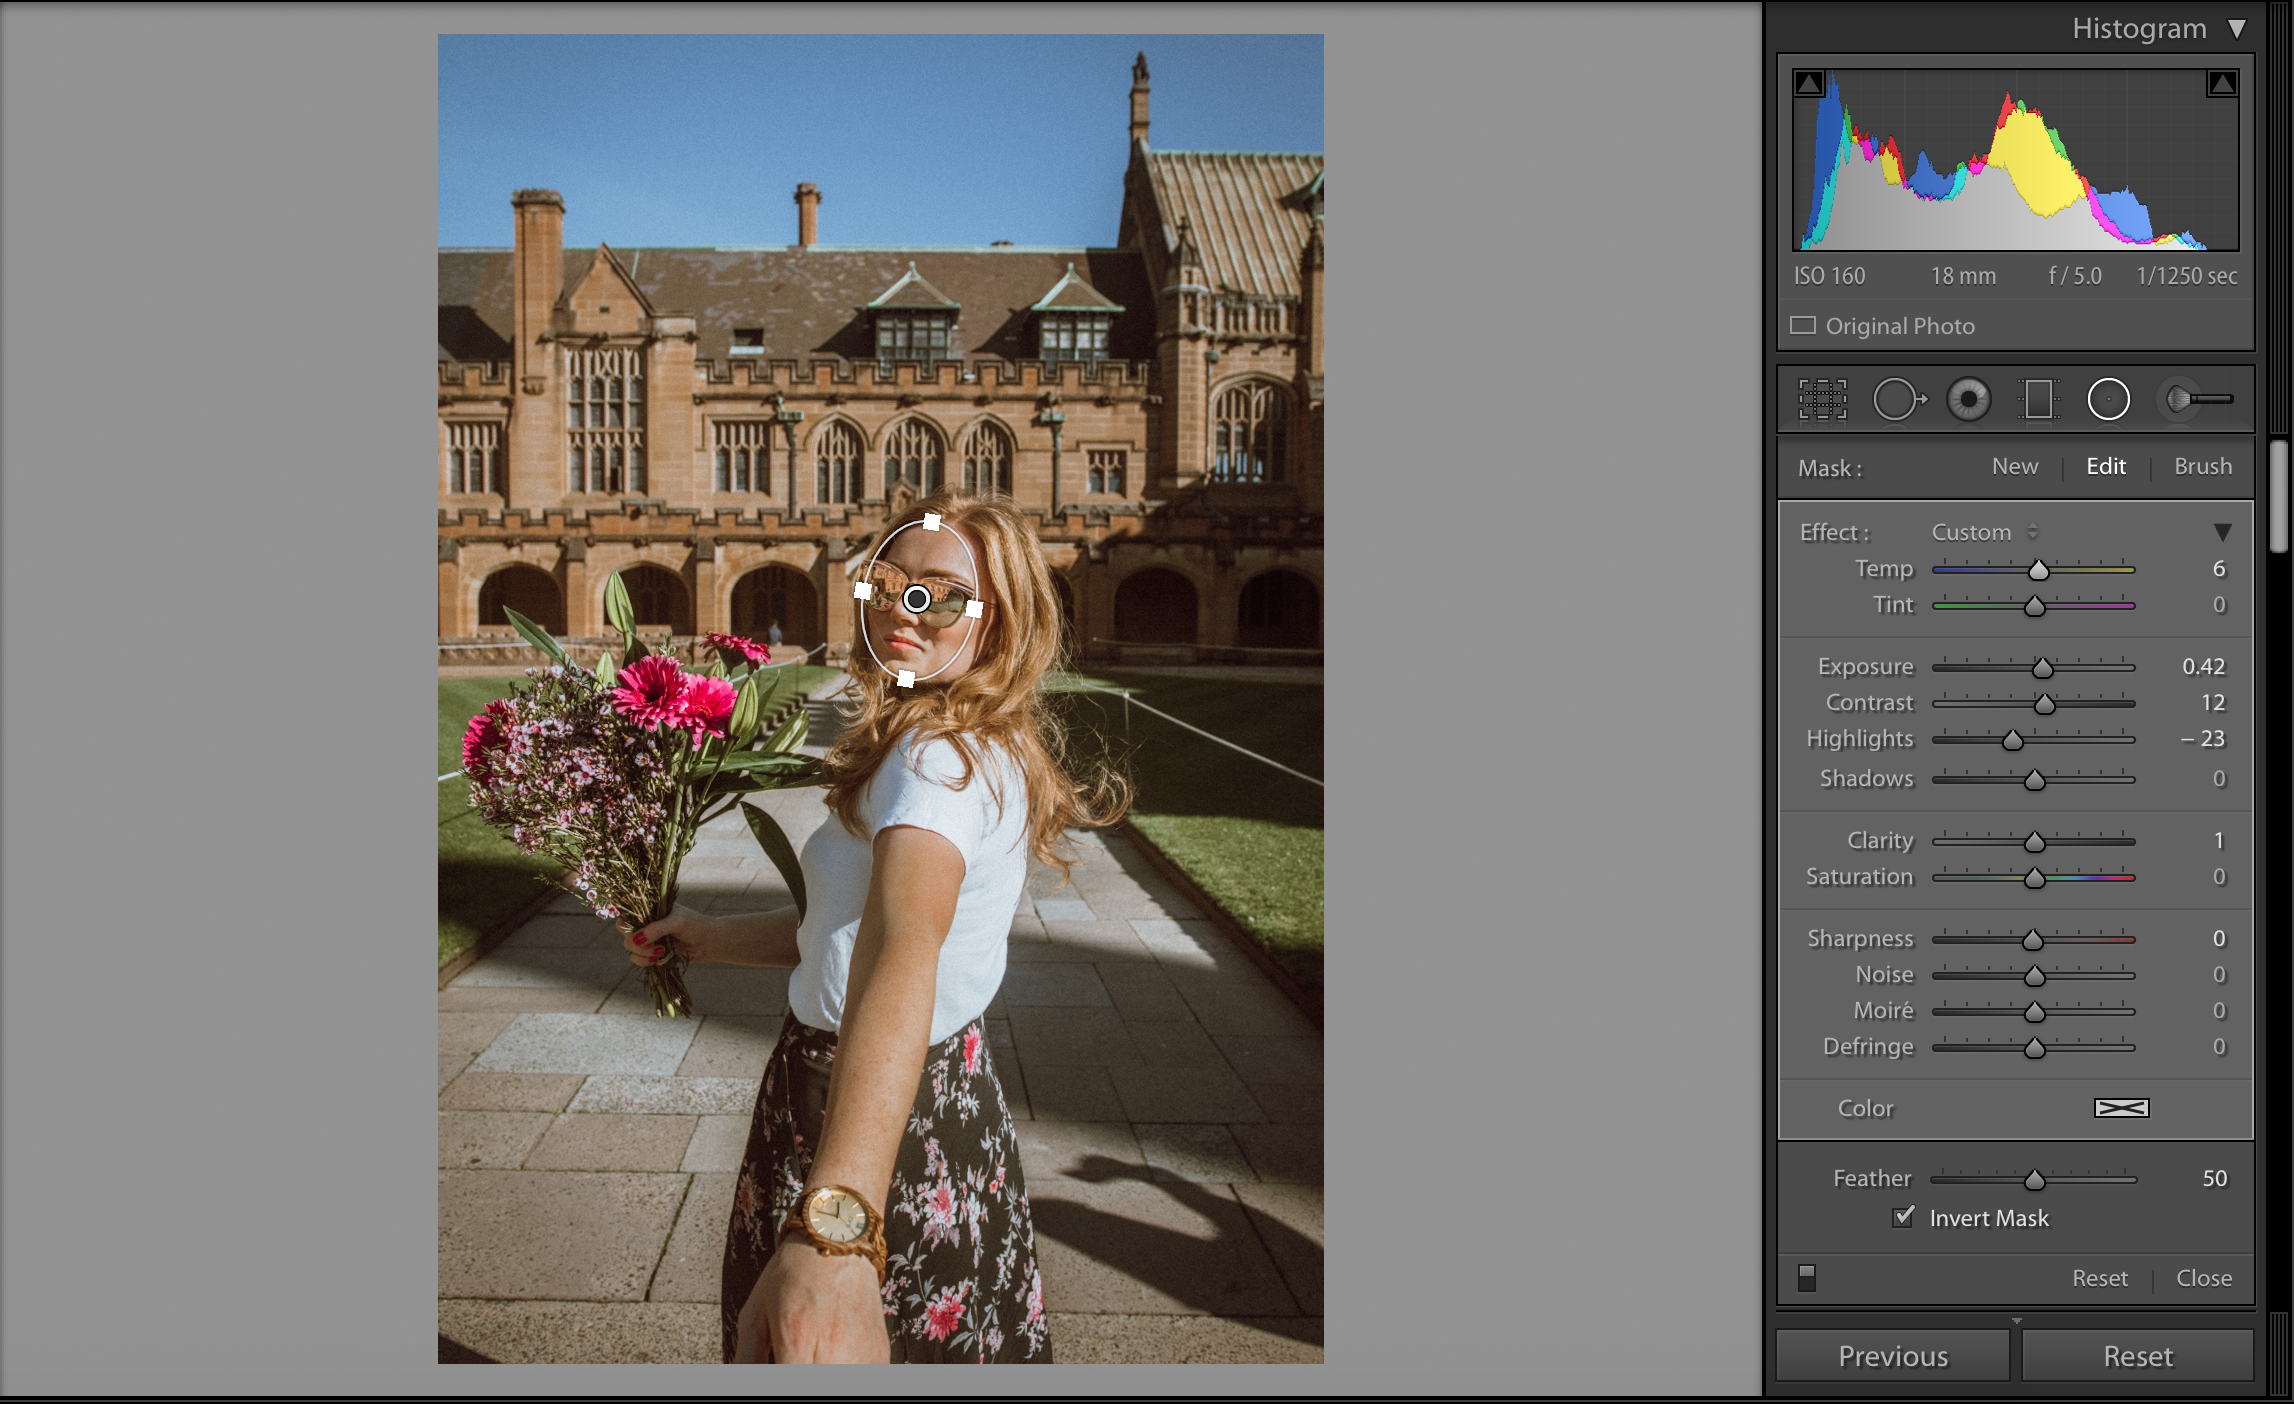
2) How to brighten a face
- Using the radial tool you want to create a circle around the face.
- Make sure ‘invert’ is ticked.
- Increase exposure inside the circle to make the face brighter (more flattering).
Photo edited with my Golden Film preset.
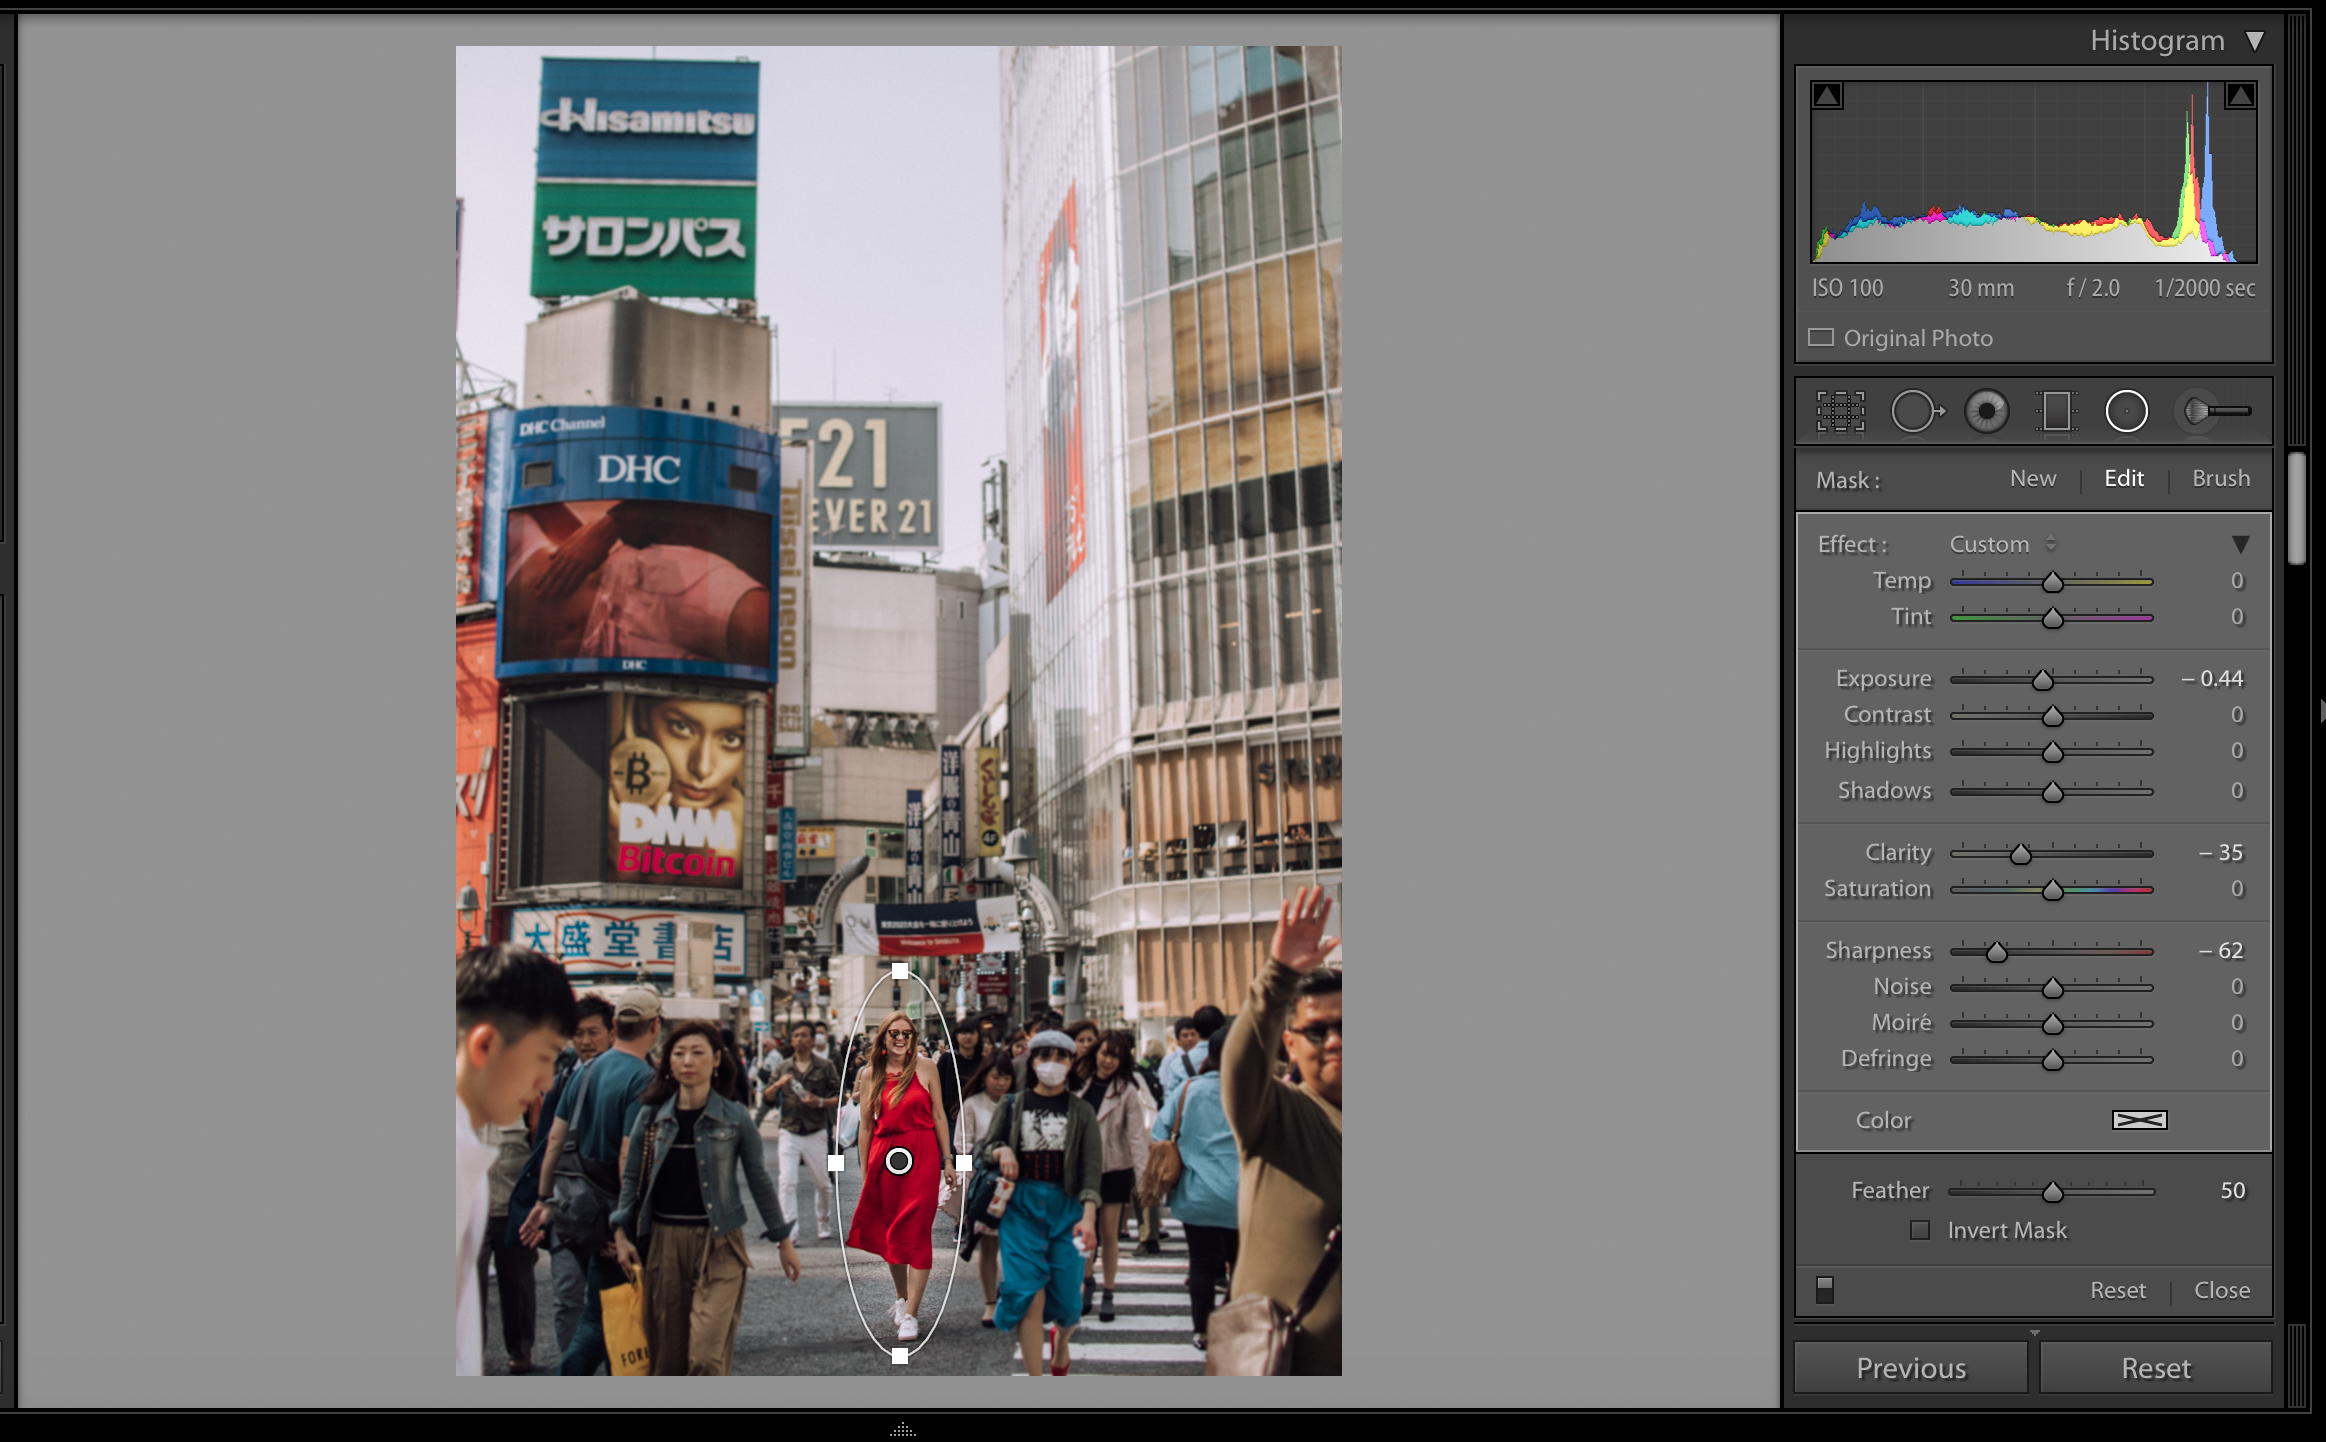
3) How to make the subject pop
- Using the radial tool you want to create an oval around the subject.
- Make sure ‘invert’ is not ticked.
- Decrease clarity, sharpness and exposure to dull the surroundings and thus make your subject pop.
Photo edited with my Golden Glow 2 preset.
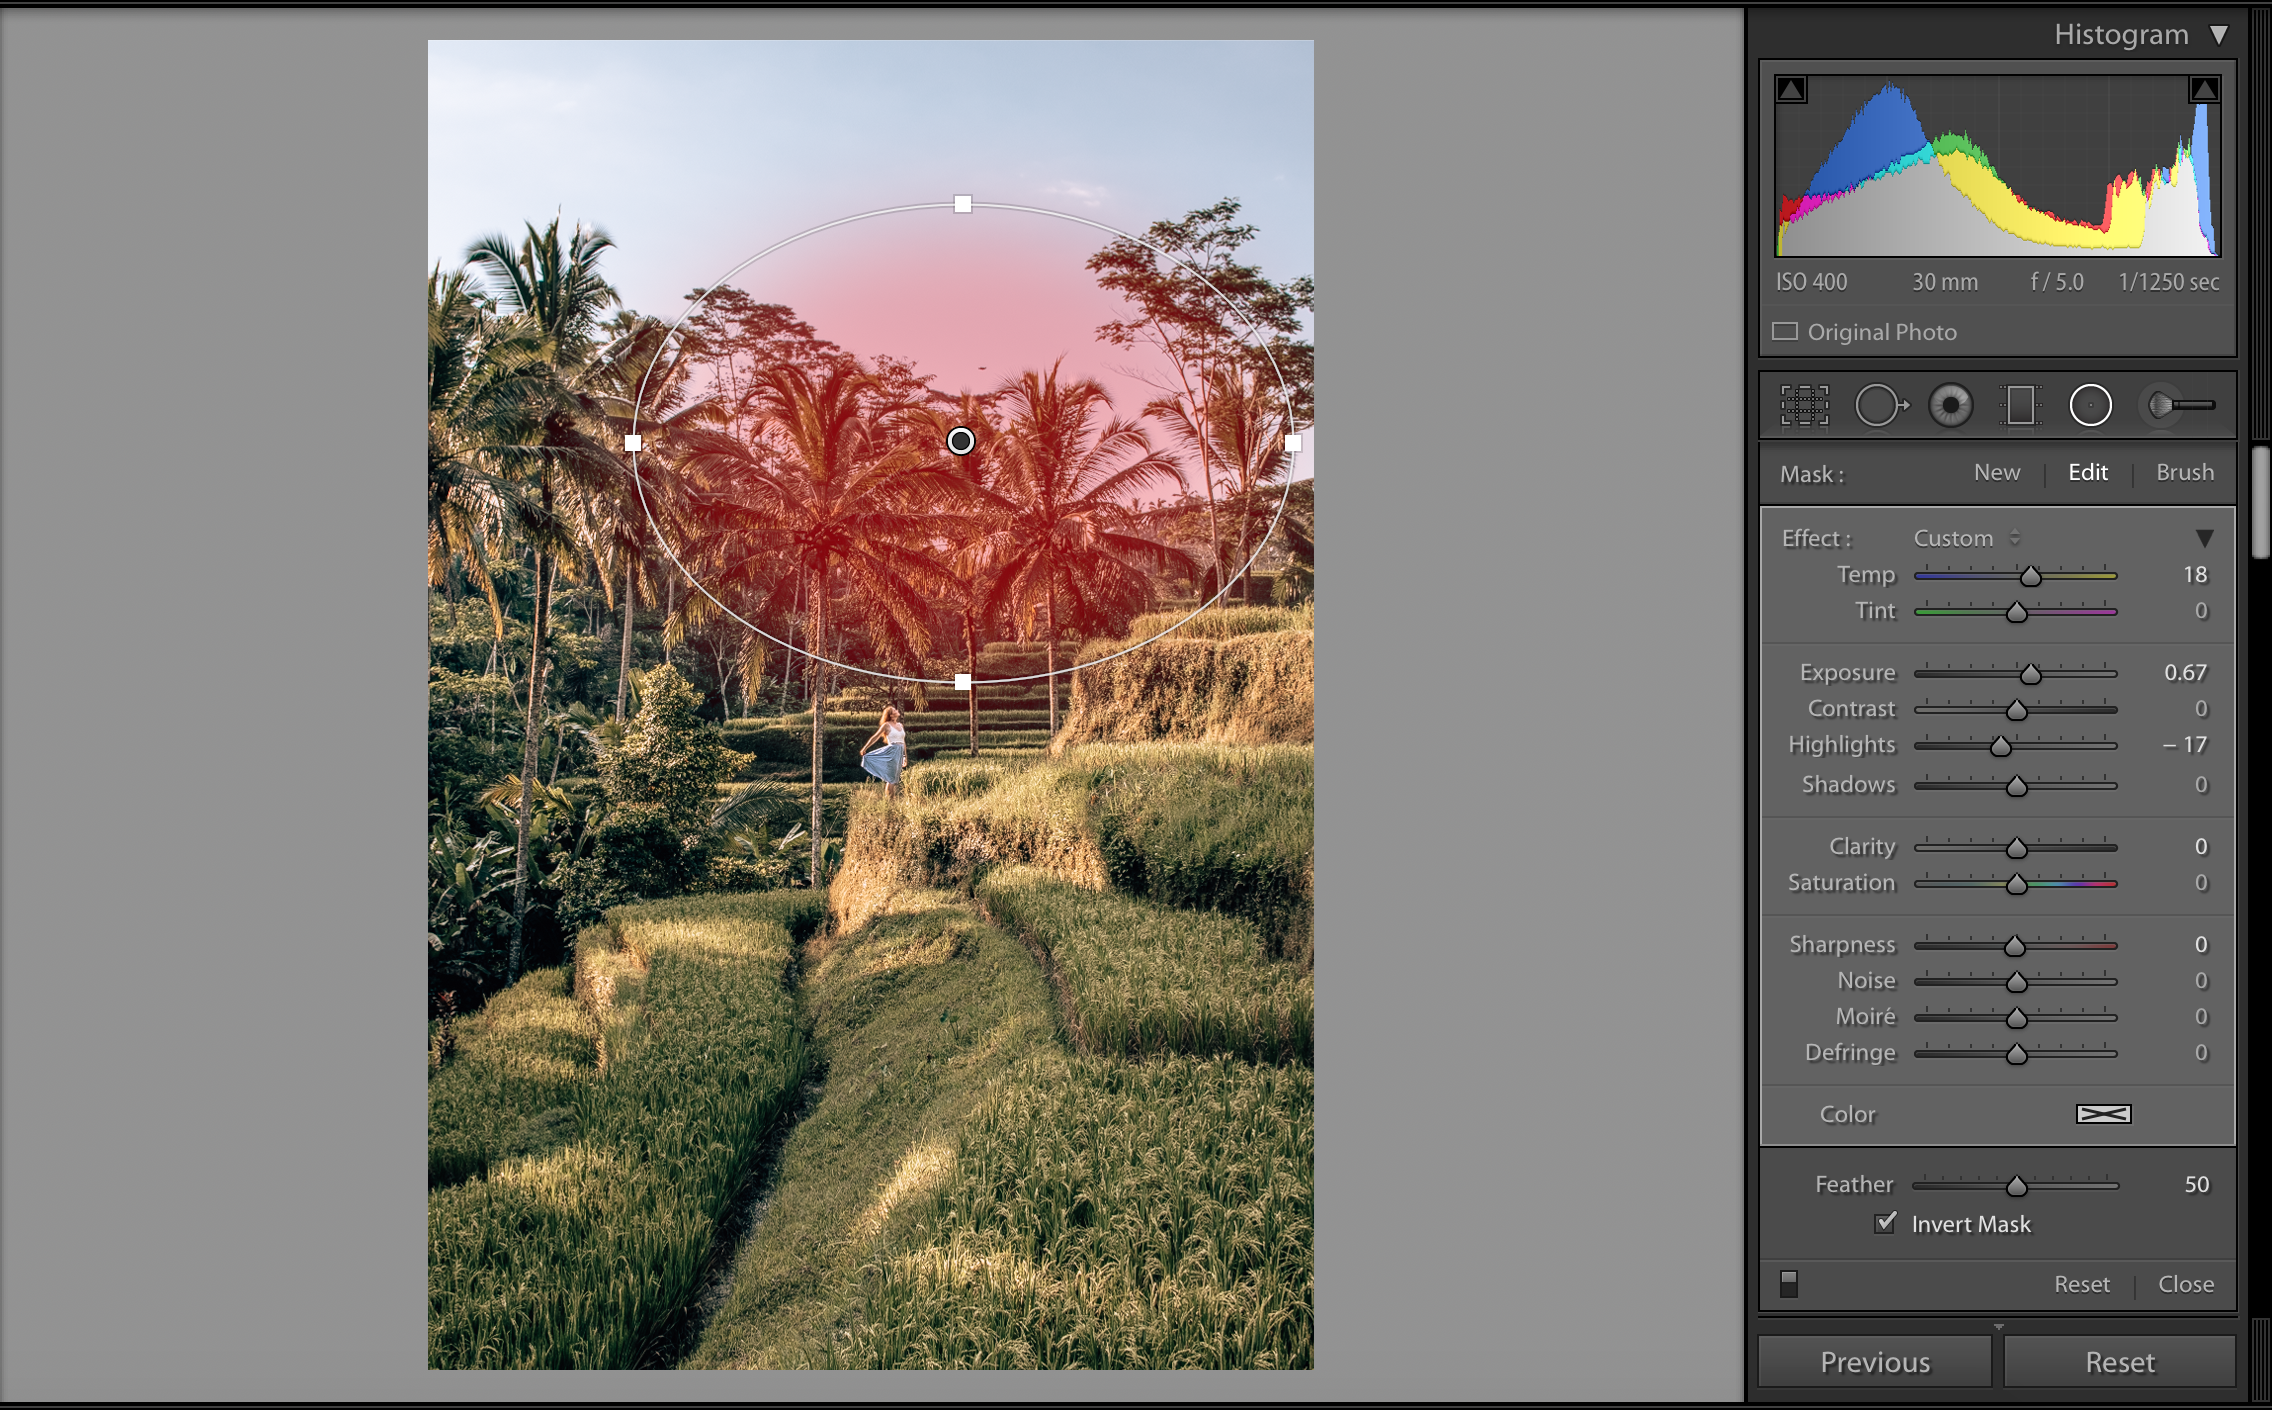
4) How to add a fake sun
- Using the radial tool you want to create a circle
- Make sure ‘invert’ is ticked.
- Increase the exposure and warmth inside the circle to create a fake sun effect.
- Move the radial filter to the side of the image so it’s half showing, or place it on top of a mountain. Make sure you place it in a similar direction to where the sun was actually coming from.
If you’re after sun rays you should check out the Lens Distortion app.
Photo edited with my Green Dream 7 preset.
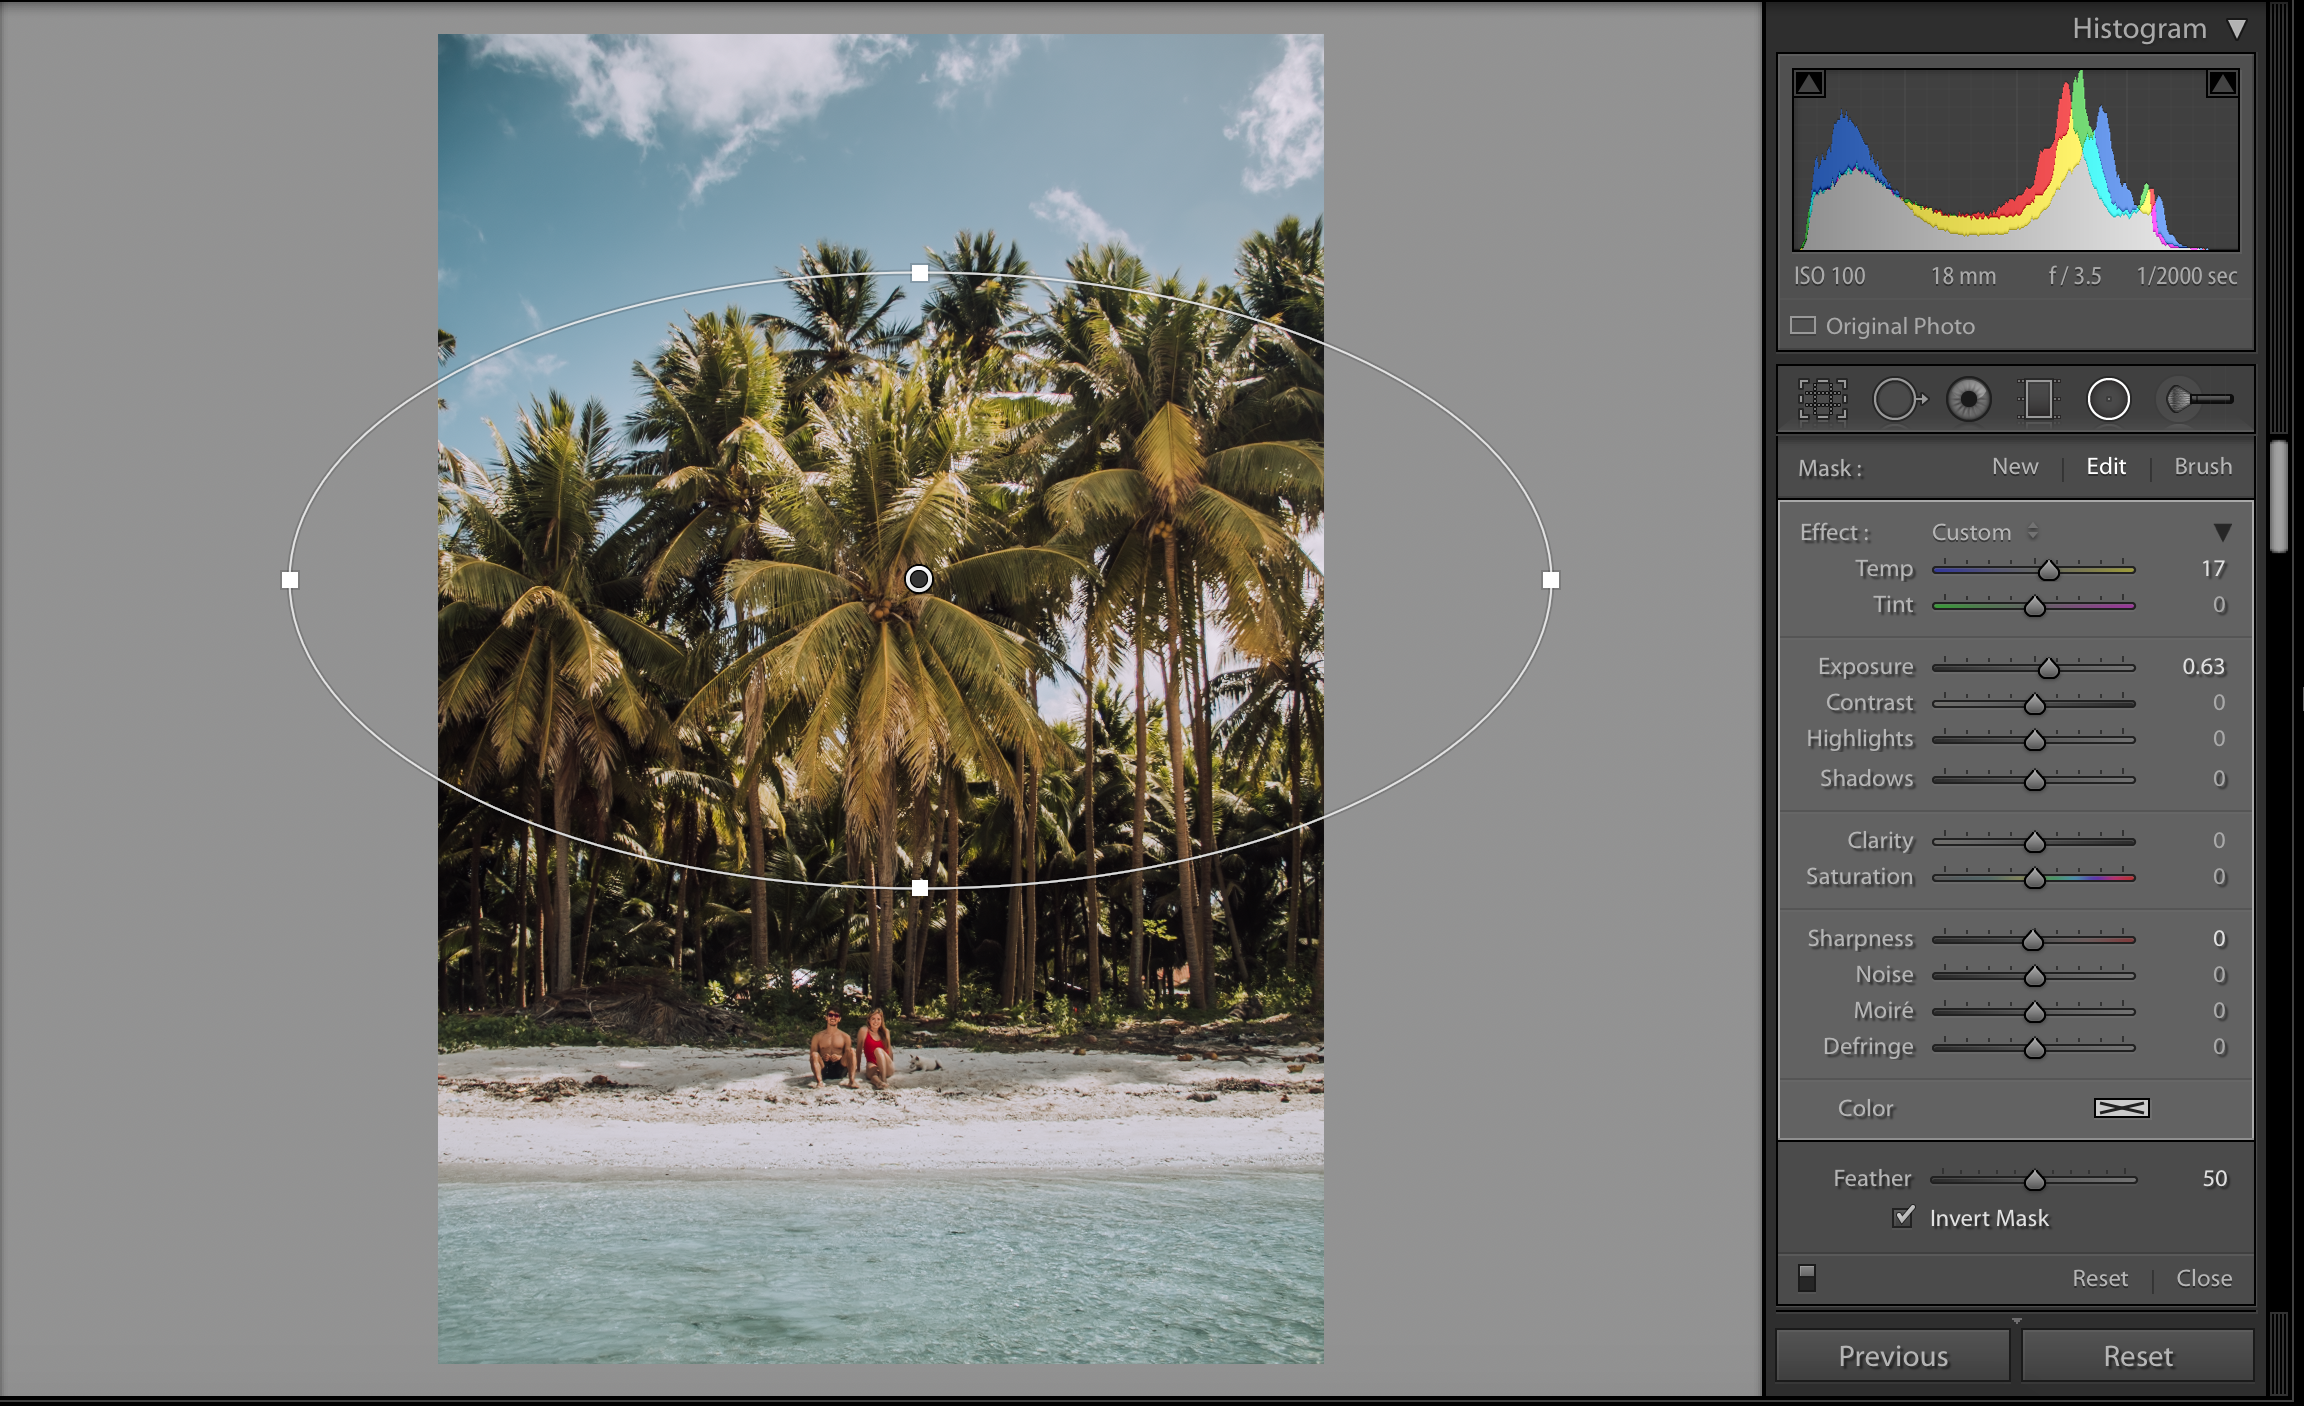
5) How to warm palm trees
- Depending on the location of the palm trees you can use either the radial or graduated filter. Graduated is best if they’re to the side and radial if they’re in the middle.
- If you’re using the radial filter make sure ‘invert’ is ticked.
- Increase the exposure and warmth to lighten and warm up the palm trees.
Photo edited with my Smooth Blues 6 preset.
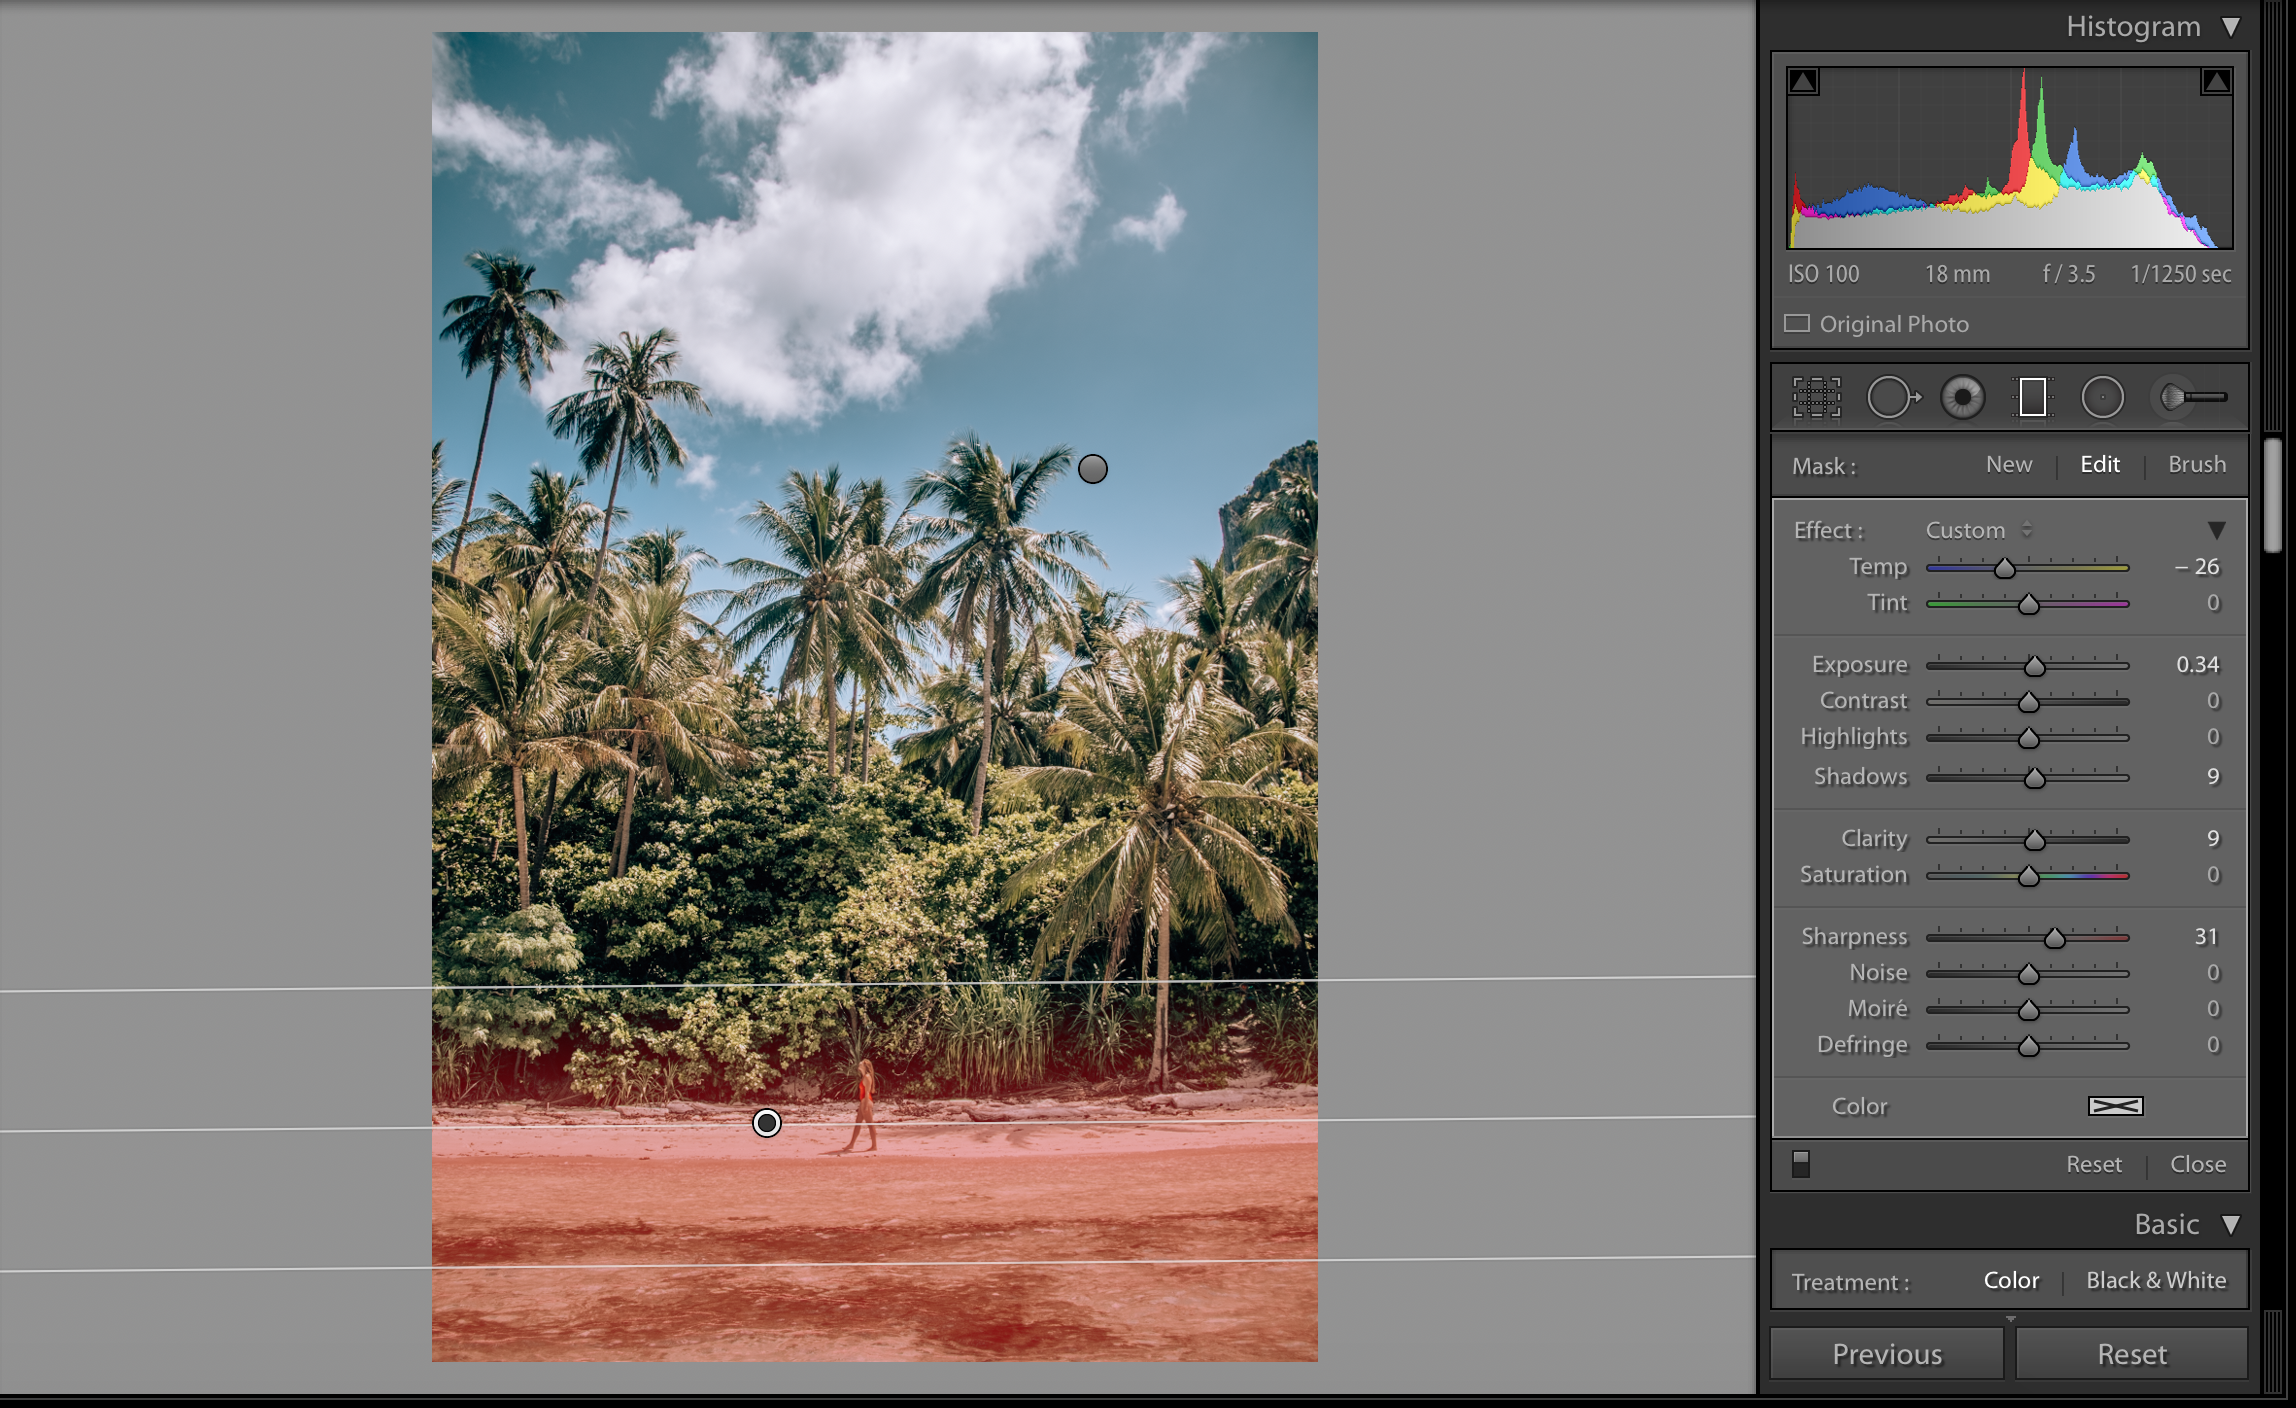
6) How to change the colour of water
- Depending on the location of the water you can use either the graduated filter or brush tool. Graduated is best if the water is to the side or bottom and brush if it’s uneven/more central
- Decrease the warmth and green tint to the colour you prefer. You can also choose to increase contrast, exposure and clarity to make it pop.
Photo edited with my Smooth Blues preset.
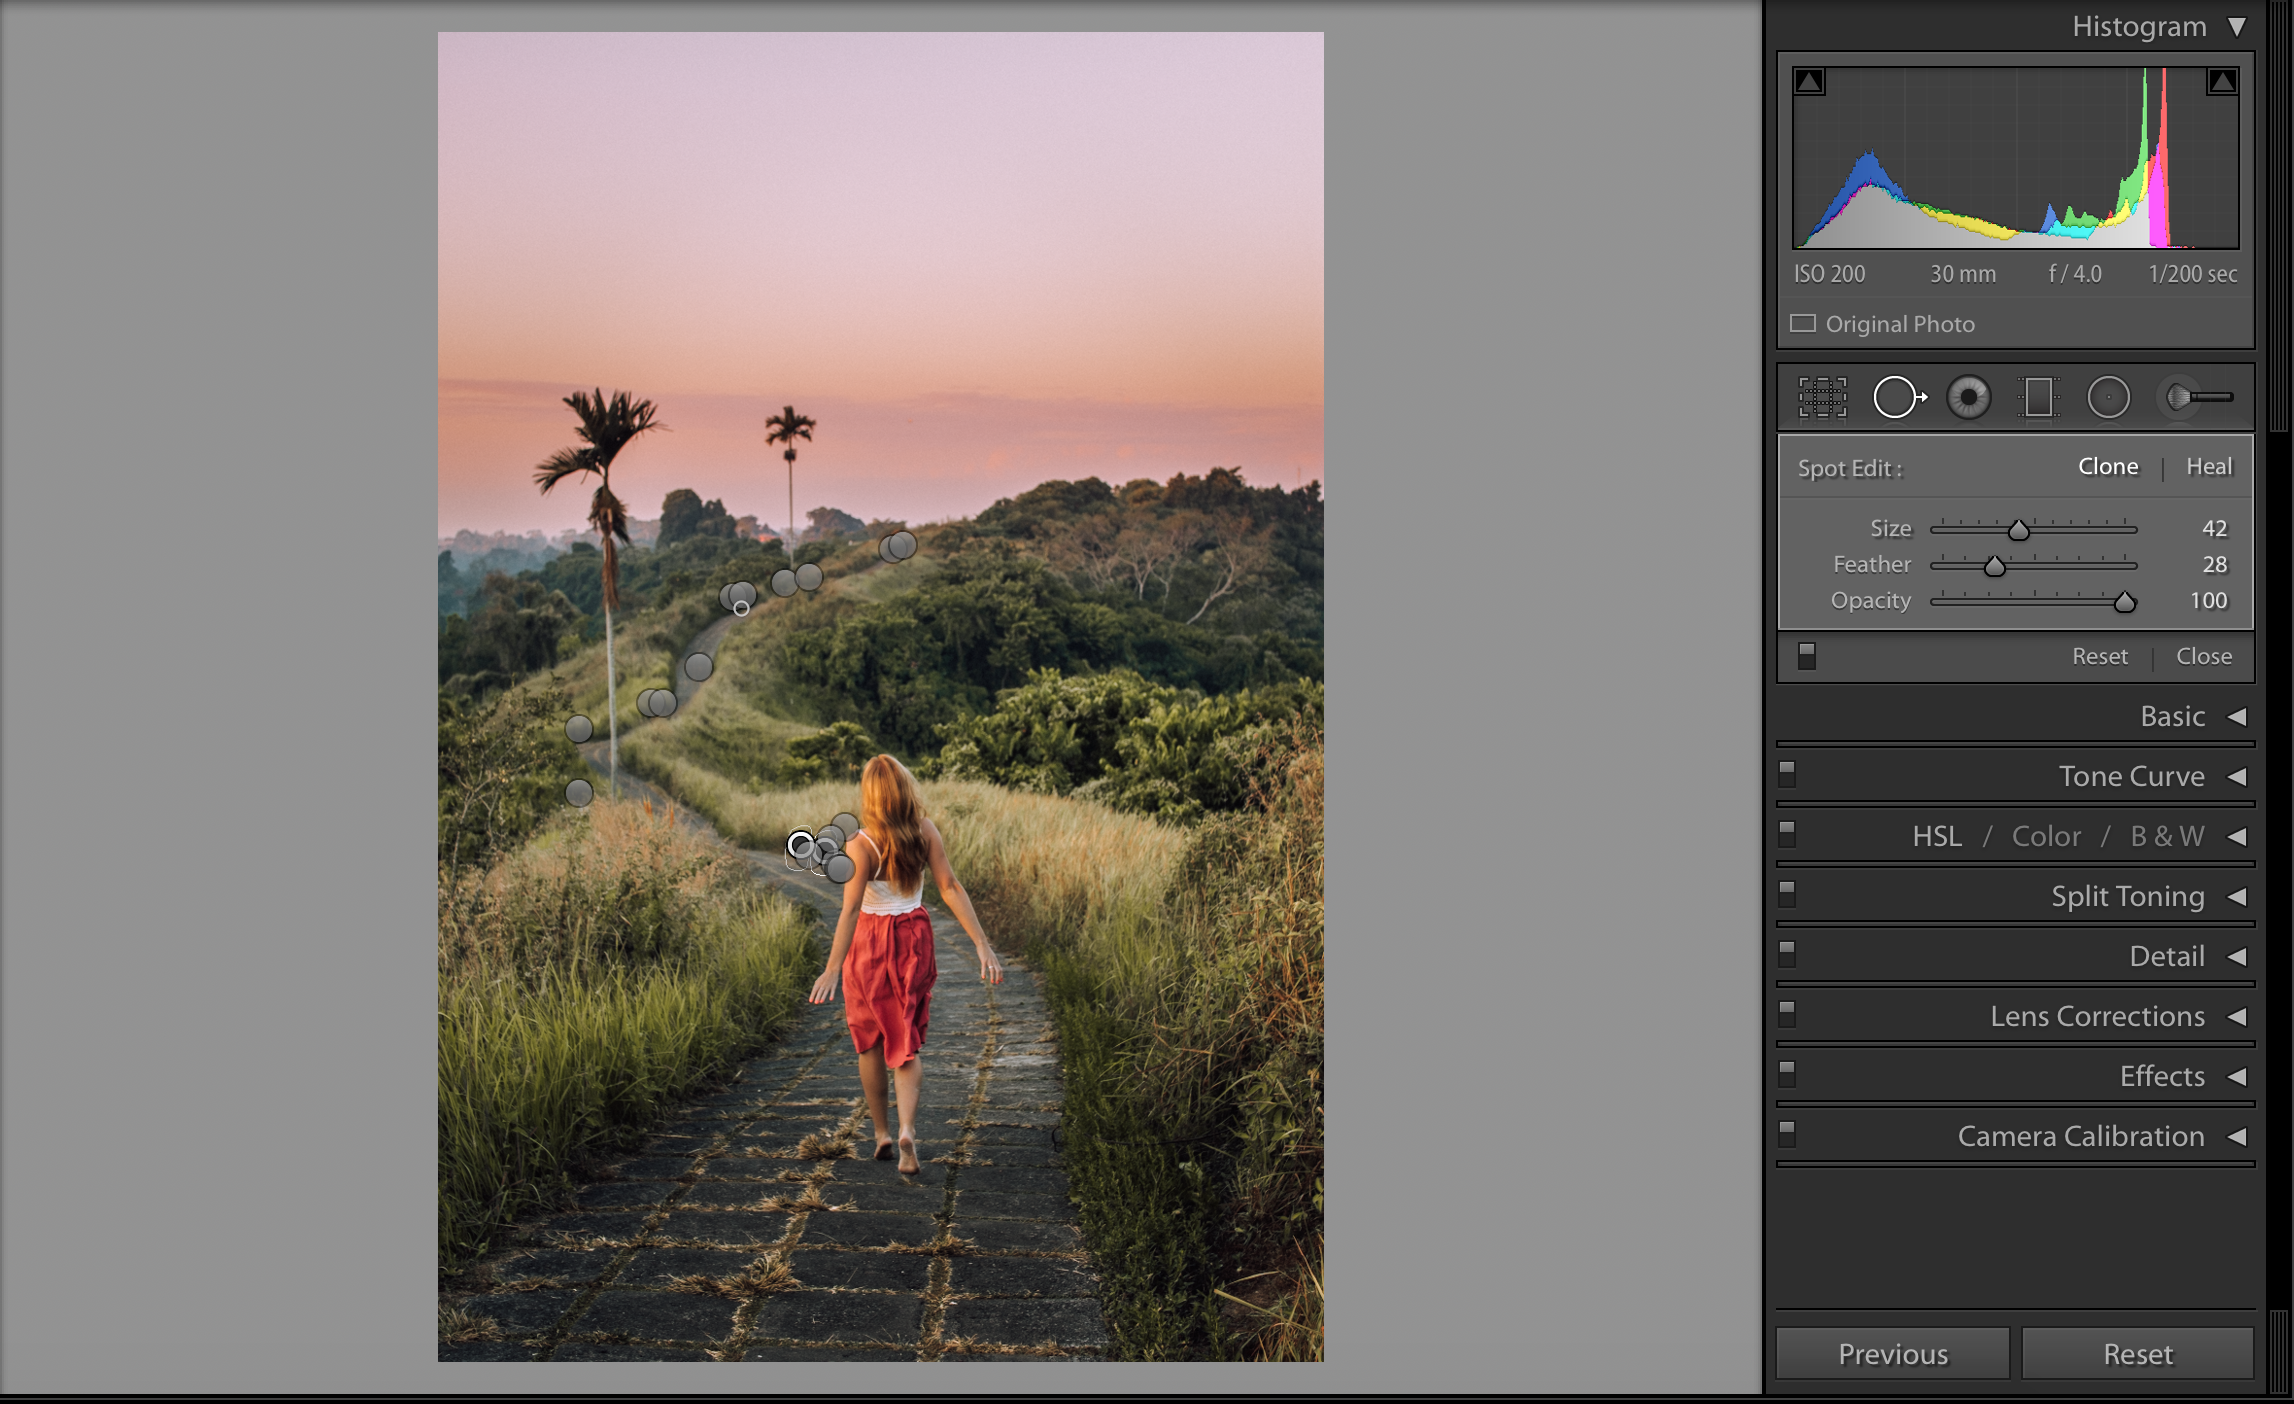
7) How to remove people or objects
- You might want to zoom in on the object or person you are removing for this.
- Using the clone tool draw over whatever it is you wish to remove.
- The software will automatically choose which area it wants to copy. You might need to change this. It doesn’t need to be perfect though as step 4 will help!
- Using the heal tool draw over the border of the area you just copied (unless it is already unnoticeable).
- The software will automatically choose which area it wants to copy. You might need to change this.
If you find it too difficult to do you should check out the touch retouch app.
Photo edited with my Golden Glow 8 preset.
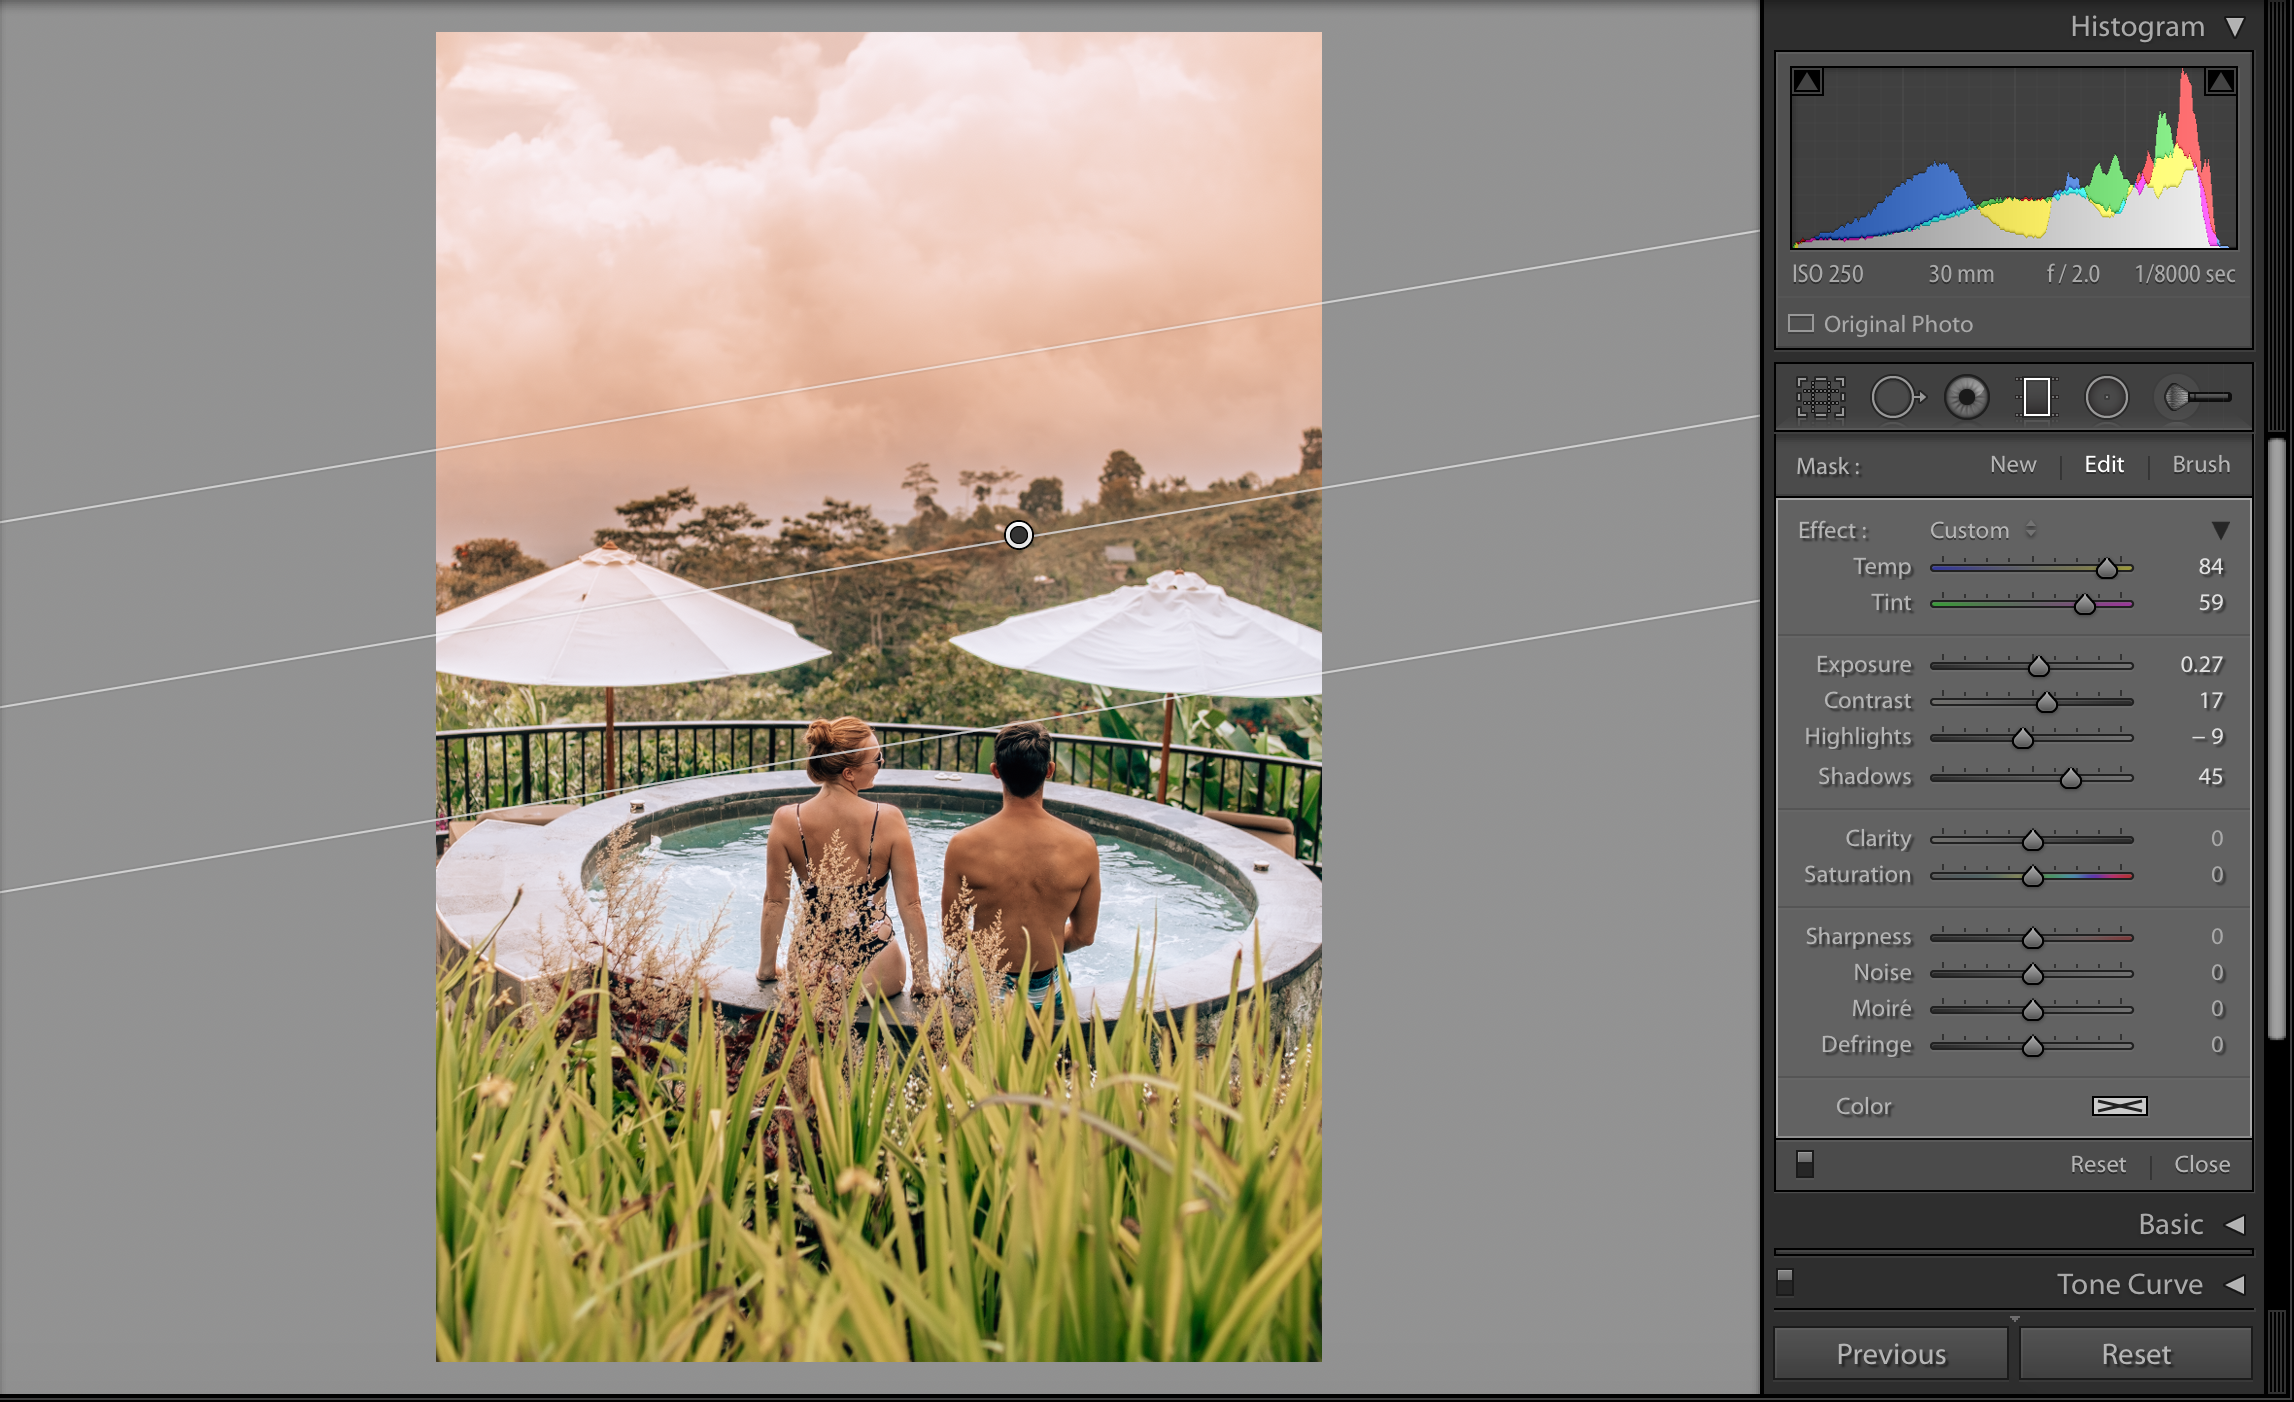
8) How to accentuate a sunset or sunrise sky
- Point the graduated filter upwards so that it is in line with the horizon.
- Increase warmth and pink to the colour you prefer
Photo edited with my Green Dream 7 preset.
To help you understand these filters even further I have created 4 FREE presets for desktop. These presets will either include a graduated or radial filter which will add on a warm sun, blue ocean or pink sky effect or help your subject pop. They will not edit the entirety of you photo – you will need to do your edit first and then you can add a a filter similar to the ones I have created. Head to my shop to find all of my presets.
Like this post? Pin it to save for later!


5 Comments
maja szymczyk
September 25, 2018 at 6:26 pmthat is great Ellie thank you so much!I am a total beginner and only started using lightroom on desktop.. may i ask – the ‘invert’ that you mention – is it only on desktop or on mobile version too? cannot find it to tick or untick it 🙂 please advise thank you!
The Ginger Wanderlust
September 25, 2018 at 11:49 pmIt’s on both – on mobile it’s a circle in a square in half white and half black. You should see 5 icons to the left of the app when you add a filter, it’s the 4th one down. Best thing to do is play around 🙂
The Ultimate Guide to Editing on Lightroom - The Ginger Wanderlust
September 26, 2018 at 6:09 am[…] When the gradient is activated, you can click on the “brush” symbol and remove or add part of the image to the gradient. Find out more about the graduated filter. […]
Unsettled Couple
November 23, 2018 at 6:29 amYou are my hero 🙂
Love your blogs about Lightroom.
Have been using this program for about 6 months. And every week I learn something new.
It is so much fun investing time and seeing better and better results.
Thank you so much!
The Ginger Wanderlust
February 9, 2019 at 1:38 amthanks so much!