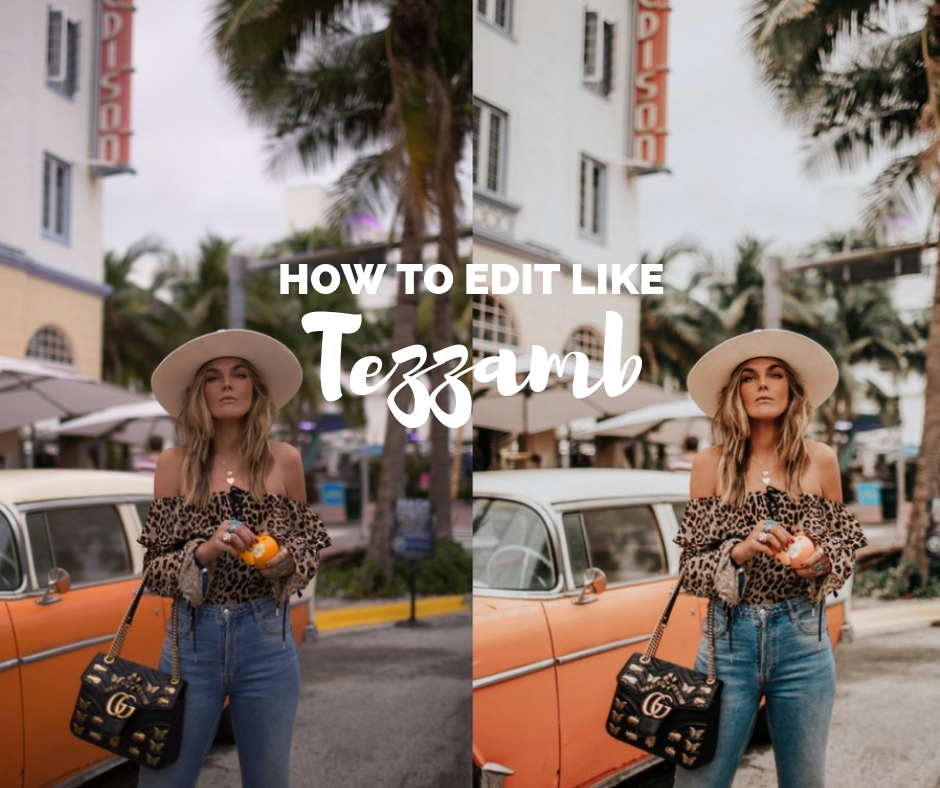
How to create a vintage film effect on Lightroom (edit like Tezza)


In this tutorial I will walk you through the process of creating a beautiful vintage film effect in Lightroom. This is quite a popular editing style on Instagram and works with a variety of photos. Tezza uses a vintage film look on her profile and it works perfectly with all her creative fashion and lifestyle shots. If you want to learn more about creating a streamlined profile and growing your Instagram, check out my e-book!
There are a few different tools you will need to change on Adobe Lightroom in order to get the vintage film effect. My blog post aims to seamlessly guide you through the process! My Ultimate Guide to Editing on Lightroom will help you to understand all of the different editing tools on Lightroom.
If you would prefer to learn by having the settings automatically added to a photo with the help of a preset (a filter for Lightroom), then you should checkout my Golden Film Preset.
How to Edit Like Tezzamb in 5 Easy Steps:
1) The Basics
The first tools you will come across are the basic ones that you will find in most photo editing apps and softwares. Here you can alter the light within the photo.
In most photos Tezza:
- Increases warmth and adds a slight green tint.
- Decreases highlights (most standard thing to do – this makes the background less bright)
- Increases shadows (most standard thing to do – this makes the foreground brighter)
- Slightly decreases whites and increases blacks.
For the clarity, vibrancy and saturation, It doesn’t look like she just decreases the saturation a bit. Understand more what each of the basic tools do in my Lightroom guide.
2) Tone Curve
The main way to get the matte look that makes a photo look like vintage film is to adjust the tone curve. You will need to slightly raise the left end point and lower the right end point on the RGB curve.
The below image was edited using my Golden Film Preset.
3) Colours
As Tezza shoots in a variety of locations her photos include a lot of different colours. Her photos look slightly faded and the best way to get this effect is to decrease the saturation and luminance of the different colours in your photo.
4) Extra effects
If you zoom in on instagram photos by Tezza you will notice they have a lot of texture. This is because she adds grain to her photos which gives a cinematic look.
As you can see the grain they must have it at a roughness of around 50, a size of around 20 and an amount of 20.
Some of her photos also have a more worn out look. You can get this effect on your mobile with the free Nebi app.
5) Camera calibration colours
The final step in creating the iconic vintage look for your photos is by playing with the colours in the camera calibration.
Red primary – Increase the hue and slightly decrease saturation.
Green primary – Increase the hue and slightly decrease saturation.
Blue primary – Slightly decrease the hue and saturation.
The below image was edited using my Golden Film Preset.
A good way to better understand the editing process, is by buying presets. Presets are filters that you can use within Lightroom, that will change your photo in one click, and you can then see what changes have been made in the different tools, and adjust them to suit your photo (if necessary). I also explain all of the Lightroom tools in more detail in my Ultimate Guide to Editing on Lightroom.
I have created a Golden Film Preset which is designed to give a Tezza esque effect. I also have a Vintage Vibe preset which gives an earthy vintage effect similar to DoYouTravel. Just check out the before/afters in my shop.
Using the same presets on your photos is a great way to maintain a streamlined instagram feed.
*Some of the pictures used in this post are before/after’s by Tezza.*
Like this post? Pin it to save for later!
Recent Posts
Diamond Beach Iceland : Ultimate Guide
Diamond Beach in Iceland is a breathtaking wonder where glistening icebergs meet the black volcanic…
Top Things to Do in Reykjavik Iceland
I first visited Reykjavik in 2016 and instantly fell in love with its charm and…
Top things to do in Extremadura Spain: A Perfect Road Trip Itinerary
If you're dreaming of a scenic Spain road trip filled with stunning nature, rich history,…
Ultimate Norway Road Trip Itinerary: Best Places to See Near Bergen
Norway’s stunning natural beauty makes it one of the best destinations for a road trip,…
Ultimate Guide to the Trolltunga Hike in Norway
If you are looking to do one of the best hikes in Norway, then you…
Best things to do in Stowe, Vermont in the Fall: A Perfect 3-Day Itinerary
If you're dreaming of a quintessential New England fall, look no further than Stowe, Vermont.…

View Comments