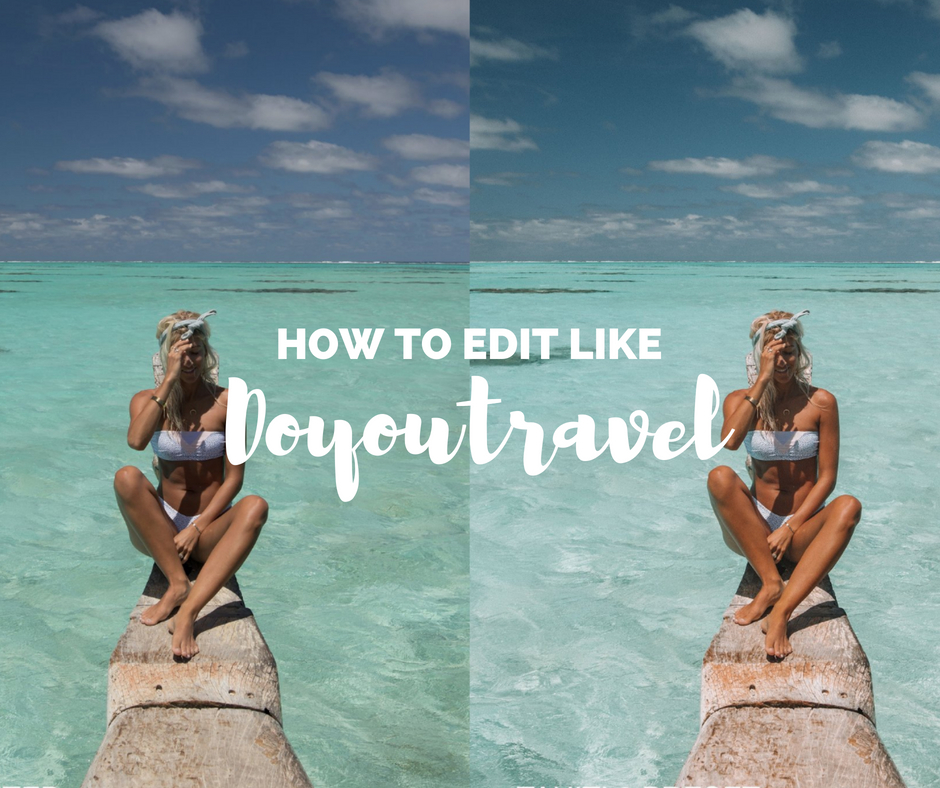
Easily the most famous travel influencers on Instagram, Jack and Lauren have beautiful, inspirational profiles, with an earthy, vintage editing style. If you’re wanting to learn how to edit like DoYouTravel and GypseaLust you need to know three things:
- They never use Instagram filters (they edit on Lightroom)
- They primarily take photos an hour after sunrise of before sunset to have a consistent light in their photos.
- Their before shots are also beautiful as they shoot with a Canon 5d mark iii.
The earthy, Vintage look is a perfect theme for your Instagram as it works with most colours, from ocean blues to jungle greens to desert yellows. If you want to learn more about creating a streamlined profile and growing your Instagram, check out my e-book!
There are a few different tools you will need to change on Lightroom in order to get the earthy, vintage effect. My blog post aims to seamlessly guide you through the process! My Ultimate Guide to Editing on Lightroom will help you to understand all of the different editing tools on Lightroom.
How to Edit Like DoYouTravel and GypseaLust in 5 Easy Steps:
1) The Basics
The first tools you will come across are the basic ones that you will find in most photo editing apps and softwares. Here you can alter the light within the photo.
In most photos Jack and Lauren tend to:
- Increase warmth and have a slight green tint.
- Decrease highlights (most standard thing to do – this makes the background less bright)
- Increase shadows (most standard thing to do – this makes the foreground brighter)
The whites and blacks will differ as per the lighting in the photo. You can tell that they decrease the blacks in their portrait presets as the subjects pops. Whereas the photos where they are further away, or if the photo is darker, it looks like they increase the blacks.

For the clarity, vibrancy and saturation, It doesn’t look like they change this much. Understand more what each of the basic tools do in my Lightroom guide.
2) Colours
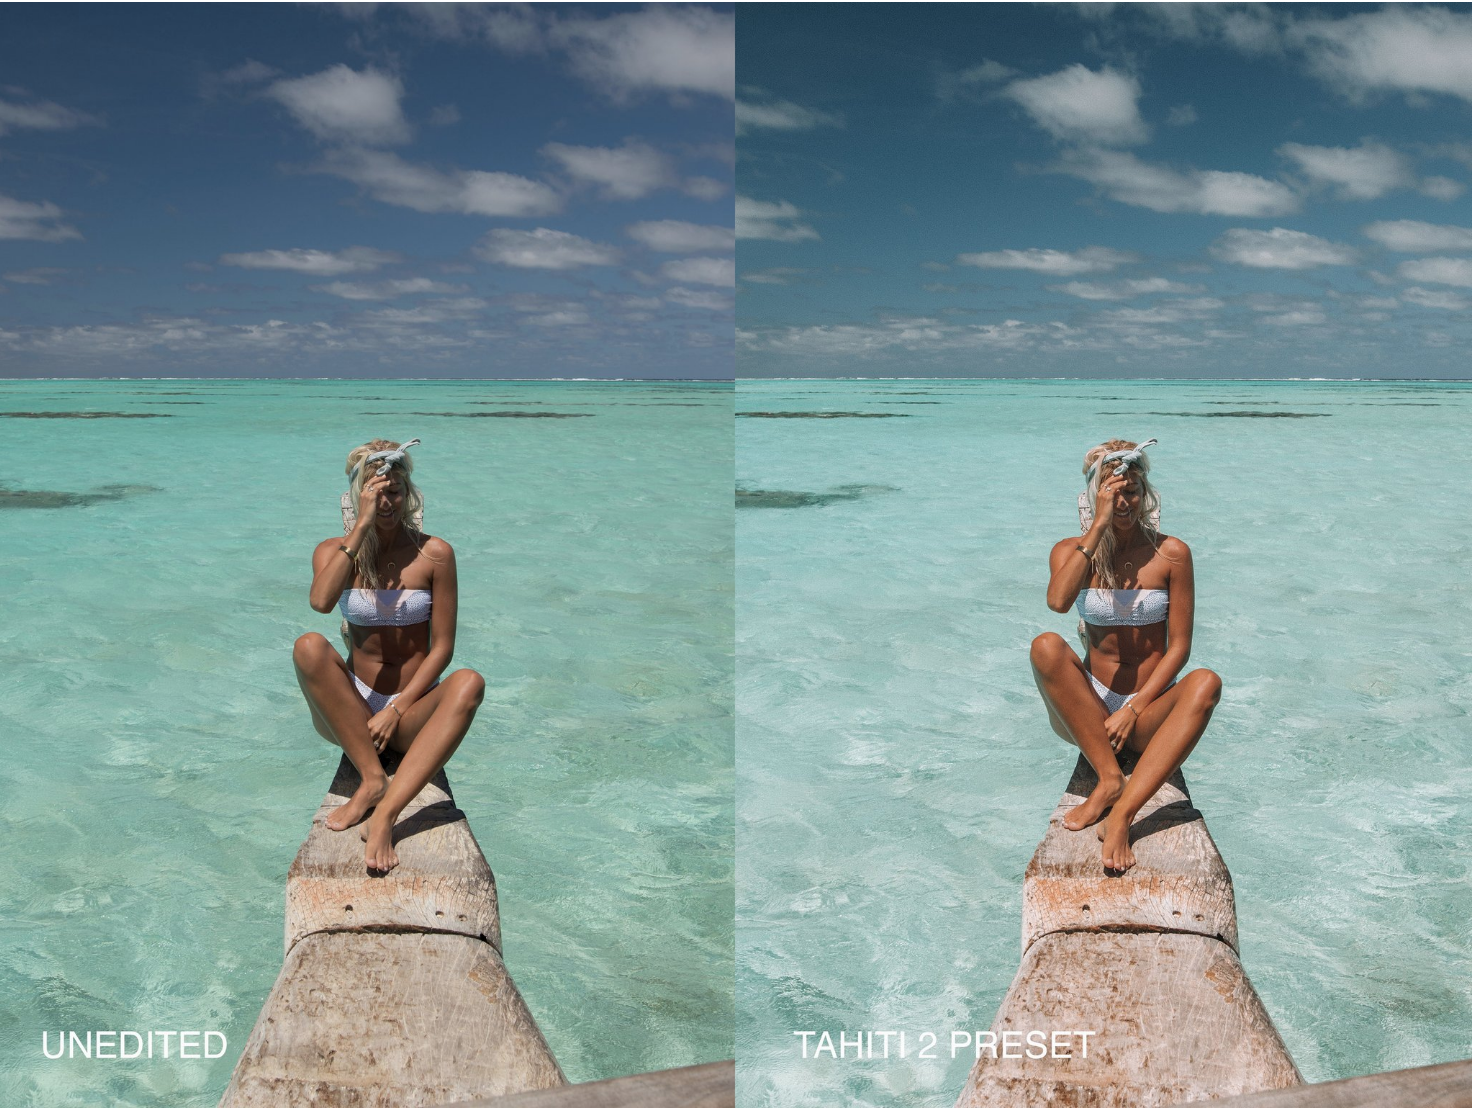
The colours that appear the most in their photos (and thus the ones that they must change the most) are orange, yellow, green, turquoise and blue.
Orange:
You can tell by the sun kissed skin tone that they decrease the orange luminance in most of their photos.
Yellow:
In order to make buildings glow, teeth look whiter and plants look more vintage you will need to decrease saturation and hue and increase luminance.
Green:
Again to give a vintage effect to plants you need to decrease saturation and hue and increase luminance .
Turquoise:
This will affect the water. If you look at most of DoYouTravel and GypseaLust‘s photos you will notice that the water pops and looks clearer. This is because they decrease saturation and increase luminance of the turquoise. This is a very popular edit to do as it makes the water look so much more inviting, it is one I use in my Smooth Blues preset.
Blue:
To get the beautiful vintage sky you will need to decrease both the saturation and the luminance.
3) Split toning
Split toning is the addition of two different colours to the highlights and shadows of a photograph.
A good way to add an earthy vintage look to your photos is by adding a shadow tone with the hue around 36. You can then increase the saturation to suit your photo.
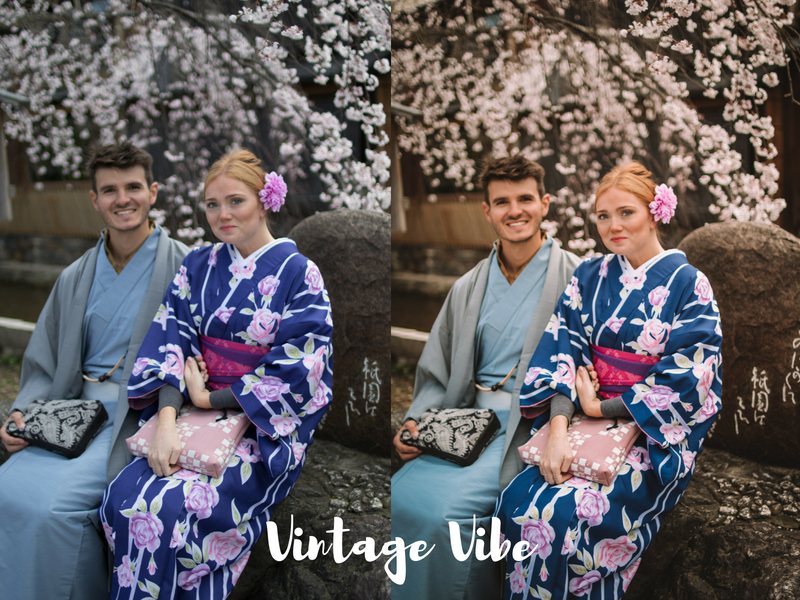
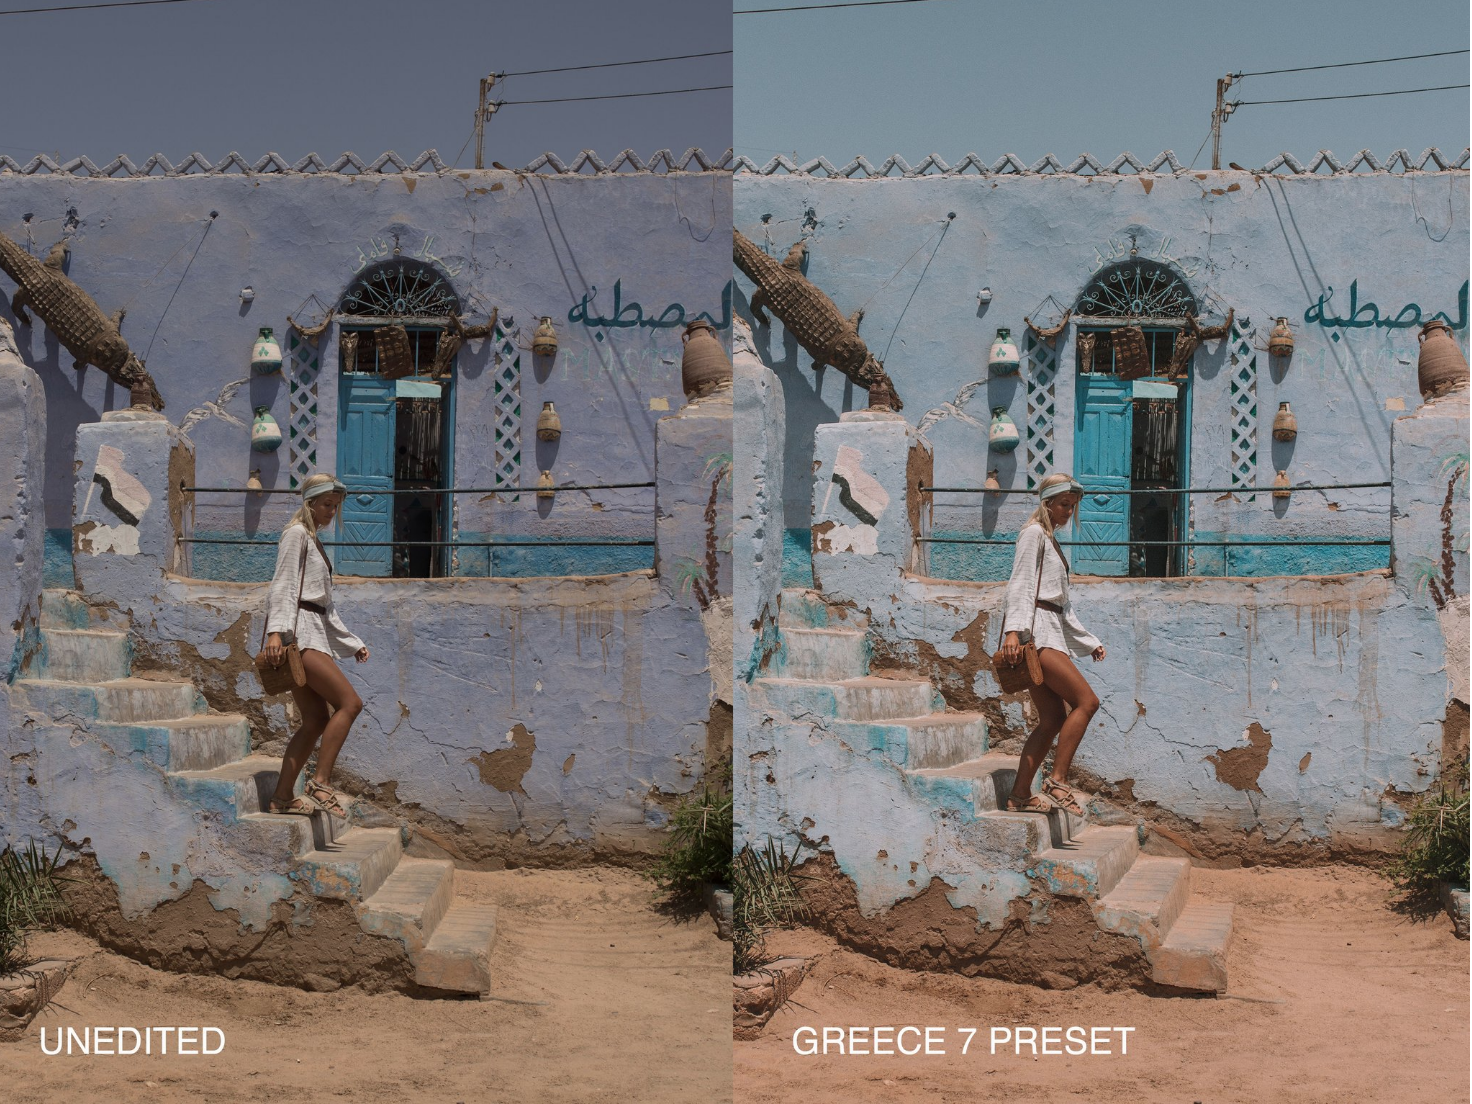
My Vintage Vibe preset gives a nice vintage brown effect as seen below.
4) Extra effects
If you zoom in on instagram photos by Doyoutravel and GypseaLust you will notice that they usually add grain to their pics. This is a good way to add a cinematic look to your photo.
As you can see the grain they must have it at a roughness of around 50, a size of around 20 and an amount of 20.
5) Camera calibration colours
The best way to get the iconic earthy look to your photos is by playing with the colours in the camera calibration.
Red primary – Increase the hue and saturation.
Green primary – Increase the hue.
Blue primary – Decrease the hue and saturation.
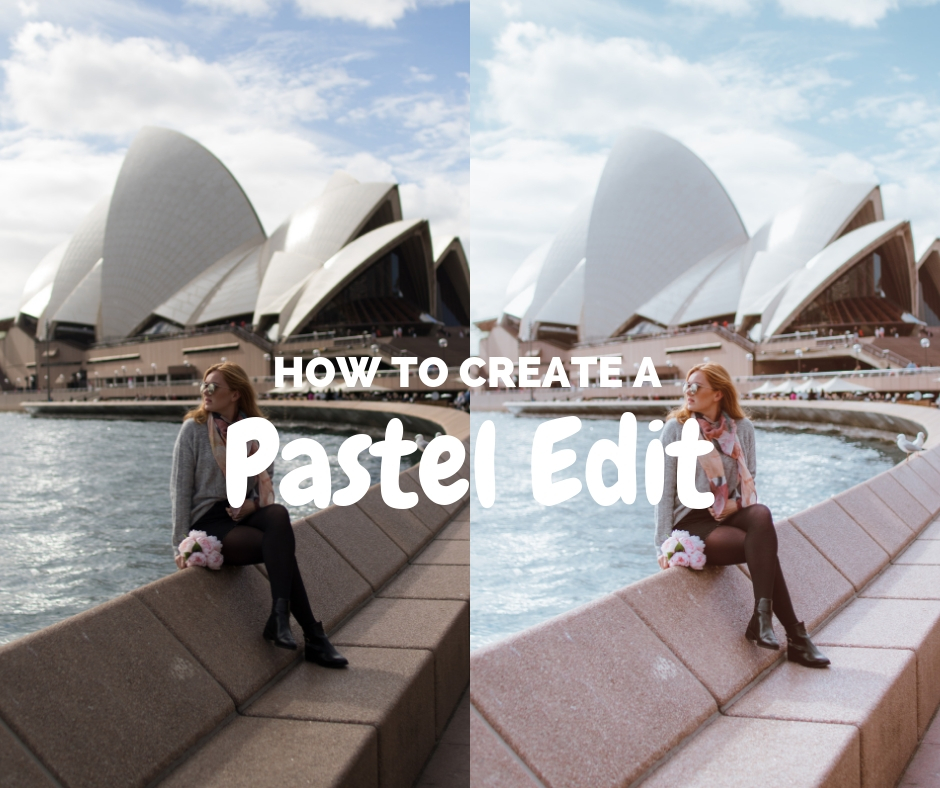
A good way to better understand the editing process, is by buying presets. Presets are filters that you can use within Lightroom, that will change your photo in one click, and you can then see what changes have been made in the different tools, and adjust them to suit your photo (if necessary). I also explain all of the Lightroom tools in more detail in my Ultimate Guide to Editing on Lightroom.
I have more of a golden editing style, but I also have a few earthy, vintage presets available, such as my Vintage Vibe preset. Just check out the before/afters in my shop.
*The pictures used in this post are before/after’s by DoYouTravel and GypseaLust.*
Like this post? Pin it to save for later!


2 Comments
How to create a vintage film effect on Lightroom (edit like Tezzamb) – The Ginger Wanderlust
September 19, 2018 at 5:14 am[…] esque effect. I also have a Vintage Vibe preset which gives an earthy vintage effect similar to DoYouTravel. Just check out the before/afters in my […]
How to Make Your Instagram Feed Look More Streamlined - The Ginger Wanderlust
November 10, 2018 at 10:14 am[…] You can learn more about the different tools on Lightroom with my ultimate guide or learn how to edit a vintage film effect. I also have a guide to editing like DoYouTravel. […]